
I made these on a Tuesday night with zero plans to share them.
By Wednesday morning, three people had texted me asking for the recipe.
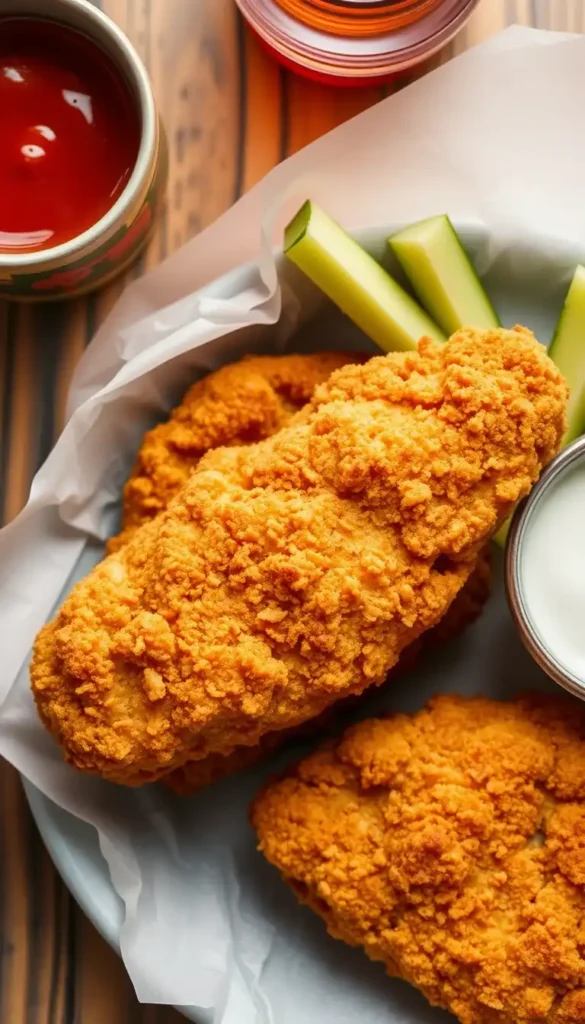
That’s the kind of thing that happens when you nail fried chicken tenders at home — crispy, juicy, seasoned all the way through, and shockingly easy once you know two things most people skip entirely.
Stick with me. The “cornstarch trick” coming up in a few sections? It’s going to change how you fry things forever. 👇
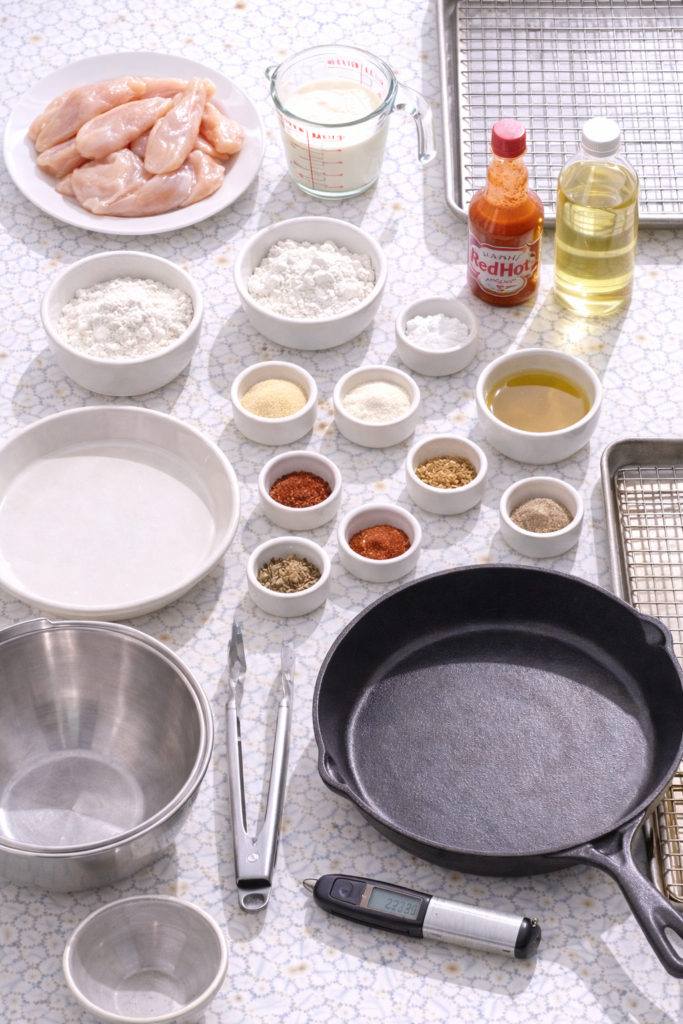
What You’ll Need
No mystery ingredients. No specialty store runs. Just the right ratios — and those matter more than you’d think.
The Chicken
| Ingredient | Amount | Notes |
|---|---|---|
| Chicken tenders | 1.5 lbs | Or chicken breasts sliced into 1-inch strips |
| Buttermilk | 1 cup | Full-fat works best |
| Hot sauce | 1 tsp | Frank’s RedHot is the move |
The Breading
| Ingredient | Amount | What It Does |
|---|---|---|
| All-purpose flour | 1.5 cups | Base of the crust |
| Cornstarch | 1/2 cup | The crunch secret — don’t skip this |
| Garlic powder | 1.5 tsp | Deep, savory backbone |
| Onion powder | 1.5 tsp | Rounds out the flavor |
| Smoked paprika | 1 tsp | Color + subtle smokiness |
| Salt | 1 tsp | Seasons from inside out |
| Black pepper | 1/2 tsp | Warmth |
| Cayenne pepper | 1/2 tsp | Adjustable heat |
| Dried oregano | 1/2 tsp | Earthy depth |
For Frying
| Ingredient | Amount | Notes |
|---|---|---|
| Vegetable or canola oil | 2–3 cups | Neutral flavor, high smoke point — don’t use olive oil |
Tools You’ll Need
You’ll love these too : oven fried chicken
Before you start, pull these out. Nothing is worse than realizing mid-fry that you’re missing something.
- Cast iron skillet (or heavy-bottomed pan)
- 2 large mixing bowls
- 1 shallow dish or pie plate
- Metal tongs
- Wire cooling rack + sheet pan
- Paper towels
- Instant-read thermometer (a $10 one from Amazon works fine)
💡 Why a wire rack matters: Resting tenders on paper towels alone traps steam underneath and softens the crust. A wire rack lets air circulate on all sides. Small detail, big difference.
Pro Tips
Read these before you start. These are the difference between soggy and shatteringly crispy.
1. Cornstarch Is the Real Secret 🤯
Most recipes use only flour. Big mistake.
Adding cornstarch creates a lighter, lacier crust that stays crispy even after it cools. The ratio here — 3 parts flour to 1 part cornstarch — is the sweet spot that took me a few batches to nail.
2. The Buttermilk Soak Changes Everything
The acidity in buttermilk breaks down protein in the chicken, making it noticeably more tender. It also acts like glue — making the breading stick properly instead of falling into the oil.
Minimum: 30 minutes Ideal: Overnight in the fridge
3. Rest the Breaded Tenders Before Frying
Five minutes on a wire rack after breading. The coating firms up and grips the chicken better. Skip this and the crust slides off in the oil.
4. Oil Temperature Is Everything
350°F is the number. Too low = greasy. Too high = burnt outside, raw inside.
No thermometer? Drop a pinch of flour into the oil. Sizzles and floats immediately? You’re ready.
5. Salt Right Out of the Oil
The second they come out — hit them with a small pinch of salt. The residual heat makes it stick to the crust perfectly. This is the move restaurants use that nobody talks about.
Recommended for you : fried rice and chicken
How to Make Them — Step by Step
Now that you know why each step matters, here’s the full process. It’s easier than it looks.
Step 1 — Marinate (30 Min to Overnight)
Combine buttermilk and hot sauce in a large bowl. Add chicken, toss to coat, cover, and refrigerate.
The longer the soak, the more tender the chicken. If you can prep this the night before, do it.
Step 2 — Mix the Breading
In a shallow dish, whisk together all your dry ingredients — flour, cornstarch, and all the spices.
Mix really well. Uneven seasoning means some bites taste bland and some taste like a salt bomb.
Step 3 — Bread the Chicken
- Pull a tender from the buttermilk, let excess drip off
- Press it into the breading — firmly, on both sides
- Flip and press again
- Set on a wire rack
- Repeat with all pieces
- Let rest 5 minutes before frying
Step 4 — Fry
Heat 1.5 to 2 inches of oil in your cast iron skillet to 350°F over medium-high heat.
Add tenders in batches — never crowd the pan. Crowding drops the oil temperature and turns crispy dreams into a soggy reality.
Fry 3 to 4 minutes per side until deep golden brown.
Internal temp: 165°F
People also like : chicken fried chicken
Step 5 — Season and Rest
Transfer to a wire rack. Salt immediately. Let rest 2 minutes before serving.
Which Cooking Method Is Right for You?
Not everyone wants to pan-fry. Here’s the honest breakdown so you can pick what works for your kitchen and your life.
| Method | Crispiness | Effort | Cook Time | Best For |
|---|---|---|---|---|
| Cast iron pan fry | ⭐⭐⭐⭐⭐ | Medium | ~30 min | Maximum crunch, classic results |
| Air fryer | ⭐⭐⭐⭐ | Easy | ~20 min | Lighter, less mess, weeknight wins |
| Oven bake | ⭐⭐⭐ | Very easy | ~40 min | Hands-off, healthiest option |
| Deep fryer | ⭐⭐⭐⭐⭐ | Hard | ~25 min | Restaurant-level, more cleanup |
The air fryer version gets closer to pan-fried than you’d expect — especially if you spray them generously with oil and don’t skip the cornstarch.
Substitutions and Variations
Already have the base recipe down? Here’s where things get interesting.
Easy Ingredient Swaps
| Swap Needed | Original | Use This Instead |
|---|---|---|
| No buttermilk | Buttermilk | Milk + 1 tbsp white vinegar, rest 5 min |
| Gluten-free | All-purpose flour | 1:1 GF flour blend |
| Dairy-free | Buttermilk | Full-fat coconut milk + 1 tbsp ACV |
| Lower fat | Pan fry | Air fryer at 400°F, 10–12 min |
Flavor Variations Worth Making
🔥 Nashville Hot Mix 2 tbsp hot frying oil + 1 tsp cayenne + 1 tsp brown sugar + 1/2 tsp garlic powder. Brush over finished tenders. Serve on white bread with pickles. Absolutely unhinged in the best way.
🍯 Hot Honey Drizzle with hot honey right before serving. Two ingredients. Somehow tastes like a whole event.
🌿 Herb & Parmesan Add 1/4 cup finely grated parmesan + 1 tsp Italian seasoning to the breading. Skip the cayenne. Great for people who don’t love heat.
🌶️ Spicy Buttermilk Double the cayenne, add 1 tsp chili powder, and mix a splash of extra hot sauce into the buttermilk. For the heat-lovers in your life.
Make Ahead Tips
Life is busy. Here’s how to make this work around your schedule.
| Stage | How Far Ahead | How to Store |
|---|---|---|
| Buttermilk marinate | Up to 24 hours | Covered bowl in fridge |
| Breaded, unfried | Up to 2 hours | Wire rack, uncovered, in fridge |
| Freeze before frying | Up to 3 months | Sheet pan freeze → freezer bag |
| Cooked and stored | Up to 3 days | Airtight container in fridge |
Freezer shortcut: Bread the tenders, freeze on a sheet pan until solid, then bag them. Fry straight from frozen at 325°F for 7 to 8 minutes per side. Future you will be very grateful.
Nutritional Breakdown
Because sometimes it’s nice to know what you’re actually eating.
Per serving, approximately 4 servings total
| Nutrient | Pan Fried | Air Fried |
|---|---|---|
| Calories | ~420 | ~310 |
| Protein | 38g | 38g |
| Carbohydrates | 28g | 26g |
| Fat | 16g | 7g |
| Sodium | ~620mg | ~600mg |
The protein is the same either way. The air fryer version cuts fat significantly — worth knowing if you’re making these on repeat.
What to Serve With Them
These go with basically everything. But some pairings are genuinely worth going out of your way for.
| Vibe | What to Pair |
|---|---|
| Classic comfort | Waffle fries + honey mustard + coleslaw |
| Southern style | Creamy mac and cheese + pickled jalapeños |
| Fresh and light | Arugula salad with lemon vinaigrette |
| Crowd pleaser | Platter with 4 dipping sauces (see below) |
| Brunch flex | Chicken + waffles + maple syrup drizzle |
The Dipping Sauce Guide
| Sauce | Heat Level | Flavor | Pairs Best With |
|---|---|---|---|
| Classic ranch | None | Cool, herby, tangy | Original recipe |
| Hot honey | Low–medium | Sweet + spicy | Hot honey variation |
| Buffalo sauce | Medium | Tangy, buttery heat | Original or spicy |
| Honey mustard | None | Sweet, sharp | Classic or herb parmesan |
| Spicy mayo | Low | Creamy, mild heat | Any version |
Leftovers and Storage
Good news: these reheat surprisingly well — if you do it right.
Fridge: Airtight container, up to 3 days.
Freezer: Freeze cooked tenders on a sheet pan first, then bag. Reheat from frozen at 400°F for 15 to 18 minutes, flipping halfway.
Reheating — Don’t Microwave Them
| Method | Temp | Time | Result |
|---|---|---|---|
| Oven | 375°F | 7–8 min | Crispy ✅ |
| Air fryer | 375°F | 5–6 min | Very crispy ✅✅ |
| Microwave | High | 1–2 min | Soft and sad ❌ |
The air fryer is genuinely the best reheating method here. Crust comes back to life in under 6 minutes.
FAQ
Can I use chicken breasts instead of tenders? Yes — slice them into strips about 1 inch wide. Cook time stays the same.
My coating keeps falling off. What’s going wrong?
Three things cause this every time:
- Oil wasn’t hot enough (drops the coating into the oil)
- Didn’t let them rest after breading
- Didn’t press the coating on firmly enough
Fix any one of those and you’ll see a big improvement.
Can I reuse the frying oil? Once or twice for the same type of food. Let it cool completely, strain through a fine mesh sieve, store sealed. Toss it if it smells off or turns dark.
How do I know they’re done without a thermometer? Cut into the thickest piece. Juices run clear, meat is white all the way through — no pink. That said, a basic instant-read thermometer is one of the most useful $10 investments for a home kitchen.
Kid-friendly version? Skip the cayenne entirely. Everything else in the seasoning is mild and still genuinely delicious.
Can I bake these instead? Yes — spray generously with oil and bake at 425°F for 20 to 25 minutes, flipping halfway. Not quite as crispy as pan-fried, but absolutely still worth making.
Wrapping Up
Crispy outside. Juicy inside. Seasoned all the way through.
You now know the cornstarch trick, the buttermilk secret, why oil temperature makes or breaks the whole thing, and exactly when to salt them.
That’s the full picture. Make them once and you’ll understand why people started texting me about them on a Wednesday morning. 🍗
Try them this week — then come back and drop a comment below. Which variation did you go with? What dipping sauce? Any questions? I read every single one and I’d genuinely love to hear how they turned out.


1 thought on “The Fried Chicken Tenders That Ruined Fast Food For Me Forever”