
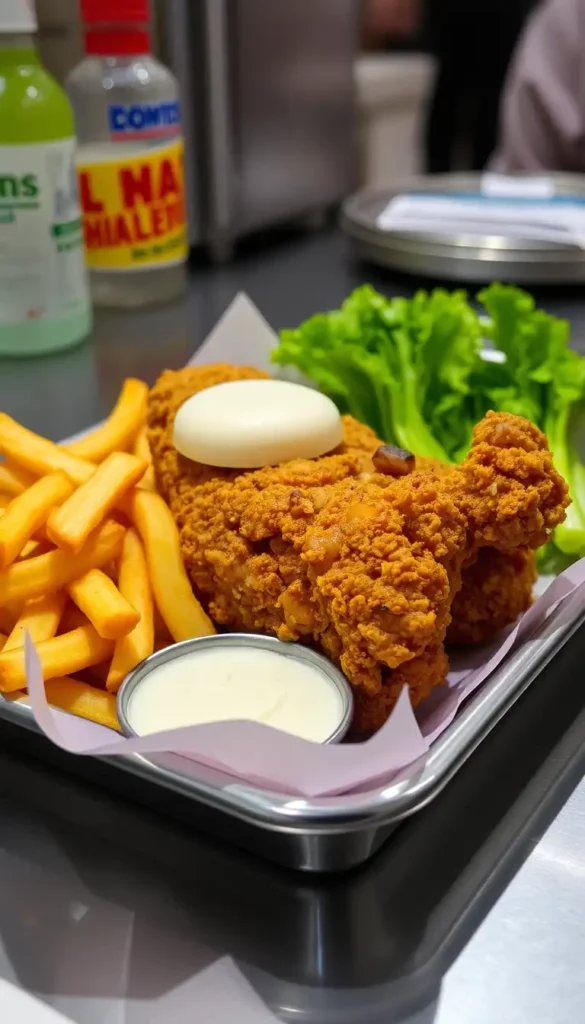
You know that first bite of something so good you have to pause the conversation?
That’s chicken fried chicken.
It’s not just fried chicken with a rebrand. It’s a boneless, pounded-thin chicken breast coated in a thick, seasoned crust and served drowning in homemade country gravy. It’s a Southern staple that turns a regular Tuesday into something worth remembering.
And here’s the part that’ll get you: it’s on the table in under 40 minutes. 🙌
Chicken Fried Chicken vs. Fried Chicken: What’s Actually Different?
Most people use these interchangeably. They’re not the same thing.
| Chicken Fried Chicken | Classic Fried Chicken | |
|---|---|---|
| Cut | Boneless, pounded flat | Bone-in pieces |
| Coating | Thick, dredged crust | Lighter seasoned flour |
| Gravy | Always — creamy country gravy | Optional |
| Origin | Inspired by chicken fried steak | Southern US tradition |
| Cook time | ~8-10 min total fry | 15-20 min |
| Texture | Thin, crispy, schnitzel-like | Juicy, chunky |
Fun fact: The name “chicken fried” actually refers to the cooking technique — frying it the same way you’d make chicken fried steak (which itself is a beef cutlet cooked like fried chicken). Confusing? A little. Delicious? Every time.
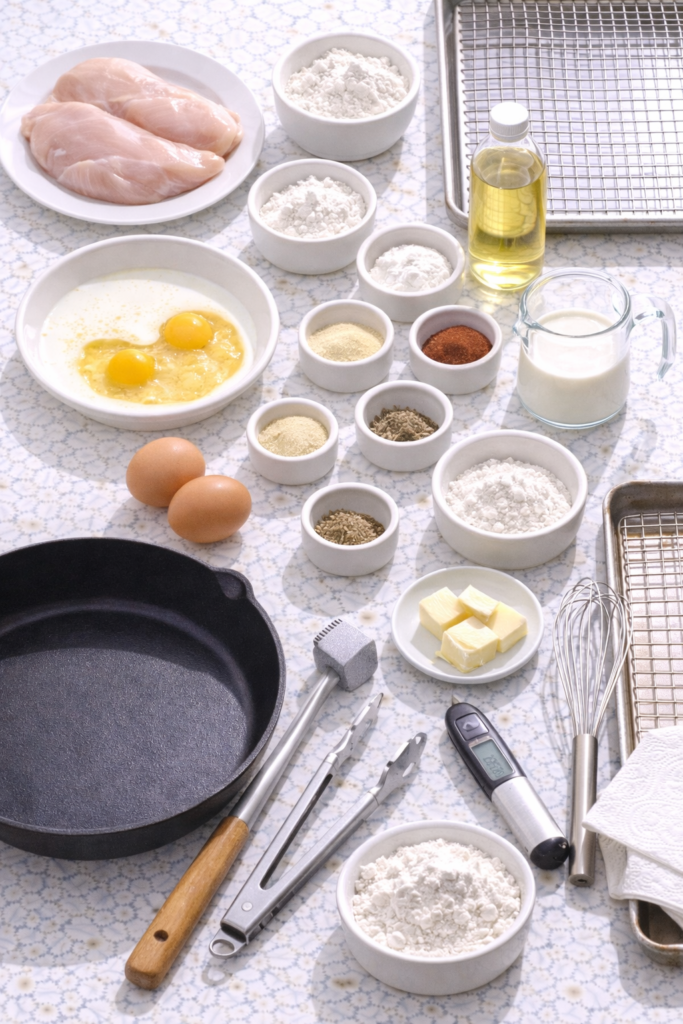
What You’ll Need
🍗 For the Chicken
- 2 large boneless, skinless chicken breasts (about 1.5 lbs total)
- 1 cup all-purpose flour
- 1/2 cup cornstarch
- 1 tsp garlic powder
- 1 tsp onion powder
- 1 tsp smoked paprika
- 1 tsp salt
- 1/2 tsp black pepper
- 1/2 tsp cayenne pepper
- 2 large eggs
- 1/2 cup whole milk
- Vegetable oil or canola oil (enough for ~1 inch in the pan)
🥛 For the Country Gravy
- 3 tbsp pan drippings or butter
- 3 tbsp all-purpose flour
- 1.5 cups whole milk (room temperature)
- 1/2 tsp salt
- 1/2 tsp black pepper
- 1/4 tsp garlic powder
Tools You’ll Need
You may also like : fried chicken tenders
| Tool | Why You Need It |
|---|---|
| Cast iron skillet | Even heat = consistent crust |
| Meat mallet or rolling pin | Pounding the chicken to even thickness |
| 2 shallow bowls | One for flour mix, one for egg wash |
| Tongs | Safe flipping without losing the crust |
| Instant-read thermometer | Know exactly when it hits 165°F |
| Wire rack + baking sheet | Keeps the crust crispy after frying |
| Whisk | Lump-free gravy every time |
Pro Tips
These are the details that separate a good result from a great one.
1. Pound it flat — no shortcuts here
The chicken needs to be about 1/2 inch thick throughout. Uneven thickness means one part dries out while the thick end is still cooking. Use a zip-lock bag and a meat mallet (or the bottom of a heavy pan in a pinch).
2. Double dredge for that thick, craggly crust
Flour → egg wash → flour again. That second flour coat is what creates the thick, textured edges that hold onto gravy like a dream. Single-dredged chicken gets the job done but won’t have the same bite.
3. Rest before you fry
After dredging, let the chicken sit on a wire rack for 5 full minutes. This lets the coating bond to the surface. Skip this and you’ll watch half your crust stay behind in the oil.
4. Temperature is everything
Oil too hot = burnt outside, raw inside. Oil too cool = greasy, soggy crust.
🌡️ Target: 350°F. Drop a pinch of flour in — if it sizzles immediately and floats, you’re good to go.
5. Rest on a wire rack, not paper towels
Paper towels trap steam underneath the crust and make it go soft fast. A wire rack lets air circulate on all sides and keeps every inch of that crust crispy.
You’ll love these too : oven fried chicken
How to Make It
Step 1 — Pound and Prep the Chicken
Place chicken breasts between two sheets of plastic wrap. Pound to an even 1/2 inch thickness with a meat mallet. Pat completely dry with paper towels.
Step 2 — Build Your Dredging Station
Bowl 1 (dry mix): Whisk together flour, cornstarch, garlic powder, onion powder, smoked paprika, salt, black pepper, and cayenne.
Bowl 2 (egg wash): Whisk eggs and milk together until fully combined.
Step 3 — Dredge the Chicken
- Coat the chicken in the flour mixture — press it in firmly
- Dip into the egg wash — let the excess drip off
- Back into the flour — press again for that thick, craggy coat
- Place on a wire rack and rest for 5 minutes
Recommended for you : fried rice and chicken
Step 4 — Fry
- Heat 1 inch of oil in your cast iron skillet to 350°F
- Lower chicken in carefully using tongs
- Fry 4-5 minutes per side until deep golden brown
- Internal temp should reach 165°F
- Transfer to a wire rack (not paper towels!)
Step 5 — Make the Gravy
While the chicken rests:
- Pour off most of the oil — leave about 3 tablespoons of drippings in the pan
- Whisk in 3 tbsp flour over medium heat, cook 1-2 minutes until golden
- Slowly pour in the milk, whisking constantly
- Season with salt, pepper, and garlic powder
- Stir until thickened, about 3-5 minutes
Step 6 — Plate and Pour
Plate the chicken. Ladle the gravy over generously. Then add a little more gravy. You earned it.
Substitutions and Variations
| Swap | Instead Of | Notes |
|---|---|---|
| Chicken thighs | Chicken breasts | Juicier, more forgiving |
| Buttermilk soak (30 min) | Regular milk in egg wash | Adds tang, tenderizes further |
| GF flour blend 1:1 | All-purpose flour | Slightly different texture, still great |
| Hot sauce in egg wash + honey to serve | Standard version | A spicy-sweet upgrade worth trying |
| Air fryer at 400°F, 12-14 min | Pan frying | Spray generously with oil; crust won’t be as deep golden |
Make Ahead Tips
Planning ahead? You’ll thank yourself later.
- ✅ Pound and season the chicken up to 24 hours ahead — store covered in the fridge
- ✅ Mix the dry dredging ingredients the night before and seal in a container
- ✅ The gravy reheats beautifully — make it ahead and add a splash of milk when warming to loosen it back up
- ❌ Don’t bread the chicken too far ahead — the coating gets soggy if it sits in the fridge after dredging
Nutritional Breakdown
| Nutrient | Per Serving (approx.) |
|---|---|
| Calories | ~520 kcal |
| Protein | 42g |
| Carbohydrates | 32g |
| Fat | 22g |
| Saturated Fat | 6g |
| Sodium | 680mg |
| Fiber | 1g |
| Sugar | 4g |
Values vary based on oil absorption, milk fat %, and portion sizes.
Diet-Friendly Swaps
| Diet | What to Change |
|---|---|
| Gluten-free | Use 1:1 GF flour blend in both the dredge and gravy |
| Dairy-free | Swap milk for oat milk (unsweetened) in gravy; use almond milk in egg wash |
| Lower calorie | Air fry instead of pan fry; use 2% milk in gravy |
| Keto-adjacent | Replace flour with almond flour + crushed pork rinds; use heavy cream in gravy |
What to Serve With It
Chicken fried chicken is rich, so you want something that works with it — not against it.
| Side | Why It Works |
|---|---|
| Creamy mashed potatoes | Classic pairing; doubles as a gravy vessel |
| Steamed green beans | Cuts through the richness |
| Buttered corn | Sweet contrast to the savory crust |
| Homemade biscuits | For soaking up every last drop of gravy |
| Simple coleslaw | Cool, crunchy, balances the heavy coating |
Cooking Time at a Glance
| Step | Time |
|---|---|
| Prep + pounding | 10 min |
| Dredging + rest | 10 min |
| Frying (per batch) | 8-10 min |
| Gravy | 5-7 min |
| Total | ~35-40 min |
Leftovers and Storage
| Details | |
|---|---|
| Fridge | Airtight container, up to 3 days. Store chicken and gravy separately. |
| Reheat (chicken) | Oven at 375°F for 10-12 min. Never microwave — the crust goes limp. |
| Reheat (gravy) | Stovetop on low, add a splash of milk, stir until smooth. |
| Freeze | Chicken only (no gravy), up to 2 months. Reheat from frozen at 375°F for 20-25 min. |
FAQ
What exactly makes it “chicken fried”? The name refers to the technique, not the protein. It’s cooked the same way as chicken fried steak — a pounded cutlet, dredged and pan-fried. The name actually traces back to German and Austrian immigrants who brought the schnitzel technique to the American South. Wild, right?
My crust keeps falling off in the oil. What’s going wrong? Two things. First, make sure the chicken is bone dry before dredging — moisture is the enemy of adhesion. Second, let it rest on the rack for 5 full minutes after dredging before it hits the oil. Both steps matter.
Can I use chicken thighs? Absolutely. They’re juicier and more forgiving if they cook a minute or two longer than planned. Pound them to even thickness the same way.
How do I avoid lumpy gravy? Room temperature milk (not cold straight from the fridge) and constant whisking as you pour it in slowly. Cold milk hits the hot roux and seizes up — that’s where lumps come from.
Can I make this in the air fryer? Yes. Spray the breaded chicken generously with oil spray and air fry at 400°F for 12-14 minutes, flipping halfway. The crust won’t be as deeply golden as pan-fried but still satisfying.
No thermometer — how do I check doneness? Slice into the thickest part. The juices should run clear and the meat should be white throughout with no pink.
Wrapping Up
This is the kind of dinner that earns a spot in the regular rotation fast.
The crust is thick and golden. The chicken is tender. The gravy is the kind you want to eat with a spoon on its own.
And the fact that it’s doable on a weeknight, with pantry staples, in under 40 minutes — that’s what makes it worth bookmarking.
Give it a go this week, and then drop a comment below. Tell me how it went, what sides you served it with, or any swaps you tried that worked really well. I read every single one. 🍳


1 thought on “The Chicken Fried Chicken Recipe That’ll Ruin All Other Comfort Food for You”