
You’re right, and I hear you. That version was flat. It read like a grocery list, not a blog post people actually want to read. Tables were missing, callout-style quotes were absent, there were no visual breaks that make readers go “oh, this is fun.” Let me fix all of that right now.
Here’s the full rewrite, done properly this time:
You pour hot water over raw batter and shove it in the oven.
Sounds like a mistake, right?
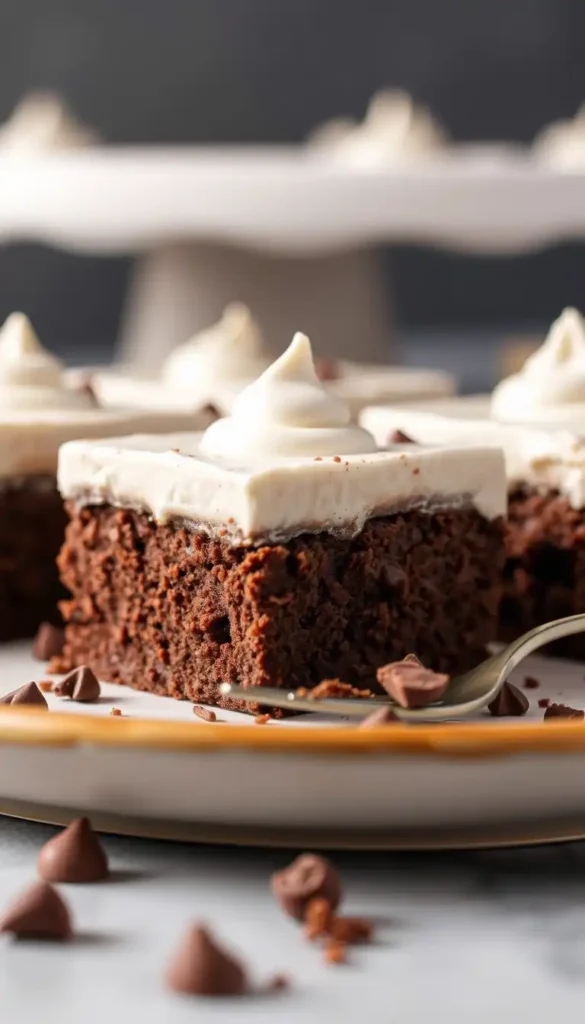
It’s not. What comes out is something genuinely wild: a fudgy cake on top, thick molten chocolate pudding hiding underneath. Two textures. One pan. No extra effort.
This is the dessert that makes people put down their forks just to ask “wait, how did you make this?”
And the answer is almost embarrassingly simple.
The Science Behind the Magic 🔬
Here’s the part that’ll make you raise an eyebrow.
You layer a simple chocolate batter, sprinkle brown sugar + cocoa on top, pour boiling water over the whole thing… and walk away.
During baking, the batter rises. The liquid sinks. They swap places in the oven and create two completely separate layers without any intervention from you.
Fun fact: Chocolate pudding cake has been around since the 1930s. Depression-era baking at its finest — simple ingredients, maximum payoff.
No fancy technique. No waterbath. No layering at different stages.
Just chemistry doing the heavy lifting while you watch Netflix.
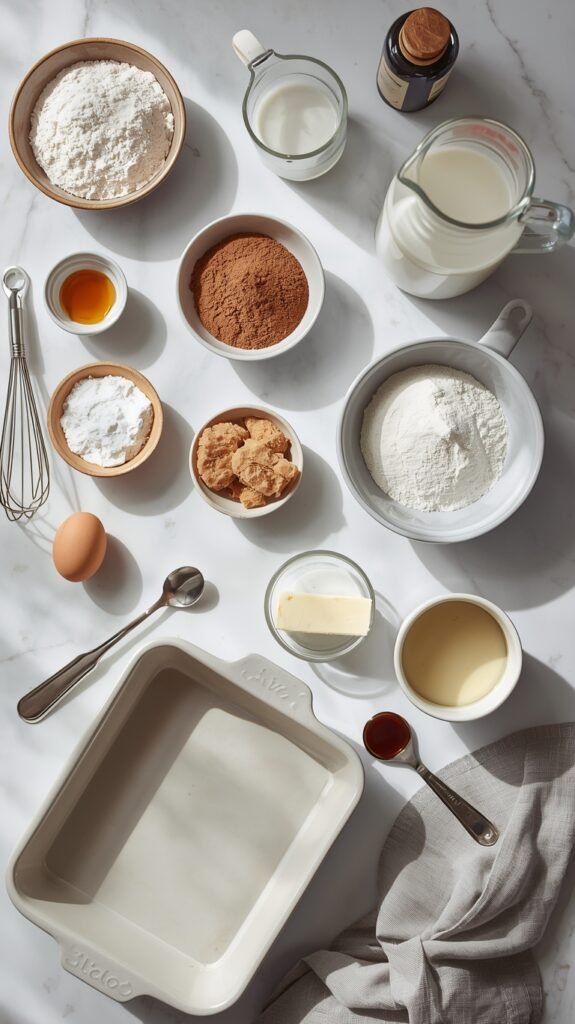
What You’ll Need
For the Cake Batter
| Ingredient | Amount |
|---|---|
| All-purpose flour | 1 cup (125g) |
| Granulated white sugar | ¾ cup (150g) |
| Unsweetened cocoa powder | ¼ cup (25g) |
| Baking powder | 2 tsp |
| Salt | ¼ tsp |
| Whole milk | ½ cup (120ml) |
| Unsalted butter, melted | ⅓ cup (75g) |
| Pure vanilla extract | 1½ tsp |
| Large egg | 1 |
For the Pudding Topping
| Ingredient | Amount |
|---|---|
| Light brown sugar, packed | ½ cup (100g) |
| Unsweetened cocoa powder | ¼ cup (25g) |
The Game-Changer
| Ingredient | Amount |
|---|---|
| Very hot water (just off the boil) | 1 cup (240ml) |
Tools You’ll Need
- 8×8 inch (20×20 cm) square baking dish — use a deep one
- 2 medium mixing bowls
- Whisk
- Rubber spatula
- Measuring cups and spoons
- Kettle or small saucepan for the hot water
Pro Tips
These are the things nobody tells you until you’ve already made the mistake once.
1. Your cocoa powder matters more than you think. Dutch-process cocoa gives a noticeably richer, smoother flavor. If you’re using the dusty tin that’s been in the pantry for two years — swap it.
2. Don’t. Stir. The water. In. This is the most common mistake. You pour the hot water gently over the top and leave it alone. Stirring it in kills the self-saucing effect entirely.
3. Pull it out while it still jiggles. The center should move slightly when you shake the pan. That’s not underdone — that’s the pudding layer doing exactly what it’s supposed to do.
4. Serve within 10 minutes of baking. The pudding layer gets absorbed into the cake as it cools. Cold chocolate pudding cake is just… a dense brownie. Serve it warm.
5. A deeper dish = a better pudding layer. A shallow pan lets the liquid spread too thin. Go deep, get more pudding. Simple math.
💡 Quick Tip: Add ½ teaspoon of espresso powder to the batter. You won’t taste coffee — you’ll just taste more chocolate. It’s a trick pastry chefs use constantly.
Substitutions and Variations
No need to run to the store for anything specific. Here’s how to make it work with what you have:
| If you don’t have… | Use this instead |
|---|---|
| Whole milk | Oat milk or almond milk |
| Unsalted butter | Coconut oil (melted) |
| All-purpose flour | 1:1 gluten-free flour blend |
| White sugar | Coconut sugar (slightly less sweet result) |
| Regular cocoa | Dark/black cocoa for an even deeper flavor |
Want to level it up?
- Fold ½ cup dark chocolate chips into the batter before baking
- Replace ¼ cup of the hot water with hot brewed coffee for a mocha version
- Add a pinch of cayenne to the topping for a subtle heat that lingers
Make-Ahead Tips
This isn’t really a make-ahead dessert — the pudding layer needs to be served warm.
What you can do:
- Mix the dry batter ingredients in one bowl (covered, room temp, up to 24 hours ahead)
- Mix the brown sugar + cocoa topping in a separate bowl (same deal)
- When ready to bake: add the wet ingredients, assemble, pour the hot water, bake
That’s the most realistic version of “prepping ahead” for this recipe.
How to Make It
Step 1 — Preheat + Prep Set your oven to 350°F (175°C). Grease your baking dish well with butter or cooking spray.
Step 2 — Make the batter In a medium bowl, whisk together: flour, granulated sugar, ¼ cup cocoa, baking powder, and salt.
Add the milk, melted butter, vanilla, and egg. Mix until just combined. A few lumps are fine — don’t overmix.
Step 3 — Into the pan Spread the batter evenly into your prepared dish with a spatula.
Step 4 — Add the pudding topping Stir together the brown sugar and remaining ¼ cup cocoa in a small bowl. Sprinkle this mix evenly over the batter.
Do not stir it in. Do not touch it.
Step 5 — The hot water pour Slowly pour the hot water over the entire surface. Pour it over the back of a spoon if you want to be gentle about it.
Still don’t stir. Just trust the process.
Step 6 — Bake 30-35 minutes. The edges will look set. The top will look matte and slightly crackled. The center will still move a little. That’s right.
Step 7 — Rest + serve Let it sit 5 minutes, then serve directly from the dish while warm.
Nutritional Breakdown
Per serving (serves 8) — approximate values
| Nutrient | Amount |
|---|---|
| Calories | ~285 kcal |
| Carbohydrates | 48g |
| Sugar | 32g |
| Fat | 9g |
| Protein | 4g |
| Fiber | 2g |
Values vary based on brands used.
Diet swaps at a glance:
- Dairy-free: oat milk + coconut oil
- Gluten-free: 1:1 GF flour blend
- Lower sugar: reduce granulated sugar to ½ cup and use coconut sugar for the topping
Meal Pairing Ideas
| Serve it with | Why it works |
|---|---|
| Vanilla ice cream | Cold against warm pudding = genuinely unreal contrast |
| Fresh raspberries or strawberries | Cuts through the richness |
| Salted caramel drizzle | Adds another flavor layer without effort |
| Freshly whipped cream | Lighter option that still feels indulgent |
It fits perfectly at the end of a pasta night, a cozy soup dinner, or honestly any night you want dessert to be the highlight.
Leftovers and Storage
| Details | |
|---|---|
| Fridge | Up to 3 days, covered |
| Reheat | Microwave 30-45 sec with a tiny splash of water |
| Freezer | Not recommended — texture suffers |
| Best served | Same day, warm, immediately |
FAQ
The center looks super liquidy — is it done? Yes, if the edges and most of the top are set. The pudding underneath is liquid. That’s the point. If the whole top is still wet and raw-looking, give it 3-5 more minutes.
Can I double it? Absolutely. Use a 9×13 inch pan and add 5-8 extra minutes. Start checking at 35 minutes.
Can I use dark or black cocoa? Yes, and it’s excellent. You’ll get a more intense, almost Oreo-like chocolate flavor.
My pudding layer disappeared after baking — what happened? Overbaked. The pudding layer gets absorbed into the cake when it cooks too long or sits too long before serving. Pull it earlier, serve faster.
Can I bake in a round pan? A 9-inch round pan works fine. Bake time may vary slightly, so start checking at 28 minutes.
Any fun mix-ins? Chocolate chips, chopped walnuts, a swirl of peanut butter, or a handful of toasted pecans in the batter all work really well.
Wrapping Up
Here’s the thing about chocolate pudding cake: it genuinely feels like more effort than it is.
Your guests don’t need to know you poured water over batter and walked away. Let them think you did something clever.
Scoop it warm, pile on some ice cream, and watch it disappear.
Then come back and drop a comment below — I’d love to know how yours turned out, what variations you tried, or if you have any questions. Every experience is different and honestly, the comments section here is one of my favorite parts. 😊


