You know that moment when you open your pantry and spot three brown bananas just begging to be tossed?
Stop right there.
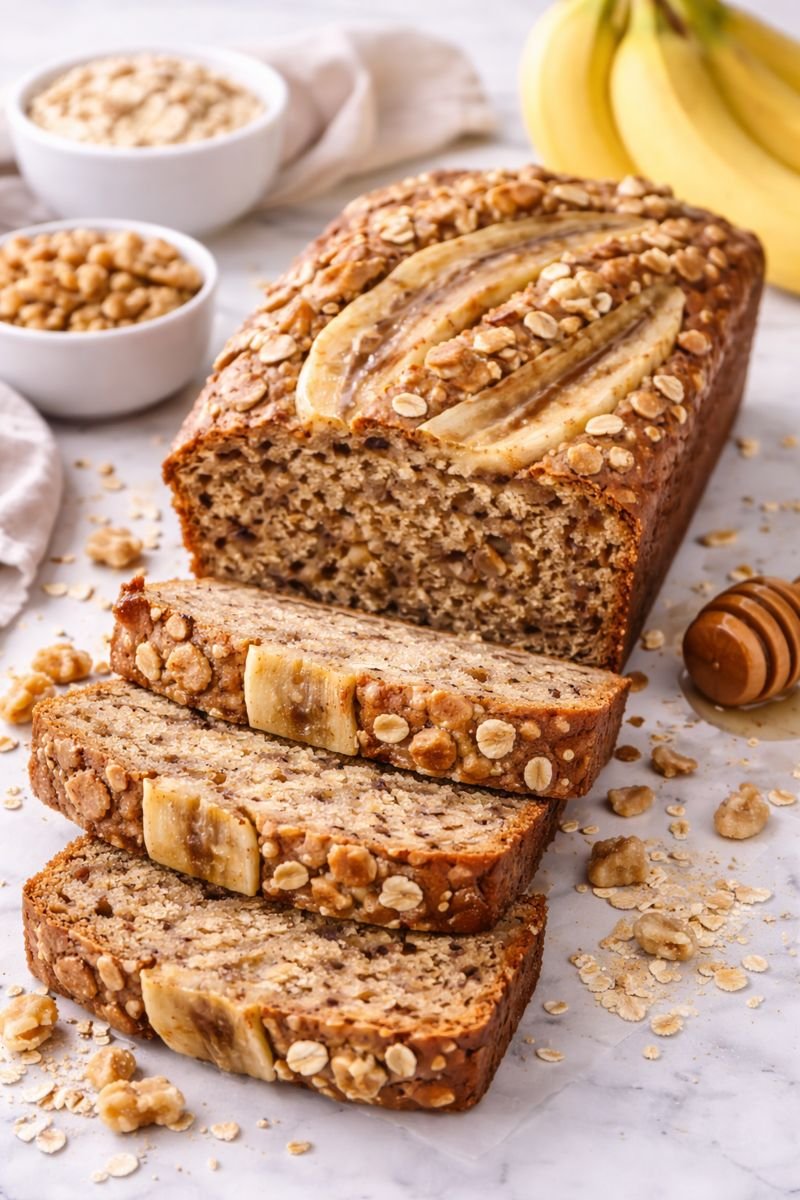
Those ugly, spotty bananas are about to become the star of your kitchen.
I’m talking about banana bread that’s actually good for you, made with ingredients you can actually pronounce, and still tastes like the kind of comfort food you’d eat straight out of the pan at 2am.
No weird protein powder aftertaste. No dry, cardboard texture that makes you question all your life choices. Just really, really good banana bread that happens to be healthy.
“This is the only banana bread recipe I’ll ever need. Made it three times this month already!” – Sarah M.
Why This Recipe Works
Let’s get real for a second.
Most “healthy” banana bread tastes like cardboard had a baby with sawdust.
But this one’s different.
| Traditional Banana Bread | This Healthy Version |
|---|---|
| Refined white flour | Whole wheat flour (more fiber, nutrients) |
| 1+ cups white sugar | 1/2 cup pure maple syrup (natural sweetness) |
| Vegetable oil | Coconut oil (healthy fats) |
| Sour cream | Greek yogurt (protein boost) |
| 400+ calories/slice | 245 calories/slice |
The secret? We’re not just swapping ingredients randomly. Every single change serves a purpose.
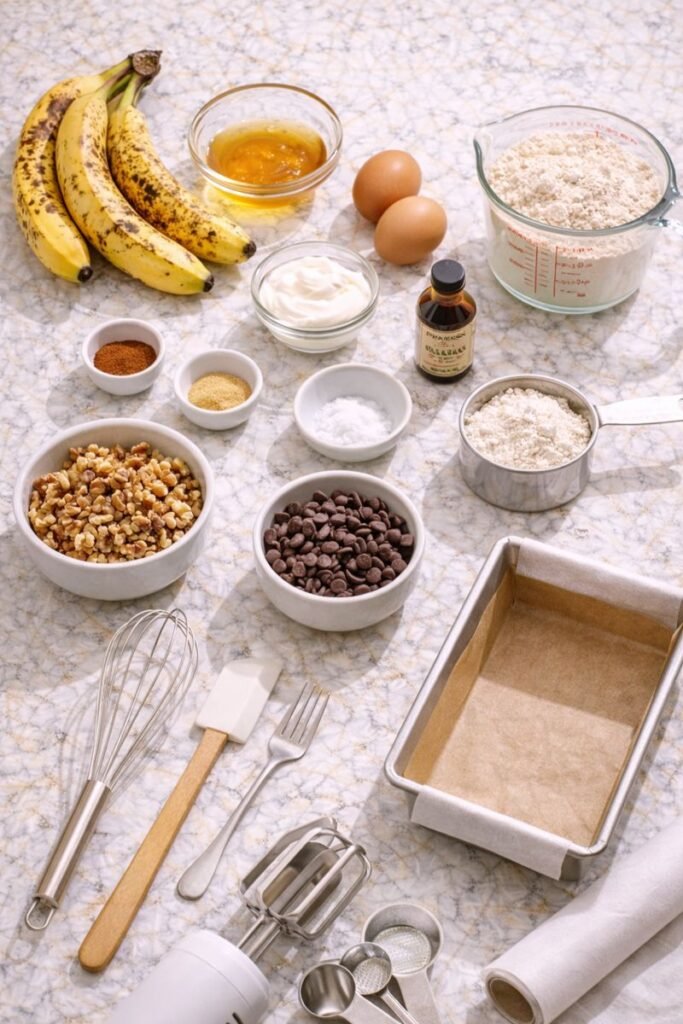
What You’ll Need 🥄
The Wet Squad
- 3 overripe bananas (the spottier, the sweeter)
- 1/3 cup melted coconut oil
- 1/2 cup pure maple syrup
- 2 large eggs (room temp is key)
- 1/4 cup Greek yogurt (plain, full-fat)
- 1 teaspoon vanilla extract
The Dry Team
- 1 3/4 cups whole wheat flour
- 1 teaspoon baking soda
- 1/2 teaspoon sea salt
- 1 teaspoon cinnamon
- 1/4 teaspoon nutmeg
The Fun Extras (Optional But Amazing)
- 1/2 cup chopped walnuts
- 1/3 cup dark chocolate chips
Pro move: Toast those walnuts for 5 minutes first. Game changer.
Your Tool Kit
You may also like : banana bread recipe
Don’t overthink this. You need:
✓ 1 large mixing bowl
✓ 1 medium mixing bowl
✓ Fork for mashing
✓ Whisk
✓ Rubber spatula
✓ 9×5 inch loaf pan
✓ Parchment paper
✓ Measuring cups & spoons
✓ Toothpick
That’s it. No fancy stand mixer required.
Pro Tips From Someone Who’s Made This 50+ Times
🍌 Tip #1: Banana Ripeness Is EVERYTHING
Want to know the difference between “meh” banana bread and “oh my god this is incredible” banana bread?
The bananas.
| Banana State | What It Means | Should You Use It? |
|---|---|---|
| Green/Yellow | Not ripe, starchy, no sweetness | ❌ Nope |
| Yellow with few spots | Getting there, but not sweet enough | ❌ Not yet |
| Yellow with lots of brown spots | Perfect! Sweet, soft, flavorful | ✅ YES |
| Mostly brown, very soft | Even better! Maximum sweetness | ✅ HELL YES |
| Black and mushy | Still works if not moldy | ✅ Surprisingly good |
Speed hack: Need ripe bananas NOW? Stick them in a 300°F oven for 15-20 minutes until the skins turn black. Let them cool, then use them. Not quite as good as naturally ripened, but it works in a pinch.
🥄 Tip #2: The Mixing Rule You Can’t Break
Here’s where everyone messes up:
STOP MIXING THE SECOND YOU DON’T SEE FLOUR.
I’m serious. Those lumps you see? They’re supposed to be there.
Overmixing = tough, dense, sad banana bread.
Undermixing = tender, fluffy, perfect banana bread.
Mix until just combined, then walk away. Your arms might want to keep going. Don’t let them.
🥚 Tip #3: Temperature Matters More Than You Think
Cold eggs straight from the fridge don’t mix well with room temperature ingredients.
The result? Lumpy batter and uneven texture.
The fix:
Place your eggs in a bowl of warm (not hot!) water for 5 minutes before using.
Your batter will be smoother, and your bread will have better rise and texture.
⏰ Tip #4: Check Early, Check Often
Your oven is a liar.
It might say 350°F, but it’s probably running 25 degrees hotter or cooler.
Start checking at 50 minutes, not 60. Insert a toothpick into the center:
- Wet batter clinging to it = needs more time
- A few moist crumbs = PERFECT, take it out now
- Completely clean = you’ve gone too far, my friend
🧊 Tip #5: The Cooling Period Is Not Optional
I know your kitchen smells like heaven. I know you want to cut into it RIGHT NOW.
Don’t.
Hot banana bread = gummy, falls apart, disappointing.
Cooled banana bread = clean slices, perfect texture, worth the wait.
Minimum cooling time: 10 minutes in the pan, then at least 1 hour on a wire rack.
Use that time to clean up (or scroll through your phone, no judgment).
You’ll love these too : banana ice cream recipe
Let’s Make This Thing 👩🍳

Step 1: Prep Work (Don’t Skip This)
Preheat your oven to 350°F.
Line your loaf pan with parchment paper, leaving overhang on the sides. This is your handle for later.
Set out your eggs to come to room temp if you forgot earlier.
Takes 3 minutes, saves you headaches later.
Step 2: Banana Mashing Time
Peel those beautiful brown bananas and toss them in your large bowl.
Mash them with a fork until mostly smooth. A few chunks are totally fine.
You want about 1 1/2 cups of mashed banana.
Side note: The smell at this stage is already incredible. If you’re not excited yet, check your pulse.
Step 3: Build Your Wet Mix
Add to your mashed bananas:
- Melted coconut oil
- Maple syrup
- Eggs
- Greek yogurt
- Vanilla extract
Whisk it all together until smooth and creamy.
The mixture should look golden and smell like a bakery. If it doesn’t, you’re doing it wrong (kidding, you’re doing great).
Step 4: The Dry Ingredients Dance
In your medium bowl, combine:
- Whole wheat flour
- Baking soda
- Sea salt
- Cinnamon
- Nutmeg
Whisk for 30 seconds to distribute everything evenly.
This step seems unnecessary until you bite into banana bread that has a pocket of baking soda. Trust me, you don’t want that.
Step 5: The Sacred Union
Pour your dry ingredients into the wet ingredients.
Now remember what I said about overmixing?
Use your rubber spatula to gently fold everything together. Scrape from the bottom, turn it over. Repeat until you see no more flour streaks.
Stop immediately.
If you’re adding walnuts or chocolate chips, fold them in with just 3-4 strokes.
Step 6: Pan Time
Pour the batter into your prepared loaf pan.
Spread it evenly with your spatula.
Tap the pan on the counter 2-3 times to release air bubbles.
This is weirdly satisfying, so enjoy it.
Recommended for you : healthy banana recipe
Step 7: The Baking Game
Slide that pan into your preheated oven.
Set timer for 50 minutes.
At 50 minutes, do the toothpick test.
If it comes out with wet batter = 5-10 more minutes.
If it has moist crumbs = YOU’RE DONE, take it out!
If it’s completely clean = oops, slightly overbaked but still good.
The top should be deep golden brown with that gorgeous crack down the middle.
Step 8: The Hardest Part
Let it sit in the pan for 10 minutes.
Use the parchment overhang to lift it out onto a wire rack.
Cool for at least 1 hour before slicing.
Go do literally anything else. Walk your dog. Call your mom. Reorganize your spice drawer. Just don’t cut into it yet.
Swap Meet: Make It Your Own 🔄
Can’t Do Eggs?
Use: 2 “flax eggs” (2 tablespoons ground flaxseed + 6 tablespoons water, let sit 5 minutes)
What changes: Slightly denser texture, but still delicious
No Coconut Oil?
| Instead of Coconut Oil | Use This | Flavor Profile |
|---|---|---|
| Want buttery richness | Melted butter | Classic, indulgent |
| Want neutral flavor | Avocado oil | Mild, healthy |
| Have olive oil only | Light olive oil | Slightly fruity (not bad!) |
Prefer White Flour?
Swap whole wheat for all-purpose flour 1:1.
You’ll get lighter color and fluffier texture, but you’ll lose the nutty flavor and nutritional benefits. Your call.
Maple Syrup Breaking the Bank?
Option 1: Honey (1:1 swap)
Option 2: Coconut sugar (use 3/4 cup + add 2 extra tablespoons yogurt)
Want It Vegan?
- Eggs → flax eggs (see above)
- Greek yogurt → coconut yogurt or 1/4 cup mashed avocado
- Honey → stick with maple syrup
Flavor Twists To Try
Go Tropical: Add 1/2 cup shredded coconut + 1/2 cup diced pineapple
Chocolate Lovers Unite: Increase chocolate chips to 2/3 cup + add 2 tablespoons cocoa powder to dry ingredients
Warming Spice: Add 1/4 teaspoon cardamom or ginger
Extra Nutrition: Throw in 1/4 cup chia seeds, hemp hearts, or rolled oats
Make Ahead Magic ✨
This bread actually gets better after Day 1.
The flavors develop. The texture becomes incredibly moist. It’s basically magic.
The Batter Freeze Method
- Line your loaf pan with plastic wrap
- Pour in the batter
- Freeze until solid (about 4 hours)
- Pop it out, wrap tightly in plastic + foil
- Freeze up to 3 months
When ready to bake: Thaw overnight in fridge, bake as directed.
The Whole Loaf Freeze
- Let bread cool completely
- Wrap tightly in plastic wrap
- Wrap again in aluminum foil
- Freeze up to 3 months
When ready to eat: Thaw at room temp for a few hours or overnight in the fridge.
The Individual Slice Hack
- Cool bread completely
- Slice it all
- Wrap each slice in plastic wrap
- Store in freezer bag
When you want one: Microwave 30 seconds or toast straight from frozen. Breakfast sorted.
Leftover Life 🍞
| Storage Method | How Long It Lasts | Best For |
|---|---|---|
| Room temp (wrapped) | 4 days | Daily snacking |
| Refrigerator | 7 days | Meal prep week |
| Freezer (whole loaf) | 3 months | Future you will thank you |
| Freezer (slices) | 3 months | Grab-and-go breakfasts |
My favorite way to eat leftovers:
Toast a slice. Smear with almond butter. Drizzle with honey.
It’s like dessert for breakfast, but you can feel good about it.
Other genius uses:
- French toast (soak in egg mixture, pan fry)
- Bread pudding (cube it, add custard, bake)
- Ice cream sandwich (slice horizontally, add ice cream)
- Croutons for salad (cube and toast, sounds weird but trust me)
The Numbers Game 📊
Nutrition Facts (Per Slice, Makes 10 Slices)
| Nutrient | Amount | % Daily Value |
|---|---|---|
| Calories | 245 | – |
| Protein | 6g | 12% |
| Carbohydrates | 38g | 13% |
| Fiber | 4g | 16% |
| Sugar | 16g | Natural from fruit & maple |
| Fat | 9g | 14% |
| Sodium | 185mg | 8% |
| Potassium | 280mg | 8% |
What this means in real life:
✓ Complex carbs that give you sustained energy
✓ Healthy fats that keep you full
✓ Protein to build and repair
✓ Fiber to keep your gut happy
✓ Natural sugars (no refined stuff)
Compare that to store-bought:
Most commercial banana bread packs 400+ calories and 30+ grams of added sugar per slice.
This version is genuinely better for you without tasting like punishment.
Serve It Up Right 🍽️
Breakfast Combos That Hit Different
The Protein Pack:
Thick slice of banana bread + scrambled eggs + fresh berries + black coffee
The Sweet Start:
Toasted slice with almond butter + sliced strawberries + Greek yogurt on the side
The Grab & Go:
Slice wrapped in parchment + cheese stick + apple + coffee in a travel mug
Brunch Vibes
Build a spread:
- This banana bread (obviously)
- Greek yogurt parfaits with granola
- Fresh fruit salad
- Crispy bacon or veggie sausage
- Good coffee or mimosas
Everyone will think you tried way harder than you did. Don’t tell them it was easy.
Afternoon Pick-Me-Up
Pair with: Hot latte, Earl Grey tea, or even matcha
Add: Small handful of almonds for extra protein
Vibe: Cozy, productive, main character energy
Dessert Mode Activated
Warm a slice for 15 seconds.
Top with:
- Vanilla ice cream + caramel drizzle
- Whipped cream + fresh berries
- Cream cheese frosting (if you’re feeling fancy)
Or turn it into banana bread pudding by cubing it, soaking in custard (2 eggs + 1 cup milk + vanilla), and baking at 350°F for 30 minutes.
FAQ: Every Question You’re About To Ask 🤔
Q: Why is my banana bread dense and heavy?
A: You overmixed the batter.
When you combine wet and dry ingredients, mix ONLY until you can’t see flour anymore. Those lumps are your friends.
Also check that your baking soda is fresh. Test it by dropping a pinch in vinegar – it should fizz like crazy. If nothing happens, buy new baking soda.
Q: Can I reduce the sugar even more?
A: You can drop the maple syrup to 1/3 cup if your bananas are super ripe.
Any less and the bread will taste bland and won’t stay moist as long. The sugar isn’t just for sweetness – it also keeps the bread tender.
Q: My bread is raw in the middle but burning on top. Help!
A: Your oven runs hot.
The fix:
Lower temp to 325°F and bake longer. After 40 minutes, tent the top with foil to prevent over-browning while the middle finishes.
Get an oven thermometer. They’re like $8 and will change your baking life.
Q: Can I make muffins instead?
A: Yes!
Fill muffin cups 2/3 full. Bake at 350°F for 18-22 minutes. You’ll get about 12 muffins.
Perfect for meal prep and grab-and-go breakfasts.
Q: How ripe should the bananas REALLY be?
Visual guide:
🍌 All yellow = Too early, not sweet enough
🍌 Yellow with small brown spots = Getting close
🍌 More brown than yellow = PERFECT ⭐
🍌 Almost entirely brown = Even better
🍌 Black and super soft = Still good if not moldy
The rule: If you wouldn’t want to eat it plain, it’s perfect for banana bread.
Q: Can I use frozen bananas?
A: Absolutely.
Thaw them completely. They’ll release a lot of liquid – drain most of it off, but keep about 2 tablespoons of the liquid.
Your bread might take 5-10 extra minutes to bake because of the extra moisture.
Q: Why did my bread sink in the middle?
Two reasons:
1. You opened the oven too early
Don’t check before 45 minutes. Opening the door drops the temperature and can cause collapse.
2. Too much baking soda
Measure carefully. Too much makes it rise fast then collapse.
Q: Is this actually healthy or are you lying to me?
Real talk: It’s healthier than traditional banana bread.
You’re getting:
- Whole grains instead of refined flour
- Natural sweeteners instead of white sugar
- Healthy fats instead of butter
- Extra protein from Greek yogurt
But: It’s still bread. It’s still got calories and carbs.
Eat it as part of a balanced diet, not as your entire meal. Enjoy it without guilt, but maybe don’t eat the whole loaf in one sitting.
Q: Can I make this gluten-free?
A: Yes, but you need to use a gluten-free flour blend (not just almond flour).
Use Bob’s Red Mill 1-to-1 Gluten Free Flour or King Arthur Measure for Measure. Swap it 1:1 for the whole wheat flour.
Add 1/4 teaspoon of xanthan gum if your blend doesn’t include it.
Wrapping Up 💛
There you have it.
Banana bread that tastes like your grandma made it, but with ingredients that won’t make your doctor give you the side-eye.
The kind of recipe you’ll make until you can measure ingredients in your sleep.
Next time those bananas start looking questionable on your counter, you know exactly what to do. And when people ask how you made something this good, just smile mysteriously and say it’s a family recipe.
Give this a try and come back to tell me about it. Did you go heavy on the chocolate chips? Toast those walnuts? Make it vegan?
Drop a comment below and let me know:
- How your bread turned out
- What variations you tried
- What you paired it with
- Any questions you still have
I read every single one and love hearing about your kitchen victories (and occasionally, your baking disasters – we’ve all been there).


1 thought on “Healthy Banana Bread That Tastes Like Grandma Made It (But Better)”