Ground beef gets a bad rap sometimes. People think it’s boring or just for tacos and burgers.
But here’s what I know after years of cooking: when you treat ground beef right, it becomes the hero of your weeknight dinner rotation.
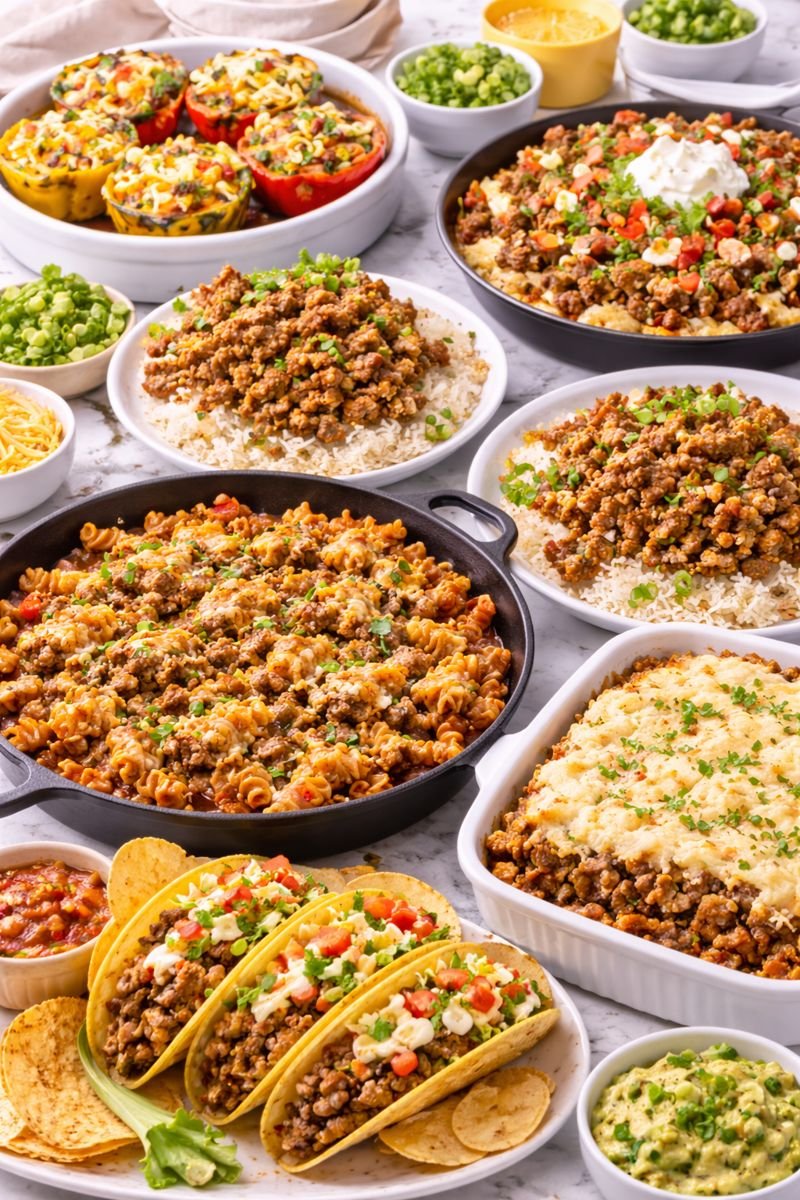
This one-pan skillet is proof.
I’m talking about a dish that goes from fridge to table in under 30 minutes, uses ingredients you probably already have, and tastes like you spent way more time on it than you actually did.
No fancy techniques. No hard-to-find ingredients.
Just really good food that makes you feel like you’ve got your life together, even if you’re eating it straight from the pan while standing at the counter. 😊
The Reality Check: Most weeknights, we’re too tired to cook something complicated. This recipe gets that. It’s for the nights when you need actual food, not another bowl of cereal.
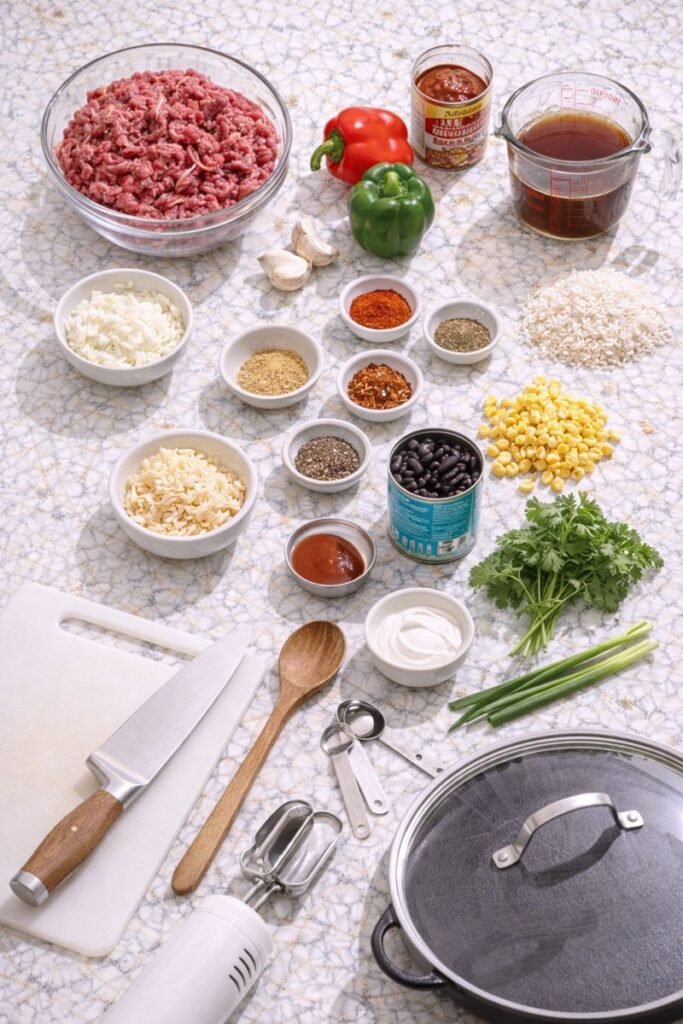
What You’ll Need
The Protein & Aromatics
- 1 ½ pounds ground beef (80/20 works best)
- 2 tablespoons olive oil
- 1 large yellow onion, diced
- 4 cloves garlic, minced
- 1 red bell pepper, diced
- 1 green bell pepper, diced
The Flavor Builders
| Spice | Amount | Why It Matters |
|---|---|---|
| Smoked paprika | 2 tsp | Adds depth and a subtle smokiness |
| Cumin | 1 ½ tsp | Brings warmth and earthiness |
| Chili powder | 1 tsp | Mild heat and complexity |
| Dried oregano | 1 tsp | Herbal notes that tie everything together |
| Salt | ½ tsp + more | Season to your taste |
| Black pepper | ½ tsp | Basic but essential |
| Cayenne pepper | ¼ tsp | Optional kick (skip if heat-sensitive) |
The Base
- 1 can (14.5 oz) diced tomatoes with juices
- 1 cup beef broth
- 2 tablespoons tomato paste
- 1 ½ cups uncooked long-grain white rice
- 1 cup frozen corn
- 1 can (15 oz) black beans, drained and rinsed
The Finishing Touches
- 1 ½ cups shredded cheddar cheese
- ¼ cup fresh cilantro, chopped
- 2 green onions, sliced
- Sour cream (for serving)
- Hot sauce (optional)
Pro Tips
1. Don’t Skip the Browning Step
I know it’s tempting to just stir everything together and call it a day.
But those caramelized bits on the bottom of your pan? That’s where all the flavor lives.
Let the beef get a nice brown crust before you start stirring. We’re talking about the difference between “meh” and “wow, you made THIS?”
2. Use the Right Fat Ratio
The 80/20 ground beef (80% lean, 20% fat) is your sweet spot here.
Too lean? Your dish will be dry and bland.
Too fatty? You’ll be swimming in grease.
Trust me on this one. I’ve tested it both ways and 80/20 wins every single time.
3. Let the Rice Absorb Everything
Once you add your liquid, resist the urge to keep lifting the lid.
Each time you peek, you’re letting steam escape and that’s what cooks your rice.
Set a timer, walk away, do literally anything else.
4. Taste Before Serving
I can’t stress this enough.
Everyone’s palate is different, and what tastes perfectly seasoned to me might need a pinch more salt for you.
Always taste and adjust at the end. This is how good home cooks become great ones.
5. Layer Your Cheese Strategically
Add half the cheese during the last few minutes of cooking (so it melts into everything), then sprinkle the rest on top right before serving.
This gives you that melty, gooey texture throughout PLUS that gorgeous cheese pull when you serve it.
Instagram-worthy without even trying. 📸
Tools You’ll Need
The Essentials:
- Large skillet with a lid (12-inch works perfectly)
- Wooden spoon or spatula
- Sharp knife
- Cutting board
The Helpers:
- Measuring cups and spoons
- Can opener
That’s it. If you have these basics, you’re golden.
Substitutions and Variations
Protein Swaps
Ground turkey or chicken work great if you’re trying to keep things lighter. Just add an extra tablespoon of olive oil since they’re leaner.
Ground pork gives you a richer flavor.
Half beef, half pork? Now we’re talking about something really special.
Rice Alternatives
| Instead of Rice | What to Know |
|---|---|
| Cauliflower rice | Add it in the last 10 minutes; great for low-carb |
| Quinoa | Cook it separately first, then stir in at the end |
| Orzo pasta | Adjust cooking time to package directions |
Veggie Options
Swap the bell peppers for:
- Zucchini (diced)
- Mushrooms (sliced)
- Whatever needs to get used up in your fridge
Add spinach or kale in the last few minutes for extra greens.
Frozen mixed vegetables work in a pinch when you just need dinner done.
Spice It Up (or Down)
Want more heat?
- Add diced jalapeños with the onions
- Use fire-roasted tomatoes instead of regular
- Stir in a tablespoon of your favorite hot sauce
Too spicy for you?
- Cut the cayenne in half or skip it entirely
- Use mild chili powder
- Keep the flavors but lose the fire
Cheese Choices
Monterey Jack melts beautifully and has a milder flavor.
Pepper jack adds heat without extra spices.
Mexican cheese blend gives you variety in one bag.
Going dairy-free? Skip the cheese and add extra fresh herbs instead. Cilantro, parsley, and green onions make it taste complete even without the dairy.
Make Ahead Tips
This is one of those dishes that actually tastes better the next day.
The flavors have time to really get to know each other.
Full Make-Ahead: Cook the whole thing, let it cool completely, then store it in an airtight container in the fridge for up to 4 days.
Reheat in a skillet over medium heat with a splash of broth to keep it from drying out.
Prep Work: Dice all your vegetables on Sunday, store in containers, and you’ve just shaved 10 minutes off your weeknight cooking time.
Freezer-Friendly: Do it before adding the cheese. Let it cool, portion it out, and freeze for up to 3 months.
Thaw overnight in the fridge and reheat with fresh cheese on top.
Weekend Meal Prep Win: Make a double batch on Sunday. Eat it fresh twice during the week, freeze the rest for those nights when even thinking about cooking feels impossible.
How to Make It

Step 1: Brown the Beef
Heat your skillet over medium-high heat and add the olive oil.
Once it’s shimmering, add the ground beef.
Here’s the key: break it up into chunks but don’t stir it constantly.
Let it sit for 2-3 minutes to develop that nice brown crust. Then break it up more and cook until no pink remains, about 6-8 minutes total.
Drain off most of the fat, leaving about 2 tablespoons in the pan.
Those drippings = flavor you want to keep.
Step 2: Build the Flavor Base
Add your diced onions to the beef and cook for 4 minutes until they start to soften.
Your kitchen should smell amazing right now.
Toss in the garlic and cook for another minute until it smells even better.
Add both bell peppers and cook for 3-4 minutes until they start to get tender.
Step 3: Season Everything
Sprinkle in all your spices: smoked paprika, cumin, chili powder, oregano, salt, pepper, and cayenne if using.
Stir everything together and cook for about 1 minute.
This step (called “blooming” the spices) wakes them up and makes them way more flavorful than if you just dumped them in at the end.
Step 4: Add the Tomatoes and Paste
Stir in the tomato paste and cook for another minute.
It’ll look a little thick and that’s fine. You’re concentrating the tomato flavor.
Then add your canned tomatoes with all their juices.
Stir everything together and let it bubble for a couple minutes.
Step 5: Add Rice and Liquid
Pour in the beef broth and stir in the uncooked rice.
Make sure the rice is distributed evenly across the pan.
Bring everything to a boil, then reduce the heat to low, cover with your lid, and let it simmer for 15 minutes.
Don’t peek! Seriously. I know it’s hard, but just don’t.
Step 6: Add Beans and Corn
After 15 minutes, remove the lid and stir in your black beans and frozen corn.
The rice should be almost done but still have a tiny bite to it.
Cover again and cook for another 5-7 minutes until the rice is fully tender and has absorbed most of the liquid.
Step 7: Cheese and Finish
Turn off the heat.
Sprinkle half the cheese over the top, cover, and let it sit for 2-3 minutes until melted.
Then add the rest of the cheese, along with your cilantro and green onions.
Step 8: Serve
Scoop into bowls and top with a dollop of sour cream and your favorite hot sauce.
Grab a fork and dig in.
Or do what I do and eat it straight from the pan. No judgment here.
Leftovers and Storage
How to Store
Fridge: Airtight container, up to 4 days
Freezer: Portioned containers (without cheese topping), up to 3 months
How to Reheat
| Method | Instructions | Time |
|---|---|---|
| Microwave | Add splash of water, cover, stir halfway | 2-3 min |
| Stovetop | Add broth to pan, heat medium-low, stir often | 5-7 min |
| Oven | 350°F in covered dish with added liquid | 15-20 min |
Leftover Transformations
Don’t just reheat the same thing over and over. Get creative:
Stuffed Peppers: Fill bell pepper halves, bake at 375°F for 25 minutes
Burrito Filling: Wrap in large tortillas with extra cheese and sour cream
Breakfast Hash: Mix with scrambled eggs and top with avocado
Quesadillas: Spread between tortillas, pan-fry until crispy
Loaded Nachos: Layer over tortilla chips, melt more cheese on top
Leftover Hack: I actually love eating this cold straight from the fridge for lunch the next day. Sounds weird, but it’s genuinely good. The flavors have melded together overnight and it’s refreshing on a hot day.
Additional Details
Nutrition Breakdown (per serving, serves 6)
| Nutrient | Amount |
|---|---|
| Calories | 520 |
| Protein | 32g |
| Carbohydrates | 48g |
| Fat | 21g |
| Fiber | 7g |
| Sugar | 5g |
Meal Pairing Suggestions
This dish is pretty complete on its own, but here’s what I serve alongside:
Light & Fresh:
- Simple side salad with lime vinaigrette
- Sliced cucumbers with tajín seasoning
- Pickled jalapeños and onions
Carb Lovers:
- Tortilla chips and guacamole
- Warm flour tortillas
- Cornbread with honey butter
Veggie Boost:
- Roasted asparagus
- Brussels sprouts with balsamic
- Grilled zucchini
Time Breakdown
| Task | Time |
|---|---|
| Prep (chopping, measuring) | 10 min |
| Cook (start to finish) | 30 min |
| Total | 40 min |
Active time: About 15 minutes
Hands-off time: About 25 minutes (while rice cooks)
This is perfect for those nights when you need to help with homework, fold laundry, or just sit down for five minutes.
Dietary Modifications
| Diet | How to Adapt |
|---|---|
| Gluten-free | Already compliant! |
| Dairy-free | Skip cheese and sour cream; add extra herbs |
| Low-carb | Use cauliflower rice; skip beans and corn |
| Vegetarian | Swap beef for plant-based crumbles or extra beans |
| Paleo | Use cauliflower rice; skip beans and corn |
FAQ
Can I use ground turkey instead of beef?
Absolutely. Just add an extra tablespoon of olive oil since turkey is leaner.
You might also want to bump up the seasonings slightly since turkey has a milder flavor than beef. An extra ½ teaspoon of cumin usually does the trick.
My rice is still crunchy after the cooking time. What do I do?
Add ¼ cup more broth or water, cover, and cook for another 5 minutes.
If you live at high altitude, you might need to add a bit more liquid and extend the cooking time by 5-10 minutes. The lower air pressure affects how rice cooks.
Can I make this in a different pan?
You need something with a tight-fitting lid.
A large Dutch oven works great. A deep sauté pan will also do the job.
Just make sure it’s big enough to hold everything without overflowing. If you’re unsure, go bigger.
How do I know when the beef is done browning?
It should be deeply browned, not grey.
You want those caramelized bits stuck to the bottom of the pan (that’s called fond and it’s pure flavor gold).
If it looks pale and sad, keep cooking. The darker it gets (without burning), the better it’ll taste.
Can I skip the beans or corn?
Sure, but you’ll want to replace them with something.
Try adding an extra ½ cup of rice, or throw in diced zucchini, mushrooms, or extra bell peppers to keep the volume up.
The beans and corn add texture and bulk, so you’ll notice if they’re just missing.
This seems too spicy/not spicy enough for me.
Too spicy? Cut the cayenne in half or skip it entirely. Use mild chili powder instead of regular.
Not spicy enough? Add diced jalapeños with the onions, increase the cayenne to ½ teaspoon, or finish with sliced fresh chili peppers on top.
Everyone’s heat tolerance is different. Make it work for you.
What’s the best way to reheat this without drying it out?
Add a splash of water or broth before reheating. This is the secret.
Cover your container if microwaving, or use a lid on the stovetop. The extra moisture will steam the rice back to life instead of turning it into little hard pebbles.
Can I double this recipe?
Yes, but you’ll need a really large skillet or Dutch oven.
A 14-inch skillet or 7-quart Dutch oven should handle it. You might need to add a few extra minutes to the rice cooking time since there’s more liquid to absorb.
Why does my ground beef always turn out grey and boring?
You’re probably crowding the pan or stirring too much.
Make sure your pan is hot before adding the beef. Don’t stir it constantly. Let it actually brown on one side before breaking it up.
If your pan is too small and the beef is piled high, it’ll steam instead of brown. Use a bigger pan or brown it in batches.
Wrapping Up
This one-pan ground beef skillet is the kind of recipe that makes you feel good about feeding yourself and your family.
It’s hearty, it’s flavorful, and it doesn’t require you to dirty every pan in your kitchen.
The first time I made this, I was just trying to use up what I had in my pantry. Turns out, those are usually the best recipes.
The ones that come from just working with what you’ve got and making it taste really good.
Make this for a regular Tuesday night when you need something reliable. Make it when friends unexpectedly show up and you need to stretch dinner for a few more people.
Make it when you just want something warm and comforting that doesn’t require much thought.
Drop a comment below and tell me how it turned out for you. Did you add anything different? Did your kids actually eat their vegetables for once?
I wanna hear about it. 💬


1 thought on “One-Pan Ground Beef Skillet That’ll Save Your Weeknight”