
Can you smell fresh bread baking?
That warm, yeasty, impossibly comforting smell that makes your whole house feel like home?
I’m about to show you how to make the kind of white bread that’ll have your family hovering around the kitchen, waiting for that first warm slice with butter melting into every soft, fluffy bite.
And before you start thinking this is going to be complicated or require some fancy bread-making skills, let me stop you right there.
This recipe is so straightforward that I’ve made it on weeknights after work. The actual hands-on time is maybe 15 minutes. The rest is just waiting while the dough does its thing.
I learned this recipe from my grandmother who made bread every single week. She never measured anything, which drove me crazy, so I spent years perfecting the measurements so you’d have a foolproof version.
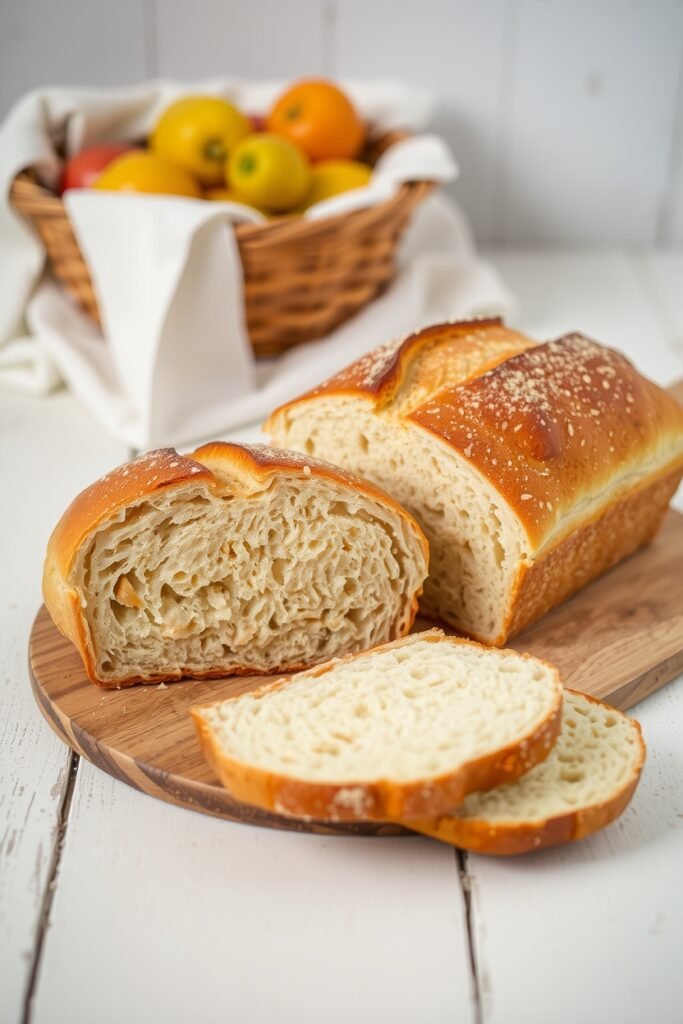
This bread comes out with a golden, slightly crispy crust and the softest, most pillowy interior you’ve ever tasted.
Perfect for sandwiches, toast, or honestly just eating warm with a ridiculous amount of butter.
Quick Recipe Overview
| Prep Time | Rising Time | Baking Time | Total Time | Yield |
|---|---|---|---|---|
| 15 minutes | 1 hour 45 min | 35 minutes | 2 hours 35 min | 1 loaf (12 slices) |
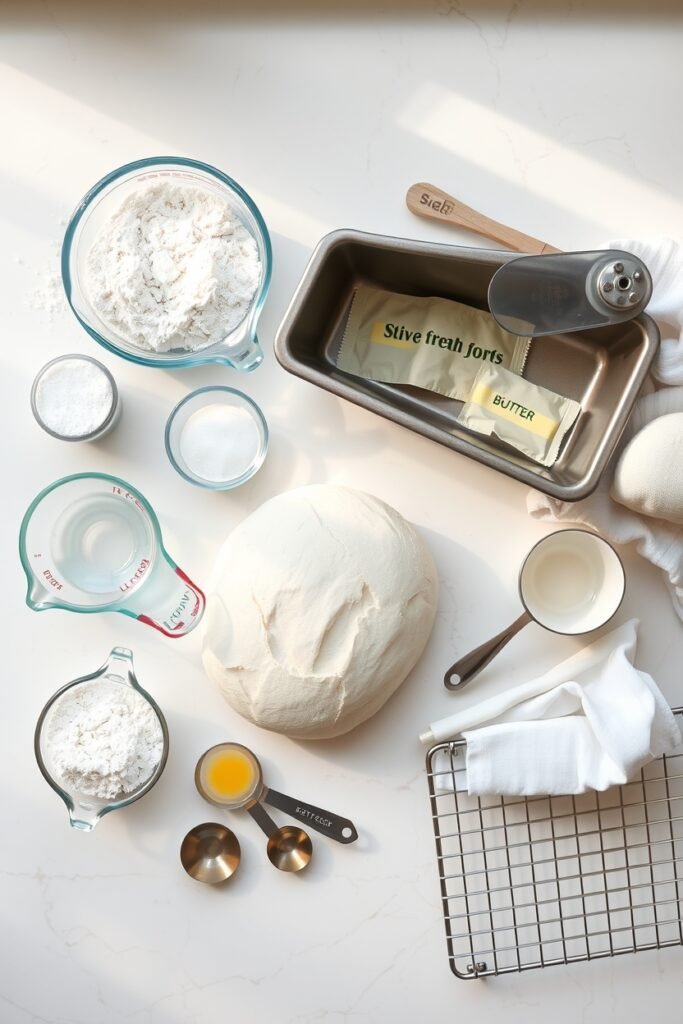
What You’ll Need
The Ingredients
For the Bread:
- 4 cups all-purpose flour (plus extra for dusting)
- 2 tablespoons granulated sugar
- 2 teaspoons salt
- 2 1/4 teaspoons active dry yeast (one standard packet)
- 1 1/2 cups warm water (110°F)
- 2 tablespoons unsalted butter (melted and slightly cooled)
That’s it. Six ingredients you probably already have in your pantry.
Tools You’ll Need
Handpicked for you : zuchinis bread recipe
| Essential Tools | Nice to Have |
|---|---|
| Large mixing bowl | Stand mixer with dough hook |
| Measuring cups & spoons | Kitchen thermometer |
| 9×5 inch loaf pan | Bench scraper |
| Clean kitchen towel | Bread lame or sharp knife |
| Cooling rack | Instant-read thermometer |
Pro Tips
From someone who’s made this bread 100+ times: These tips will save you from the mistakes I made when I was learning.
1. Temperature matters more than you think
Your water needs to be between 105-115°F.
Too hot and you’ll kill the yeast. Too cold and nothing will happen.
If you don’t have a thermometer, test it on your wrist like you would baby formula. It should feel warm but not hot.
2. Don’t skip the butter on the pan
I learned this the hard way.
Grease your loaf pan really well, even if it’s non-stick. Run your fingers inside with butter and get into every corner.
Nothing’s sadder than bread that sticks and tears apart when you’re trying to get it out.
3. The poke test is your friend
When you’re letting the dough rise in the pan, you want it to dome about an inch above the rim.
Gently poke it with your finger.
If the indent springs back slowly and leaves a slight dimple, it’s ready to bake. If it springs back immediately, give it more time.
4. Resist cutting it too early
I know it’s torture, but let the bread cool for at least 20 minutes before slicing.
Hot bread is harder to cut cleanly and the texture hasn’t fully set yet.
Plus, the crust gets better as it cools.
5. Listen for the hollow sound
When you think it’s done, tap the bottom of the loaf.
It should sound hollow, like knocking on a door. That’s how you know it’s fully baked through.
You may also like : banana bread recipe
How to Make Homemade White Bread
Step 1: Wake Up the Yeast (10 minutes)
Pour your warm water into a large mixing bowl.
Sprinkle the yeast and 1 teaspoon of the sugar over the water.
Give it a quick stir and let it sit for 5-10 minutes.
What you’re looking for: Foamy, bubbly top that looks like beer foam. That means your yeast is alive and ready to party. 🎉
If nothing happens: Your water was probably too hot or your yeast is dead. Start over with fresh yeast.
Step 2: Mix the Dough (5 minutes)
Add the melted butter, remaining sugar, and salt to your yeast mixture. Stir it all together.
Start adding the flour one cup at a time, stirring after each addition.
After about 3 cups, the dough will start coming together and pulling away from the sides of the bowl.
Add the last cup gradually until the dough is soft but not sticky.
Dough Texture Guide:
| Too Dry | Perfect | Too Wet |
|---|---|---|
| Crumbly, won’t hold together | Soft, slightly tacky, smooth | Sticky, clings to hands |
| Add 1 tbsp water at a time | Ready to knead! | Add 1 tbsp flour at a time |
Step 3: Knead the Dough (8-10 minutes)
If you’re using a stand mixer, switch to the dough hook now and knead on medium-low for 5-6 minutes.
If you’re mixing by hand, turn the dough out onto a floured surface and knead for 8-10 minutes.
How to knead by hand:
- Push the dough away from you with the heel of your hand
- Fold it back over itself
- Turn it a quarter turn
- Repeat until smooth and elastic
You want the dough to become smooth and elastic. When you poke it, it should bounce back.
The windowpane test: Stretch a small piece of dough thin enough to see light through it without it tearing. If it tears, keep kneading.
Step 4: First Rise (1 hour)
Shape your dough into a ball and place it in a greased bowl.
Turn it once so the top is greased too.
Cover with a damp kitchen towel or plastic wrap.
Let it rise in a warm spot for about 1 hour, or until it doubles in size.
Best Places for Rising:
- Oven (turned off) with just the light on
- Near a sunny window
- On top of the fridge
- In a microwave with a cup of hot water beside it
You’ll love these too : starbucks banana bread recipe
Step 5: Shape the Loaf (5 minutes)
Once doubled, punch down the dough with your fist to release the air.
This is the most satisfying part. 👊
Turn it out onto a lightly floured surface and shape it into a rectangle about 9 inches wide.
Shaping Technique:
- Pat dough into a 9×12 inch rectangle
- Roll it up tightly from the short end (like a sleeping bag)
- Pinch the seam closed as you go
- Tuck the ends under
- Place seam-side down in your greased loaf pan
Step 6: Second Rise (30-45 minutes)
Cover the pan with your towel again and let it rise for another 30-45 minutes.
You want the dough to dome about an inch above the rim of the pan.
While it’s rising, preheat your oven to 375°F.
| Under-proofed | Perfect | Over-proofed |
|---|---|---|
| Dough springs back immediately | Slow spring back, slight dimple remains | No spring back, collapses when touched |
| Give it more time | Ready to bake! | Bake now or it’ll collapse in oven |
Step 7: Bake (30-35 minutes)
Bake for 30-35 minutes, until the top is golden brown and the loaf sounds hollow when you tap it.
Baking Timeline:
| Time | What’s Happening | What to Do |
|---|---|---|
| 0-10 min | Dough expands rapidly | Don’t open the oven |
| 10-20 min | Crust starts forming | Check if top is browning too fast |
| 20-30 min | Bread sets, browns | Tent with foil if too dark |
| 30-35 min | Final browning | Check for hollow sound |
If the top is browning too quickly, tent it loosely with aluminum foil for the last 10 minutes.
Step 8: Cool and Slice (20+ minutes)
Remove from the oven and let it sit in the pan for 5 minutes.
Then turn it out onto a cooling rack.
Let it cool for at least 20 minutes before slicing.
I know it’s hard, but trust me on this one.
Why waiting matters: The bread is still cooking from residual heat. Cut it too early and you’ll get a gummy texture.
Slice with a serrated knife using a gentle sawing motion.
Substitutions and Variations
Flour Swaps
| Original | Substitution | Result |
|---|---|---|
| All-purpose flour | Up to 1 cup whole wheat | Heartier, nuttier flavor, denser |
| All-purpose flour | Bread flour | Chewier texture, more structure |
| All-purpose flour | Gluten-free blend | Won’t work (needs different recipe) |
Sweetener Options
- Honey instead of sugar: Swap in equal amounts. Gives the bread a slightly richer flavor and softer crumb.
- Maple syrup: Use 2 tablespoons. Adds subtle maple notes.
- Brown sugar: Same amount. Creates a slightly darker crust.
Flavor Add-Ins
Mix these in during the final minute of kneading:
- Herbs: 2 tablespoons fresh rosemary, thyme, or oregano
- Garlic: 1 tablespoon garlic powder or 3 cloves minced
- Cheese: 1/2 cup shredded cheddar or parmesan
- Everything bagel: 2 tablespoons everything bagel seasoning
- Cinnamon raisin: 1 tablespoon cinnamon + 1/2 cup raisins
Dairy-Free Version
Use plant-based butter or coconut oil instead of regular butter.
The taste will be slightly different but it still works perfectly.
Egg Wash for Shine
Brush the top with a beaten egg before baking for a glossier, more golden crust that looks bakery-quality.
Make Ahead Tips
Night Before Method:
After the first rise, punch it down, shape it, and put it in the loaf pan.
Cover it tightly with plastic wrap and refrigerate overnight (up to 16 hours).
The next morning:
- Take it out 1-2 hours before baking
- Let it come to room temperature
- Let it finish rising until domed
- Bake as directed
Freezing Unbaked Dough:
- Shape the dough after first rise
- Wrap tightly in plastic wrap, then foil
- Freeze for up to 3 months
- Thaw overnight in fridge
- Let come to room temperature and rise
- Bake as directed
Leftovers and Storage
Storage Methods Compared
| Method | Duration | Best For | Tips |
|---|---|---|---|
| Room temp (bread box) | 2-3 days | Daily eating | Don’t use plastic immediately |
| Room temp (wrapped) | 3-4 days | Keeping crust soft | Wrap in kitchen towel first |
| Refrigerator | 5-7 days | Hot, humid climates | Will dry out faster |
| Freezer (whole loaf) | 3 months | Long-term storage | Slice before freezing |
| Freezer (sliced) | 3 months | Quick toast | Toast from frozen |
Reviving Stale Bread
If your bread starts to dry out:
- Wrap it in a damp (not soaking) kitchen towel
- Warm it in a 300°F oven for 10 minutes
- The steam from the towel rehydrates the bread
Brings it back to life like magic. ✨
Best Uses for Day-Old Bread
Don’t throw it away! Day-old bread is actually better for these:
- French toast: Absorbs egg mixture without falling apart
- Croutons: Holds shape when baked
- Bread pudding: Perfect texture for soaking up custard
- Breadcrumbs: Dries out evenly for grinding
- Panzanella salad: Soaks up dressing beautifully
Nutritional Breakdown
Per slice (based on 12 slices per loaf):
| Nutrient | Amount | % Daily Value |
|---|---|---|
| Calories | 145 | – |
| Total Fat | 2g | 3% |
| Saturated Fat | 1g | 5% |
| Sodium | 195mg | 8% |
| Total Carbs | 28g | 9% |
| Dietary Fiber | 1g | 4% |
| Sugars | 2g | – |
| Protein | 4g | 8% |
Troubleshooting Guide
Common Problems & Solutions
| Problem | Cause | Solution |
|---|---|---|
| Bread didn’t rise | Dead yeast or water too hot | Use fresh yeast, check water temp |
| Dense, heavy texture | Not enough kneading or too much flour | Knead longer, use less flour |
| Bread collapsed | Over-proofed | Watch rise time carefully |
| Gummy inside | Cut too early or underbaked | Cool completely, bake longer |
| Crust too dark | Oven too hot | Reduce temp by 25°F |
| Bread stuck to pan | Didn’t grease well enough | Grease generously with butter |
FAQ
Why didn’t my bread rise?
Most likely your yeast was dead or your water was too hot. Yeast is picky and dies above 120°F.
Also check the expiration date on your yeast packet. Old yeast = no rise.
Can I use instant yeast instead of active dry?
Yes! Use the same amount but you can skip the proofing step.
Just mix it directly with the flour. It’ll save you about 10 minutes.
My bread is dense. What went wrong?
Three main culprits:
- You didn’t knead it enough
- You added too much flour
- You didn’t let it rise long enough
The dough should be soft and slightly tacky, not dry. And make sure you’re giving it enough time to rise fully.
How do I know when it’s done baking?
The top should be golden brown and when you tap the bottom of the loaf, it should sound hollow.
Internal temperature should be around 190-200°F if you want to use a thermometer.
Can I make this without a stand mixer?
Absolutely! Kneading by hand takes a little longer (8-10 minutes vs 5-6) but works just as well.
You’ll get an arm workout and the bread will taste exactly the same.
Why does my bread have big holes in it?
This usually means the dough over-proofed (rose too long).
Stick to the timing guidelines and keep an eye on the size rather than the clock. The dough should double, not triple.
Can I double this recipe?
Yes, but mix one loaf at a time unless you have a really large mixer.
The recipe doubles perfectly. Just make sure you have two loaf pans ready.
What if I don’t have a loaf pan?
You can shape it into a round boule and bake it on a baking sheet lined with parchment paper.
Baking time will be about the same. It’ll look more rustic and artisan.
Can I add seeds to the top?
Definitely! Brush the top with water or beaten egg, then sprinkle with sesame seeds, poppy seeds, or oats before baking.
My crust is too hard. Help!
Brush the top with melted butter immediately when it comes out of the oven.
This softens the crust. Also, storing it in plastic makes the crust softer over time.
Pairing Suggestions
Best Spreads & Toppings
For Breakfast:
- Butter and jam (classic for a reason)
- Cream cheese and smoked salmon
- Peanut butter and banana slices
- Avocado and everything bagel seasoning
For Lunch:
- Turkey, swiss, and mustard sandwich
- Grilled cheese (this bread makes THE BEST)
- Tuna salad on toast
- BLT with extra mayo
For Dinner:
- Garlic butter and soup for dipping
- Bruschetta topping
- Alongside pasta dishes
- With olive oil and balsamic vinegar
Wrapping Up
There’s something really satisfying about pulling a loaf of homemade bread out of your oven.
It’s one of those things that seems intimidating until you actually do it, and then you realize it’s just flour, water, yeast, and a little patience.
This white bread recipe has been my go-to for years.
I’ve made it on lazy Sundays, as gifts for neighbors, and on random Tuesday nights when I just wanted the house to smell amazing.
Every single time, it turns out soft, fluffy, and exactly what you want from a good loaf of bread.
The first time I made this, I felt like a wizard. No joke.
My husband walked in from work, stopped in his tracks, and said “You made that?” Like I’d performed some kind of kitchen magic.
But here’s the secret: it’s not magic. It’s just following simple steps and letting time do most of the work.
Give it a try this weekend.
The worst that can happen is you end up with fresh bread, which honestly isn’t a bad problem to have.
And hey, even if it doesn’t look perfect, it’ll still taste better than anything you can buy at the store.
Drop a comment below and let me know how yours turns out.
Did you add any fun mix-ins? Did your family demolish it before it even cooled? What did you spread on your first slice?
I want to hear all about it. 💬


2 thoughts on “The Only White Bread Recipe You’ll Ever Need (Soft, Fluffy, & Actually Easy)”