
You know that fluffy, golden loaf of bread sitting on your kitchen counter that makes you feel like you’ve got your life together?
This is it.
I’m talking about homemade sandwich bread that’s soft enough to squish between your fingers but sturdy enough to hold up to peanut butter and jelly without falling apart. The kind that makes your whole house smell like a bakery and has your family circling the kitchen like vultures.
And here’s the kicker: it only takes about 10 minutes of actual hands-on work.
I used to think bread-making was reserved for people who wore aprons and had stand mixers named “Betty” or “Martha.” You know, the ones who wake up at 5 AM on a Sunday just to knead dough while listening to classical music.
That wasn’t me.
But then I tried making sandwich bread at home and realized it’s just mixing a few ingredients together, waiting around while yeast does its thing, and throwing it in the oven.
And now? I can’t go back to store-bought bread. It tastes like cardboard in comparison.
So if you’ve been curious about baking your own bread but felt intimidated, this is your sign to just do it. You’ve got this.
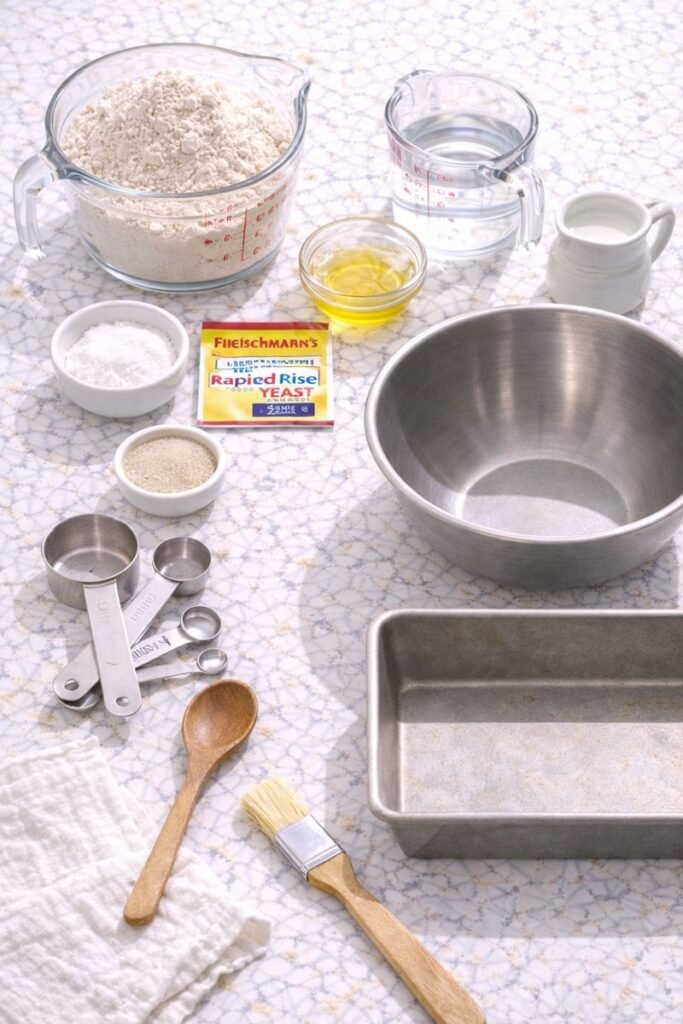
What You’ll Need
The Ingredients
| Ingredient | Amount | Notes |
|---|---|---|
| Bread flour | 3 cups | All-purpose works too |
| Granulated sugar | 2 tablespoons | Or honey/maple syrup |
| Instant yeast | 2 ¼ teaspoons | One standard packet |
| Salt | 1 ½ teaspoons | Don’t skip this |
| Unsalted butter | 3 tablespoons | Melted |
| Warm water | 1 cup | 110°F is perfect |
| Whole milk | ½ cup | Any milk works |
The Tools
- Large mixing bowl
- Measuring cups and spoons
- Wooden spoon or dough whisk
- Kitchen towel or plastic wrap
- 9×5-inch loaf pan
- Pastry brush (optional)
- Cooling rack
Quick tip: Don’t have bread flour? No problem. All-purpose flour works perfectly fine. Your bread will be slightly less chewy but equally delicious.
Pro Tips From Someone Who’s Made This 100+ Times
Here’s what I learned the hard way so you don’t have to:
1. Temperature Matters More Than You Think 🌡️
Your water needs to be warm enough to activate the yeast but not so hot that it kills it.
The finger test: Stick your finger in the water. If it feels like a comfortable bath, you’re golden. If it’s hot, wait for it to cool down.
2. Don’t Skip the Second Rise
I know you’re excited and want to bake this thing already, but that second rise in the loaf pan is what gives you that perfect sandwich bread texture.
First rise = flavor development
Second rise = fluffy texture
3. The Poke Test Is Your Best Friend
After the second rise, gently press your finger into the dough about half an inch deep.
- Indent slowly springs back but leaves a small dent? Ready to bake!
- Springs back completely? Give it more time.
- Doesn’t spring back at all? You might have over-proofed it, but bake it anyway.
4. Brush With Butter Immediately
Right when that bread comes out of the oven, brush the top with melted butter. This creates that soft, golden crust that makes homemade bread irresistible.
5. Wait Before You Slice It (I Know, Torture)
Let the bread cool for at least 20 minutes before cutting into it. Hot bread is harder to slice cleanly and can get gummy. Trust me on this one.
How to Make the Best Sandwich Bread

Step 1: Wake Up the Yeast
Mix the warm water, warm milk, and sugar in your large bowl. Sprinkle the yeast on top and let it sit for about 5 minutes.
What you’re looking for: The mixture should get foamy and smell slightly yeasty. This means your yeast is alive and ready to party.
No foam? Your yeast is dead. Start over with fresh yeast and check your water temperature.
Step 2: Add the Fat and Salt
Stir in the melted butter and salt to the yeast mixture.
The butter adds richness and keeps the bread soft for days. The salt controls the yeast and adds flavor.
Step 3: Mix in the Flour
Add the flour one cup at a time, stirring after each addition.
The dough will start to come together and pull away from the sides of the bowl. It should be slightly sticky but not wet.
“If your dough is too dry, add water one tablespoon at a time. Too wet? Add flour one tablespoon at a time. Dough is forgiving!”
Step 4: Knead Like You Mean It
Turn the dough out onto a lightly floured surface and knead for about 8-10 minutes.
How to knead:
- Push the dough away from you with the heel of your hand
- Fold it back over itself
- Give it a quarter turn
- Repeat
You’ll know it’s ready when:
- The dough is smooth and elastic
- It springs back when you poke it
- It feels like a baby’s bottom (weird but accurate)
Step 5: First Rise Time
Place the dough in a greased bowl, turning it once so the top is greased too. Cover with a kitchen towel.
Let it rise in a warm spot for about 1 hour, or until it doubles in size.
Warm spot ideas:
- Near a sunny window
- On top of your fridge
- In the oven with just the light on (don’t turn the oven on!)
Step 6: Punch It Down (Literally)
After the first rise, punch down the dough with your fist. This releases the air bubbles and redistributes the yeast.
Turn it out onto your work surface and shape it into a rectangle about as wide as your loaf pan is long.
Step 7: Shape Your Loaf
Roll the dough tightly from the short end, like you’re rolling up a sleeping bag.
Pinch the seam closed as you go. Tuck in the ends.
Place it seam-side down in your greased 9×5-inch loaf pan.
Pro move: After placing it in the pan, press down gently to eliminate any air pockets.
Step 8: Second Rise
Cover again and let it rise for another 30-40 minutes.
The dough should rise about 1 inch above the rim of the pan. This is crucial for that bakery-style dome top.
Step 9: Preheat Your Oven
While the bread is doing its second rise, preheat your oven to 375°F.
Step 10: Bake to Golden Perfection
Bake for 30-35 minutes until the top is golden brown and the loaf sounds hollow when you tap it.
The thermometer trick: The internal temperature should read 190°F if you have an instant-read thermometer.
Step 11: The Butter Finish
Remove from the oven and brush the top with melted butter immediately.
Let it cool in the pan for 10 minutes, then turn it out onto a cooling rack.
And now comes the hardest part: waiting to slice it. 😅
Quick Reference: Rise Times & Temperatures
| Stage | Time | Temperature | What to Look For |
|---|---|---|---|
| Yeast proofing | 5 minutes | 110°F water | Foamy, bubbly surface |
| First rise | 1 hour | 75-80°F room temp | Doubled in size |
| Second rise | 30-40 minutes | 75-80°F room temp | 1 inch above pan rim |
| Baking | 30-35 minutes | 375°F oven | Golden brown, hollow sound |
Substitutions and Variations
Here’s where you can get creative:
Flour Swaps
| Instead of Bread Flour | Use This | The Result |
|---|---|---|
| All-purpose flour | 1:1 ratio | Slightly less chewy, still great |
| Whole wheat flour | Replace up to half | Heartier, nuttier flavor |
| White whole wheat | 1:1 ratio | Best of both worlds |
Heads up: Whole wheat flour absorbs more liquid, so you might need to add 2-3 tablespoons more water.
Flavor Variations That Slap
Honey Oat Bread: Replace sugar with honey and add ½ cup rolled oats to the dough.
Herb Bread: Mix in 2 tablespoons of dried herbs (rosemary, thyme, or Italian seasoning).
Cinnamon Swirl: After rolling out the rectangle in step 6, brush with melted butter and sprinkle with cinnamon sugar before rolling up.
Garlic Butter Bread: Add 2 teaspoons garlic powder to the dough and brush with garlic butter instead of plain butter.
Cheese Bread: Fold in 1 cup shredded cheddar during the kneading process.
Dairy-Free Version
- Swap whole milk for any plant-based milk (oat milk works great)
- Use coconut oil or vegan butter instead of regular butter
Make Ahead Tips
Life gets busy. Here’s how to prep this bread in advance:
Option 1: Overnight First Rise Make the dough and let it do its first rise in the fridge overnight (up to 24 hours). Bring to room temperature before shaping.
Option 2: Freeze the Shaped Dough Shape the loaf, wrap tightly in plastic wrap, and freeze for up to 3 months. Thaw in the fridge overnight, let it rise, and bake.
Option 3: Bake and Freeze Bake the bread completely, let it cool, slice it, and freeze. Pop slices straight into the toaster from frozen.
Leftovers and Storage
Storage Guide
| Method | Duration | Best For |
|---|---|---|
| Room temperature (airtight bag) | 4 days | Daily sandwich making |
| Refrigerator | 7 days | Longer freshness (toast before eating) |
| Freezer (whole loaf) | 3 months | Making ahead |
| Freezer (sliced) | 3 months | Grab-and-go convenience |
Pro tip: If your bread starts to get stale after a few days, don’t toss it! Turn it into French toast, bread pudding, or croutons.
What to Do With Leftover Bread
- French toast: Thick slices of this bread make killer French toast
- Bread crumbs: Pulse in a food processor for homemade breadcrumbs
- Grilled cheese: This bread takes grilled cheese to the next level
- Bread pudding: A sweet way to use up the heel pieces
Nutritional Breakdown
Per slice (based on 14 slices per loaf):
| Nutrient | Amount | % Daily Value |
|---|---|---|
| Calories | 145 | – |
| Protein | 4g | 8% |
| Carbohydrates | 25g | 8% |
| Fat | 3g | 4% |
| Fiber | 1g | 4% |
| Sugar | 2g | – |
| Sodium | 245mg | 11% |
Pairing Suggestions
This bread is stupid-versatile. Here’s what goes well with it:
For Breakfast:
- Avocado toast with everything bagel seasoning
- Peanut butter and banana
- Butter and jam (classic for a reason)
For Lunch:
- Turkey and Swiss with Dijon mustard
- BLT with extra bacon
- Tuna salad sandwich
- Grilled cheese with tomato soup
For Dinner:
- Alongside chili or stew
- Garlic bread (slice, butter, add garlic, toast)
- As a side for pasta
Troubleshooting: What Went Wrong?
My Bread Didn’t Rise
Possible reasons:
- Your yeast was expired (check the date!)
- Water was too hot and killed the yeast
- Kitchen was too cold (yeast likes warmth)
The fix: Start over with fresh yeast and check your water temperature with a thermometer.
My Bread Is Dense and Heavy
Possible reasons:
- Didn’t knead long enough
- Added too much flour
- Didn’t let it rise long enough
The fix: Next time, knead for the full 10 minutes and be patient with the rises. The dough should actually double.
The Top Cracked While Baking
This is normal! It means your dough was rising beautifully in the oven. Some bakers even score the top intentionally for a rustic look.
It’s Doughy in the Middle
The reason: It needed more bake time.
The fix: Every oven is different. If yours runs cool, add 5 more minutes next time. Use a thermometer to check for 190°F internal temp.
The Crust Is Too Hard
The reason: It baked too long or at too high a temperature.
The fix: Check it at 30 minutes and tent with foil if it’s browning too fast. Brush with butter right out of the oven for a softer crust.
Time Breakdown: Is This Actually Doable on a Weeknight?
Let’s be real about the time commitment here:
| Task | Active Time | Passive Time |
|---|---|---|
| Mixing ingredients | 5 minutes | 5 minutes (yeast proofing) |
| Kneading | 10 minutes | – |
| First rise | 2 minutes (shaping) | 1 hour |
| Shaping loaf | 3 minutes | – |
| Second rise | – | 40 minutes |
| Baking | – | 35 minutes |
| TOTAL | 20 minutes hands-on | 2 hours 20 minutes waiting |
So yeah, you need about 2.5 hours start to finish, but only 20 minutes of that is actual work.
My strategy: I start this after dinner. Mix and knead while the kitchen’s getting cleaned up, let it rise while we watch TV, shape it, second rise, bake, and boom. Fresh bread for tomorrow’s lunches.
FAQ
Can I make this without a stand mixer?
YES! This recipe is designed to be made by hand. The kneading gives you a good arm workout and honestly, it’s kind of therapeutic.
Why didn’t my bread rise?
Your yeast might have been expired or your water was too hot and killed the yeast. Make sure your water is between 105-115°F and check the expiration date on your yeast packet.
My bread came out dense. What happened?
You probably didn’t let it rise long enough or you added too much flour. Make sure the dough doubles in size during the first rise and feels soft and slightly tacky (not dry) before baking.
Can I use active dry yeast instead of instant?
Yes! Just add it directly to the warm water with the sugar and let it sit for 10 minutes until foamy before adding the other ingredients. It needs that extra wake-up time.
How do I know when the bread is done?
The top should be golden brown and when you tap the bottom of the loaf it should sound hollow. An instant-read thermometer should read 190°F in the center.
Why is my bread doughy in the middle?
It needed more time in the oven. Every oven is different, so if yours runs cool, you might need an extra 5 minutes of bake time.
Can I add mix-ins like cheese or herbs?
Absolutely! Add them when you’re kneading the dough. Just don’t go overboard (max 1 cup of add-ins) or they’ll weigh down the dough and prevent it from rising properly.
Do I have to use a loaf pan?
Technically no, but yes. You could free-form this into a round boule, but it won’t slice as nicely for sandwiches. The loaf pan gives you those perfect square slices.
Can I halve this recipe?
You could, but why would you? 😊 Make the full loaf and freeze half. Future you will be grateful.
What’s the difference between bread flour and all-purpose flour?
Bread flour has more protein (gluten), which gives bread a chewier texture. All-purpose works fine too, just with a slightly softer crumb.
Wrapping Up
There’s something ridiculously satisfying about pulling a loaf of homemade bread out of the oven.
You’ll feel accomplished. Your kitchen will smell incredible. And your sandwiches will never be the same.
Once you make this bread a few times, it becomes second nature. You’ll start experimenting with different flavors and making it every week without even thinking about it.
The first time might feel a little intimidating, but by the third time? You’ll be that person casually mentioning “oh, I just baked some bread this morning” like it’s no big deal.
So grab your ingredients and give it a shot.
And when you do, come back and tell me how it turned out. Did you add anything special? Did your kids devour half the loaf before it cooled? Did you eat warm bread with butter straight from the oven and feel like you were living your best life?
Drop a comment below! I read every single one and I love hearing about your bread adventures. 👇


