Ever bite into store-bought wheat bread and feel like you’re eating health-flavored air?
Yeah, me too.
I used to think homemade bread was reserved for people who wore aprons unironically and had “sourdough starters” with names. But then I realized something: making wheat bread from scratch is actually easier than pretending to enjoy the cardboard loaves at the grocery store.
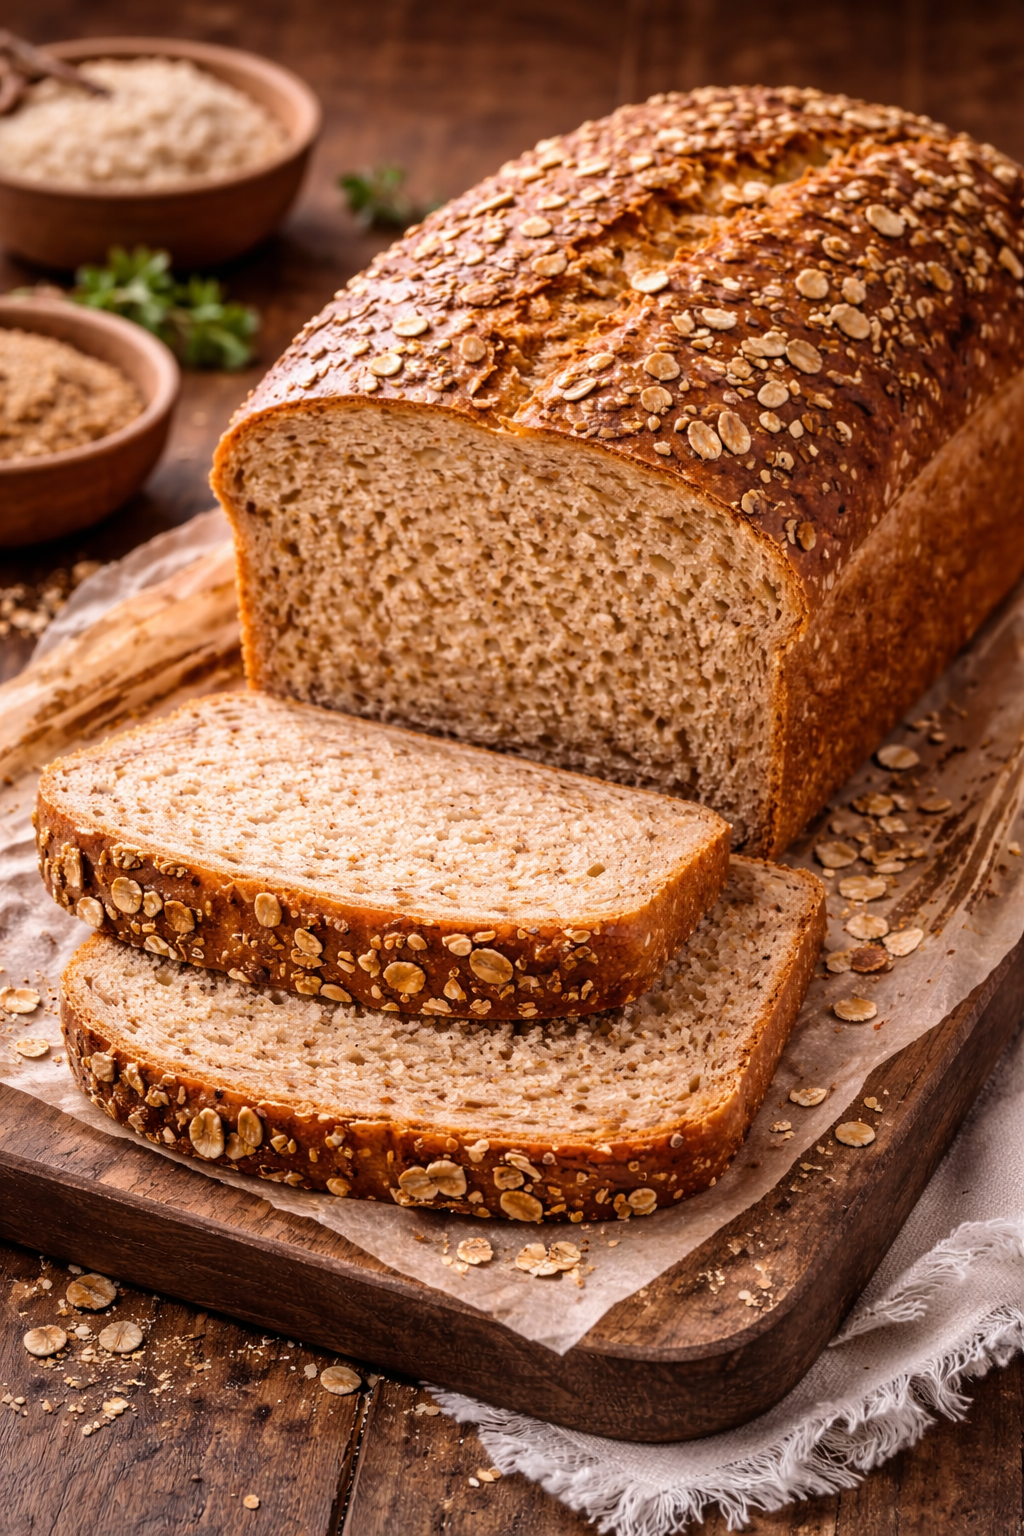
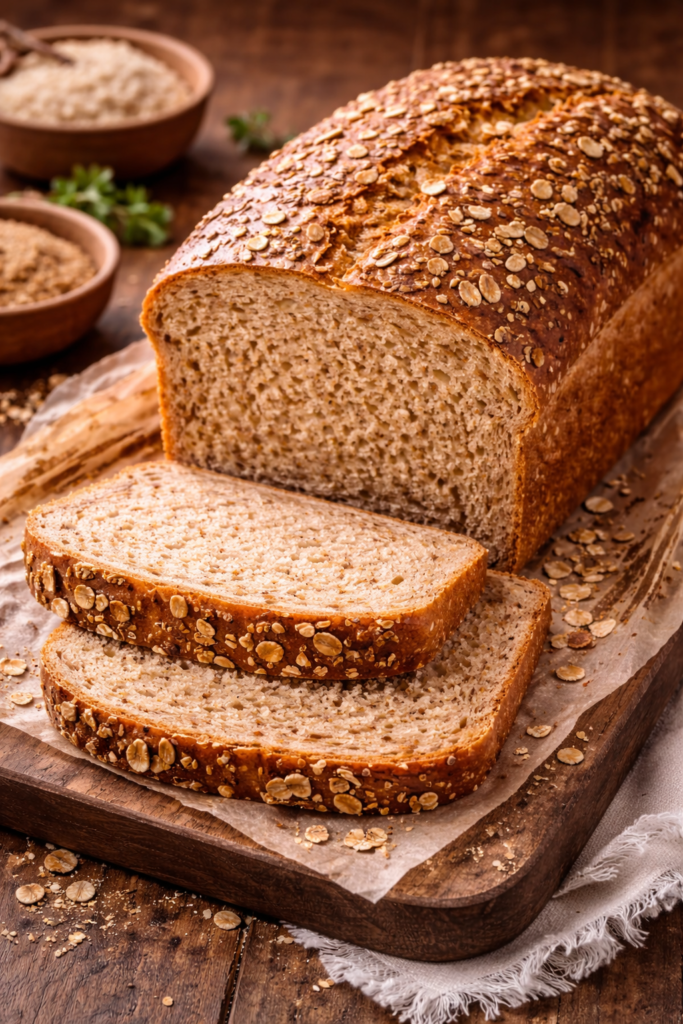
This recipe gives you a loaf that’s soft, slightly sweet, and doesn’t crumble into a million pieces when you try to make a sandwich. No bread machine required. No special skills needed. Just you, some flour, and about two hours of mostly hands-off time.
The smell alone will make you feel like a domestic god or goddess.
Ready to ditch the store-bought stuff forever? Let’s do this.
What You’ll Need
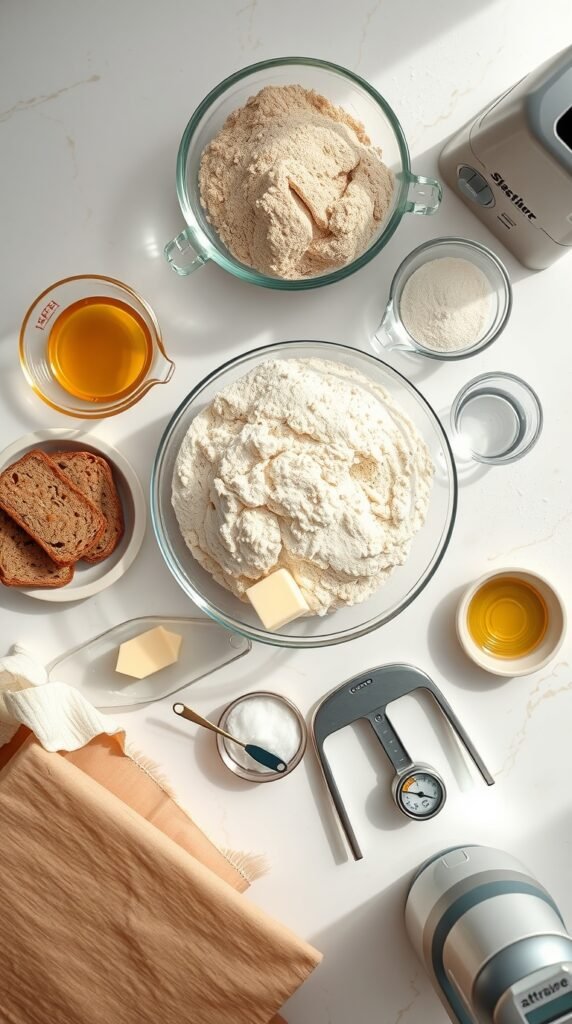
For the Bread
| Ingredient | Amount | Why It Matters |
|---|---|---|
| Whole wheat flour | 3 cups | The star of the show – gives that nutty, hearty flavor |
| All-purpose flour | 1 cup | Keeps it from being too dense (you’re welcome) |
| Active dry yeast | 2 ¼ tsp (1 packet) | The magic that makes it rise |
| Honey | ¼ cup | Natural sweetness + helps it brown beautifully |
| Butter (melted) | 2 tbsp | Flavor and tenderness |
| Warm water | 1 ½ cups | Around 110°F – not hot, not cold, just right |
| Salt | 2 tsp | Because bread without salt is just sad |
| Olive oil | 2 tbsp | For greasing |
Tools You’ll Need
- Large mixing bowl
- Measuring cups and spoons
- Kitchen towel or plastic wrap
- 9×5 inch loaf pan
- Instant-read thermometer (optional but helpful)
- Stand mixer with dough hook (or your hands – free workout!)
Pro Tips
🔥 Test your yeast before committing.
Nothing’s worse than spending an hour on dough that never rises. Proof your yeast first – if it doesn’t foam up in 5-10 minutes, it’s dead. Toss it and start fresh.
💪 Knead like you mean it.
This isn’t the time to be gentle. You’re developing gluten, which is what gives bread its structure. 8-10 minutes by hand might seem like forever, but your biceps (and your bread) will thank you.
🌡️ Temperature is everything.
Too hot? You’ll kill the yeast. Too cold? It won’t activate. Aim for 110°F for the water – should feel warm but not uncomfortable when you stick your finger in.
⏰ Patience is a virtue (seriously).
Rushing the rise time = dense, disappointing bread. Let that dough double in size, even if it takes longer than expected. Your kitchen’s temperature affects this.
👆 The poke test never lies.
Gently poke the risen dough. If the indent stays, you’re good. If it springs back immediately, give it more time. If it deflates, you over-proofed (oops).
How to Make It
Step 1: Wake Up the Yeast
Pour the warm water into your large bowl.
Sprinkle the yeast over the top and add just a teaspoon of honey. Give it a quick stir.
Now walk away for 5-10 minutes. Watch an episode of something. Check Instagram. Whatever.
When you come back, the surface should look foamy and smell slightly yeasty. That’s your green light.
Quick Tip: If your yeast just sits there doing nothing, it’s dead. Don’t waste time hoping it’ll magically come alive. Start over with fresh yeast.
Step 2: Mix the Wet Stuff
Add the remaining honey and melted butter to your foamy yeast mixture.
Stir it all together until combined. The mixture will look a little cloudy and smell sweet.
Step 3: Bring in the Flour
In a separate bowl, whisk together:
- 3 cups whole wheat flour
- 1 cup all-purpose flour
- 2 teaspoons salt
Start adding this to your wet ingredients one cup at a time.
Stir after each addition. Around cup three, things will get thick and the dough will start pulling away from the bowl.
Step 4: Get Your Hands Dirty (Literally)
Turn the dough out onto a lightly floured surface.
If you’re kneading by hand:
Push the dough away from you with the heel of your hand, fold it back over itself, turn it 90 degrees, and repeat. Do this for 8-10 minutes. Yes, your arms will get tired. Yes, it’s worth it.
If you’re using a stand mixer:
Switch to the dough hook and let it run on medium-low for 5-6 minutes. Watch it transform from a shaggy mess into a smooth ball.
The dough is ready when it’s smooth, elastic, and springs back when you poke it.
Step 5: First Rise
Grease a large bowl with olive oil – make sure to coat the whole inside.
Plop your dough ball in and turn it once so all sides get oiled up.
Cover with a damp kitchen towel or plastic wrap.
Find a warm spot in your kitchen (I use my oven with just the light on) and let it hang out for 1 to 1.5 hours.
You’re looking for it to double in size. Set a timer and resist the urge to peek every five minutes.
Step 6: Punch It Down (Yes, Really)
Once your dough has doubled, give it a good punch right in the center.
This releases the air bubbles and redistributes the yeast.
Turn it out onto your work surface.
Step 7: Shape Your Loaf
Press the dough into a rectangle roughly the length of your loaf pan.
Fold the sides into the center, then roll it up tightly from one short end to the other – like you’re making a sleeping bag.
Pinch the seams and ends closed. This creates surface tension, which helps it rise up instead of out.
Step 8: Second Rise
Grease your 9×5 inch loaf pan.
Place the shaped dough seam-side down in the pan.
Cover again and let it rise for 30-45 minutes.
It should puff up about an inch above the rim of the pan. If it doesn’t, give it more time.
Step 9: Bake to Perfection
Preheat your oven to 375°F while the dough is rising.
Once it’s ready, slide it into the oven.
Bake for 30-35 minutes until the top is golden brown and gorgeous.
The tap test: Carefully remove the loaf from the pan and tap the bottom. It should sound hollow.
The thermometer test: Insert an instant-read thermometer into the center. It should read 190-200°F.
Step 10: The Hardest Part (Cooling)
Remove the bread and let it cool in the pan for 10 minutes.
Then turn it out onto a wire rack.
Here’s where you need serious willpower: let it cool for at least 20 minutes before slicing.
I know it smells incredible. I know you want to rip into it right now. But cutting into hot bread = gummy, disappointing slices.
Trust the process. 🙏
Substitutions and Variations
No honey? Use maple syrup, agave, or even brown sugar. Each gives a slightly different flavor profile but all work great.
Want 100% whole wheat? Swap all the all-purpose for whole wheat. Just know it’ll be denser and have a stronger flavor.
Dairy-free? Replace butter with coconut oil or more olive oil.
Add some crunch: Toss in ¼ cup of sunflower seeds, flax seeds, or sesame seeds. Mix them in during the last minute of kneading.
Herbs and garlic: Add 2 tablespoons of fresh rosemary and 2 cloves of minced garlic for a savory twist that’s chef’s kiss with soup.
Make rolls instead: After the first rise, divide the dough into 12-15 pieces. Shape into balls and place on a baking sheet. Bake for 20-25 minutes.
Make Ahead Tips
Overnight rise method:
After mixing the dough, stick it in the fridge for the first rise (8-12 hours). In the morning, take it out, let it come to room temp (30 minutes), shape it, do the second rise, and bake.
Freeze the shaped dough:
After shaping the loaf, wrap it tightly in plastic wrap, then foil. Freeze for up to 3 months. When you’re ready, let it thaw and rise at room temp (3-4 hours), then bake.
Freeze baked bread:
Slice the cooled loaf, wrap slices individually in plastic wrap, then store in a freezer bag. Pop slices straight into the toaster for quick breakfast.
Leftovers and Storage
| Storage Method | How Long It Lasts | Best For |
|---|---|---|
| Room temp (airtight container) | 3-4 days | Immediate use, sandwiches, toast |
| Refrigerator | 5-7 days | If your kitchen is super hot |
| Freezer (whole loaf) | 3 months | Long-term storage |
| Freezer (sliced) | 3 months | Grab-and-go breakfasts |
Stale bread rescue mission:
- Cut into cubes → toss with olive oil and garlic → bake at 350°F for 15 min → homemade croutons 🎉
- Blend in food processor → instant breadcrumbs for coating chicken or topping casseroles
- Make French toast (stale bread actually works better!)
Nutritional Breakdown
| Per Slice (based on 12 slices) | Amount |
|---|---|
| Calories | 195 |
| Protein | 6g |
| Carbohydrates | 36g |
| Fiber | 4g |
| Fat | 3g |
| Sugar | 6g |
| Sodium | 390mg |
Note: This is a rough estimate. Actual nutrition varies based on exact ingredients used.
FAQ
Q: Help! My dough isn’t rising. What did I do wrong?
A: Three main culprits:
- Dead yeast (always proof it first!)
- Water too hot (killed the yeast) or too cold (didn’t wake it up)
- Too cold of an environment (find a warmer spot)
Q: Can I use instant yeast instead of active dry?
A: Absolutely! Use the same amount but mix it directly with the dry ingredients instead of blooming it first. Everything else stays the same.
Q: Why is my bread dense and heavy?
A: Usually means:
- Not enough kneading (gluten needs development)
- Too much flour (measure correctly – spoon and level!)
- Didn’t let it rise long enough (be patient)
- Over-mixed after rising (gentle hands once it’s puffy)
Q: The crust is too hard. How do I fix it?
A: Brush the top with melted butter immediately when it comes out of the oven. This softens the crust and adds richness. You can also tent it loosely with foil for the last 10 minutes of baking.
Q: Can I add mix-ins like nuts or dried fruit?
A: Yes! Add up to ½ cup total during the last minute of kneading. More than that weighs down the dough and affects the rise.
Q: How do I know if my oven temperature is accurate?
A: Get an oven thermometer (like $7 on Amazon). Most ovens run 10-25 degrees off. This can make or break your bread.
Q: My bread has a weird alcohol smell. Is it bad?
A: That’s actually normal – it’s from the yeast fermentation. It’ll bake off. If it smells truly off or moldy, then toss it.
Wrapping Up
Here’s the thing about homemade bread: it’s not just about having a loaf that tastes better than store-bought (though that’s a major perk).
It’s about the actual process.
Kneading dough is weirdly therapeutic. Watching it rise feels like a small miracle. And pulling a golden loaf from your oven makes you feel like you’ve got your life together, even if you absolutely don’t.
This wheat bread is forgiving, beginner-friendly, and honestly just really, really good. Soft enough for sandwiches. Hearty enough to make you feel like you’re eating something substantial. And way cheaper than that $6 artisan loaf at Whole Foods.
Give it a shot this weekend. Make a mess. Enjoy the process. And then slather that warm bread with butter and feel like the kitchen champion you are.
Drop a comment and let me know how yours turned out! Did you add any fun mix-ins? Did your first attempt go perfectly or did you learn something for round two? I want to hear all about it. 💛


