Ever torn into a piece of naan at an Indian restaurant and thought, “How is this so impossibly fluffy?”
Here’s the thing: you don’t need a 900-degree tandoor oven to make it.
You just need a hot skillet and an hour of your time.
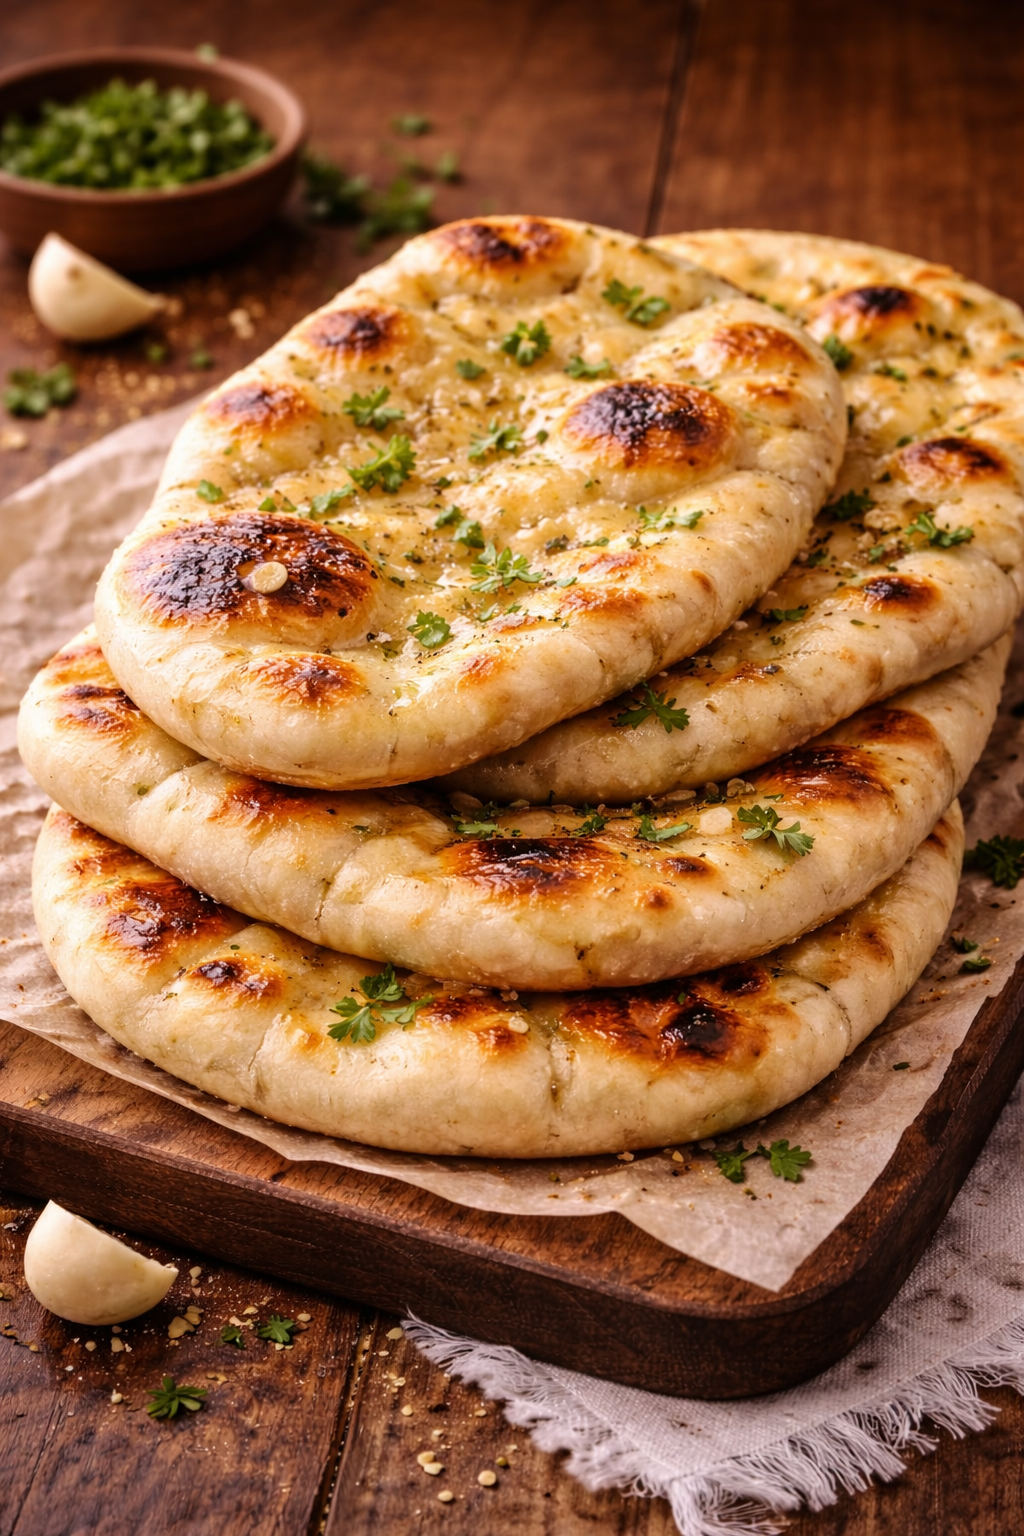
I’m talking about naan that bubbles up with those gorgeous charred spots. The kind that’s crispy on the edges but still soft enough to fold around your curry without breaking.
The smell alone will make your neighbors jealous.
And once you make it from scratch, going back to store-bought feels like a crime. Trust me on this.
Quick Look: What You’re Getting Into
| Prep Time | 15 minutes |
| Rise Time | 1 hour |
| Cook Time | 20 minutes |
| Total Time | 1 hour 35 minutes |
| Servings | 8 naan breads |
| Difficulty | Easier than you think |
| Special Equipment | Cast iron skillet or heavy pan |
What You’ll Need
For the Dough
| Ingredient | Amount | Notes |
|---|---|---|
| Warm whole milk | 1 cup | Around 110°F (not too hot!) |
| Active dry yeast | 2 teaspoons | Fresh yeast = better rise |
| Granulated sugar | 2 tablespoons | Feeds the yeast |
| All-purpose flour | 3 cups + extra | For dusting |
| Salt | 1 teaspoon | Enhances flavor |
| Baking powder | 1/4 teaspoon | Secret to extra fluffiness |
| Plain yogurt | 2 tablespoons | Full-fat works best |
| Melted ghee or butter | 2 tablespoons + more | For brushing |
| Large egg | 1 | Lightly beaten |
For the Topping
- 3 tablespoons melted butter or ghee
- 2 cloves garlic, minced (optional but you’ll regret skipping it)
- Fresh cilantro, chopped
- Flaky sea salt
💡 Temperature Matters: If your milk is too hot (above 120°F), it’ll kill the yeast. Too cold, and the yeast won’t activate. Aim for bathwater warm.
Tools You’ll Need

Must-Haves:
- ✓ Large mixing bowl
- ✓ Measuring cups and spoons
- ✓ Cast iron skillet or heavy-bottomed pan
- ✓ Rolling pin
- ✓ Pastry brush
Nice to Have:
- Clean kitchen towel (for covering dough)
- Tongs (for flipping)
- Small bowl (for melted butter)
Pro Tips
These aren’t just suggestions. They’re the difference between “meh” naan and “oh my god where has this been all my life” naan.
1. Let the dough rest properly
I know waiting is hard.
But that 1-hour rise time? That’s what gives you those soft, airy pockets inside. Skip it and you’ll get flat, dense bread.
Set a timer and walk away.
2. Your pan needs to be SCREAMING hot
Like, really hot.
If you hold your hand a few inches above the pan, you should feel serious heat radiating up. This is what creates those beautiful charred bubbles that make naan look (and taste) restaurant-quality.
No hot pan = no bubbles = sad naan.
3. Roll them thin but not too thin
Aim for about 1/4 inch thickness.
Too thin? They’ll turn crispy like crackers instead of soft and pillowy.
Too thick? The inside won’t cook through before the outside burns.
4. Work fast once they hit the pan
Each naan cooks in about 2-3 minutes total.
The second you see bubbles forming and the bottom getting those gorgeous dark spots, flip it. Don’t wait around or it’ll burn.
This is a high-heat, fast-moving operation.
5. Brush with butter immediately
The MOMENT that naan comes off the pan, brush it with garlic butter while it’s still hot.
This isn’t optional if you want restaurant-quality results.
The heat helps the butter soak in and creates that glossy, irresistible finish.
Chef’s Secret: Stack finished naan on a plate and cover with a towel. The steam keeps them soft and warm while you cook the rest.
How to Make Naan Bread

Step 1: Wake Up the Yeast
Pour the warm milk into your large bowl.
Sprinkle the yeast and sugar over the top.
Give it a quick stir and walk away for 5-10 minutes.
What you’re looking for: A foamy, bubbly layer on top. Kind of looks like the head on a beer.
If nothing happens: Your milk was too hot and killed the yeast. Start over with cooler milk (this has happened to all of us).
Step 2: Mix the Dough
Add everything else to your yeast mixture:
- Flour
- Salt
- Baking powder
- Yogurt
- Melted ghee
- Egg
Stir with a wooden spoon until it starts looking shaggy and messy.
Then get your hands in there.
Knead it right in the bowl for about 5 minutes. You’re looking for smooth, slightly sticky dough that doesn’t cling to your hands like glue.
Too sticky? Add flour, 1 tablespoon at a time.
Too dry and crumbly? Add milk, 1 teaspoon at a time.
🤔 What “Kneading” Actually Means: Push the dough away from you with the heel of your hand, fold it back over itself, turn it 90 degrees, and repeat. It should feel therapeutic, not like a workout.
Step 3: Let It Rise
Form the dough into a ball.
Lightly grease your bowl with oil or butter (just a thin coating).
Plop the dough back in, cover with a clean kitchen towel, and set it somewhere warm.
Your kitchen counter is fine. Just keep it away from cold drafts or AC vents.
Let it sit for 1 hour, or until doubled in size.
The Poke Test: Gently poke the dough with your finger. If the indent stays, it’s ready. If it springs back, give it more time.
Step 4: Divide and Roll
Punch down the dough. (This is oddly satisfying.)
Turn it out onto a lightly floured surface and divide into 8 equal pieces.
Roll each piece into a ball between your palms.
Take one ball and roll it out with your rolling pin into an oval or teardrop shape, about 1/4 inch thick.
Keep the others covered with a towel while you work so they don’t dry out.
| Naan Shape | Description |
|---|---|
| Traditional | Teardrop/oval shape |
| Round | Easier for beginners |
| Rustic | Whatever shape happens (still tastes amazing) |
Step 5: Cook the Naan
Heat your cast iron skillet over high heat until it’s crazy hot.
No oil. No butter. Just a screaming hot, dry pan.
Place one rolled naan directly onto the pan.
Within 30-60 seconds, you’ll see bubbles forming on the surface.
When the bottom has nice brown/black spots, flip it with tongs.
Cook the other side for 1-2 minutes. It should puff up like magic and get charred in spots.
Visual Cue Checklist:
- ✓ Surface bubbles appearing
- ✓ Golden brown spots on bottom
- ✓ Edges starting to lift
- ✓ Slight puffing
Step 6: Finish With Butter
Mix your melted butter with minced garlic in a small bowl.
The second that naan comes off the pan, brush it generously with garlic butter.
Sprinkle with cilantro and flaky salt.
Stack the finished naan on a plate and cover with a towel to keep them warm and soft while you cook the rest.
Repeat with remaining dough balls.
⏱️ Timing Tip: Get into a rhythm. While one naan cooks, roll out the next one. You’ll finish all 8 in about 20 minutes.
Substitutions and Variations
Want to switch things up? Here’s how.
Dietary Swaps
| Original | Substitute |
|---|---|
| Whole milk | Almond milk, oat milk, or coconut milk (warmed) |
| Yogurt | Coconut yogurt or sour cream |
| Butter/Ghee | Coconut oil or vegan butter |
| Egg | 1 flax egg (1 tbsp ground flax + 3 tbsp water) |
Flavor Variations
Garlic Naan (The Classic)
Brush minced garlic directly onto the dough before cooking. Or mix it into the butter for brushing after.
Either way, you can’t go wrong.
Cheese Naan (Life-Changing)
Add 1/4 cup shredded mozzarella or crumbled paneer to the center of each rolled-out dough.
Fold the edges over to seal it in, then gently roll it out again.
Cook as normal and watch it get all melty inside. 🧀
Whole Wheat Naan
Replace half the all-purpose flour with whole wheat flour.
You might need an extra tablespoon or two of liquid since whole wheat absorbs more.
Onion Kulcha
Mix finely chopped onions, fresh cilantro, and a pinch of chili flakes into the dough before dividing.
Gives it a savory, slightly spicy kick.
Herbs & Spices
Try adding:
- 1 teaspoon nigella seeds (kalonji)
- 1/2 teaspoon cumin seeds
- Fresh mint instead of cilantro
- A pinch of red chili flakes
Make Ahead Tips
Life gets busy. Here’s how to prep ahead.
Make the Dough 24 Hours Ahead
After the first rise, punch it down and store in an airtight container in the fridge.
When ready to cook, let it sit at room temperature for 30 minutes before rolling and cooking.
The flavor actually gets better overnight.
Freeze the Dough
Divide into balls, wrap each one tightly in plastic wrap, and freeze for up to 3 months.
Thaw in the fridge overnight, then bring to room temperature before using.
Freeze Cooked Naan
Let them cool completely, then stack with parchment paper between each one.
Wrap the whole stack in plastic wrap, then foil.
Freeze for up to 3 months.
Reheat from frozen in a hot skillet for 30 seconds per side.
Nutrition Information
Per Naan (1 of 8):
| Nutrient | Amount | % Daily Value* |
|---|---|---|
| Calories | 245 | – |
| Total Fat | 7g | 9% |
| Saturated Fat | 4g | 20% |
| Cholesterol | 35mg | 12% |
| Sodium | 320mg | 14% |
| Total Carbohydrates | 38g | 14% |
| Dietary Fiber | 1.5g | 5% |
| Sugars | 4g | – |
| Protein | 7g | 14% |
*Percent Daily Values are based on a 2,000 calorie diet. Your daily values may be higher or lower depending on your calorie needs.
Nutritional values are approximate and will vary based on specific ingredients used.
What to Serve With Naan
Naan is ridiculously versatile.
Sure, it’s perfect for scooping up curry. But don’t stop there.
Classic Indian Pairings
These are the no-brainer combos:
- Butter chicken (the GOAT pairing)
- Chicken tikka masala (close second)
- Palak paneer (creamy spinach heaven)
- Dal makhani (buttery lentils)
- Chana masala (spiced chickpeas)
Beyond Indian Food
Naan plays well with others:
- Hummus & tzatziki for dipping
- Shakshuka for soaking up all that tomato-egg goodness
- Grilled lamb with Greek vibes
- Moroccan tagine for something different
- Personal pizzas (use it as the base!)
The Simplest Option
Just eat it warm with salted butter.
No curry. No dipping sauce. Just butter.
Sometimes simple is perfect.
🍽️ Dinner Party Hack: Serve a big platter of different dips (hummus, baba ganoush, yogurt sauce) with a stack of warm naan. Everyone goes crazy for it.
Leftovers and Storage
Let’s be real, there probably won’t be leftovers. But just in case…
Room Temperature
Store in an airtight container or zip-top bag for up to 2 days.
They’ll stay soft if you keep air out.
Refrigerator
Store for up to 5 days in an airtight container.
Wrap each naan individually in plastic wrap to prevent them from drying out.
Freezer
Wrap individually in plastic wrap, then stack with parchment paper between each one.
Put the whole stack in a freezer bag.
Freeze for up to 3 months.
How to Reheat
| Method | Time | Result |
|---|---|---|
| Microwave | 20-30 seconds | Quick but can get chewy |
| Skillet | 30 seconds per side | Best texture, tastes fresh |
| Oven | 10 minutes at 350°F | Good for reheating multiple |
| Toaster oven | 3-4 minutes | Gets crispy edges |
Pro move: Wrap in a damp paper towel before microwaving. Keeps it from drying out.
Best move: Heat in a hot skillet. Brings back that just-made texture.
FAQ
Why didn’t my naan puff up?
Most likely: Your pan wasn’t hot enough.
The high heat creates steam inside the dough, which makes it puff up like a balloon. If your pan is only medium-hot, the naan will cook through without puffing.
Solution: Crank up the heat. You want that pan smoking hot before the naan hits it.
Also check that you’re rolling to the right thickness (1/4 inch). Too thick and it won’t puff properly.
Can I make this without yeast?
Yes, but it won’t be traditional naan.
You can make a quick version using just baking powder as the leavening agent (increase to 1 teaspoon total).
What you’ll lose: That characteristic tangy flavor and chewy texture that yeast creates.
What you’ll gain: Speed. No rise time needed.
My dough is too sticky. What do I do?
Add flour, 1 tablespoon at a time.
Knead it in fully before deciding if you need more.
Different flours absorb liquid differently (humidity affects this too), so small adjustments are totally normal.
The goal: Soft, slightly tacky dough that doesn’t stick to your hands.
Can I cook naan on a grill?
Absolutely! This actually gives you the closest thing to a traditional tandoor oven.
Preheat your grill to high heat.
Place the rolled naan directly on the grates.
Cook for 1-2 minutes per side, watching carefully so it doesn’t burn.
Bonus: You get those gorgeous grill marks.
What’s the difference between naan and pita?
| Naan | Pita | |
|---|---|---|
| Ingredients | Yogurt, egg, sometimes milk | Just flour, water, yeast, salt |
| Texture | Rich, soft, fluffy | Lighter, forms a pocket |
| Cooking Method | High heat, one side at a time | High heat, puffs completely |
| Origin | Indian subcontinent | Middle Eastern |
Bottom line: Naan is richer and softer because of the dairy and eggs. Pita is simpler and forms that classic pocket.
Do I need to use ghee?
Nope! Regular butter works great.
Ghee gives: A more authentic, nutty flavor
Butter gives: Pretty much the same results with what you already have in your fridge
Use what you have. Both are delicious.
How do I know if my yeast is still good?
The test: Mix it with warm milk and sugar, then wait 10 minutes.
Good yeast: Gets foamy and bubbly on top, smells yeasty
Dead yeast: Does nothing, just sits there sadly
Why it dies:
- Expired (check the date on the packet)
- Liquid was too hot (over 120°F kills it)
- Liquid was too cold (below 100°F won’t activate it)
Pro tip: Keep yeast in the fridge or freezer to extend its life.
Can I make naan in advance for a dinner party?
Best approach: Make the dough the night before, refrigerate it, then cook fresh before serving.
Second best: Cook all the naan, let them cool, then reheat in a hot skillet right before serving.
What NOT to do: Don’t leave cooked naan sitting at room temperature for hours. They’ll dry out and get sad.
The secret: That last-minute brush of hot garlic butter is what makes them shine. Don’t skip it.
Why is my naan tough instead of soft?
Possible reasons:
- Over-kneaded the dough (knead just until smooth, about 5 minutes)
- Didn’t let it rise long enough (needs the full hour)
- Rolled it too thin (shoot for 1/4 inch)
- Cooked it too long (2-3 minutes total max)
The fix for next time: Be gentle with the dough, give it proper rising time, and watch it closely while cooking.
Wrapping Up
Here’s the truth about making naan at home: it’s easier than you think, and tastes better than you’d imagine.
That first time you pull a hot, buttery naan off the pan and it’s covered in those gorgeous charred spots? You’ll feel like a kitchen genius.
The smell. The texture. The way it stays soft for days (if it even lasts that long).
All of it beats store-bought by a mile.
So grab your ingredients and give this a shot. Start with plain garlic naan to get the technique down, then go wild with cheese or herbs or whatever sounds good to you.
And when you make it, come back and drop a comment below. Tell me:
Did you add garlic? Stuff it with cheese? Burn the first one? (We all do.) What did you serve it with?
I want to hear how it went! 🍞


