
You know the joke about fruit cake being the thing people re-gift every Christmas?
Forget everything you’ve ever thought about fruit cake. The one I’m sharing today is nothing like those dense, artificial-tasting bricks people pass around at office parties.
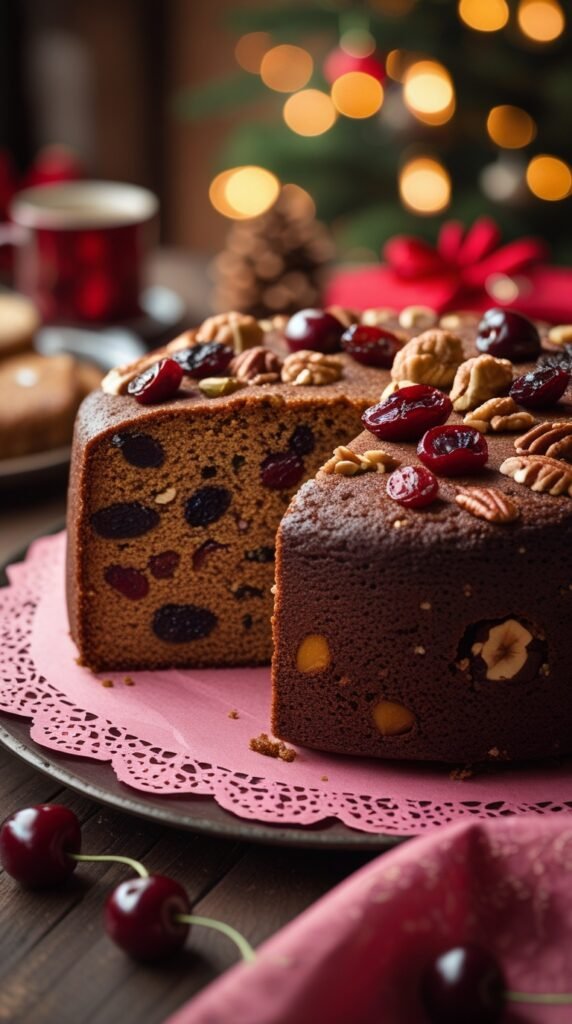
This version is soft, moist, and packed with real fruit. It’s the kind of cake that makes you go back for seconds (and thirds, but who’s counting?).
I tested this recipe four times before I got it exactly right. And honestly, by the fourth round, my kitchen smelled like a holiday dream and I was perfectly fine with that.
What You’ll Need
The Fruit Mixture
| Ingredient | Amount | Why It Matters |
|---|---|---|
| Mixed dried fruit | 2 cups | The heart of your cake (raisins, cranberries, apricots, figs) |
| Candied cherries | 1 cup, halved | Adds pops of sweetness and color |
| Candied orange peel | ½ cup, diced | Bright citrus notes that wake everything up |
| Orange juice | 1 cup | For soaking (fresh squeezed is best) |
| Brandy or rum | ½ cup + extra | The secret to moisture and depth |
| Orange zest | 1 large orange | Fresh, bright flavor |
| Lemon zest | 1 lemon | Cuts through the sweetness |
The Cake Batter
| Ingredient | Amount | Notes |
|---|---|---|
| All-purpose flour | 2 cups | Don’t pack it when measuring |
| Baking powder | 1 teaspoon | Fresh is key (check expiration) |
| Baking soda | ½ teaspoon | Helps with browning |
| Ground cinnamon | 1 teaspoon | Warm, cozy vibes |
| Ground nutmeg | ½ teaspoon | A little goes a long way |
| Ground cloves | ¼ teaspoon | Adds depth without overpowering |
| Salt | ½ teaspoon | Balances all the sweetness |
| Unsalted butter | ¾ cup, softened | Room temp is crucial |
| Brown sugar | 1 cup, packed | Dark or light both work |
| Large eggs | 3, room temp | Cold eggs = lumpy batter |
| Vanilla extract | 1 teaspoon | Pure, not imitation |
| Buttermilk | ½ cup | Makes it super tender |
| Chopped walnuts or pecans | 1 cup (optional) | Adds crunch and richness |
Tools You’ll Need

You may also like : birthday cake recipe
Here’s what you need to pull this off:
✓ 9-inch round cake pan or 9×5-inch loaf pan
✓ Parchment paper (don’t skimp on this)
✓ Large mixing bowl for soaking fruit
✓ Electric mixer (hand or stand, both work)
✓ Medium saucepan (for melting butter if needed)
✓ Fine mesh strainer (for draining fruit)
✓ Cooling rack
✓ Pastry brush (for the all-important brandy brushing)
✓ Aluminum foil (for storage and aging)
✓ Plastic wrap (double wrap for freshness)
Pro Tips
💡 From My Kitchen to Yours
These aren’t just tips. These are the mistakes I made so you don’t have to.
1. Soak those fruits overnight
I know it requires planning ahead, but soaking the dried fruit in orange juice and brandy overnight makes them plump and juicy.
Skip this step and you’ll have dry, chewy bits in your cake. Nobody wants that.
2. Room temperature ingredients matter here
When your butter, eggs, and buttermilk are all at room temperature, they mix together way better.
Cold ingredients can make your batter lumpy and nobody wants that. Set everything out 1-2 hours before baking.
3. Line your pan with parchment
Fruit cake has a tendency to stick because of all the sugar.
I learned this the hard way when my first attempt basically became part of the pan. Line the bottom AND sides with parchment paper and you’ll have zero regrets.
4. Don’t skip the brushing step
After the cake cools, brush it with more brandy or rum. This keeps it moist and adds flavor.
Do this once a week if you’re aging it (more on that below). It sounds extra but it’s what separates good fruit cake from great fruit cake.
5. Taste your dried fruit before buying
Some brands are way too sweet or taste weirdly artificial.
Get the good stuff from the bulk section if you can. The quality of your fruit = the quality of your cake.
You’ll love these too : eggless chocolate cake recipe
How to Make It
Step 1: Soak the Fruit (The Night Before)
Combine all your dried fruits, candied cherries, and candied orange peel in a large bowl.
Pour the orange juice and brandy over everything, add the zests, and give it a good stir.
Cover the bowl and let it sit at room temperature for at least 8 hours, or overnight if you can.
The fruit will soak up most of the liquid and get all plump and happy. This is where the magic starts.
Step 2: Prep Your Pan and Oven
Heat your oven to 300°F.
Yes, 300. We’re going low and slow here. High heat will dry out the edges before the center cooks.
Line your cake pan with parchment paper on the bottom and up the sides. This is non-negotiable.
Step 3: Mix the Dry Ingredients
Whisk together the flour, baking powder, baking soda, cinnamon, nutmeg, cloves, and salt in a bowl.
Set it aside. Nothing fancy here.
Step 4: Cream the Butter and Sugar
In your mixer, beat the softened butter and brown sugar together until it’s light and fluffy.
This takes about 3 minutes on medium speed. You’ll know it’s ready when the color lightens up a bit.
🎯 Quick Check: The mixture should look almost mousse-like and be a shade lighter than when you started. If it’s still grainy, keep mixing.
Step 5: Add the Eggs
Add the eggs one at a time, beating well after each one.
Throw in the vanilla with the last egg. Make sure each egg is fully incorporated before adding the next.
Step 6: Alternate Adding Dry and Wet
With your mixer on low, add about a third of the flour mixture. Mix until just combined.
Add half the buttermilk. Mix again.
Keep alternating, ending with the flour mixture.
Don’t overmix or you’ll end up with a tough cake. Stop as soon as you don’t see dry streaks anymore.
Step 7: Fold in the Fruit and Nuts
Drain any excess liquid from your soaked fruit using your mesh strainer. Save this liquid for brushing later.
Gently fold the fruit and nuts into the batter with a spatula.
The batter will be thick and packed with fruit. That’s exactly what you want. It should look more like fruit held together by batter than the other way around.
Step 8: Bake
Pour the batter into your prepared pan and smooth the top with a spatula.
Bake for 90 minutes to 2 hours. Start checking at the 90-minute mark by inserting a toothpick into the center.
It should come out clean or with just a few crumbs. The top will be deep golden brown.
Recommended for you : lemon cake recipe
Step 9: Cool and Brush
Let the cake cool in the pan for 20 minutes, then turn it out onto a cooling rack.
Once it’s completely cool (and I mean completely), brush the top and sides with brandy or rum.
Use that liquid you saved from draining the fruit, or use fresh brandy. Be generous. This is what keeps your cake moist for weeks.
Baking Timeline at a Glance
| Time | What’s Happening |
|---|---|
| Night before | Soak fruit in orange juice and brandy |
| 8+ hours later | Fruit is plump and ready to go |
| 30 minutes | Prep and mix all ingredients |
| 90-120 minutes | Baking time |
| 20 minutes | Cool in pan |
| 1-2 hours | Cool completely on rack |
| Done! | Brush with brandy and wrap for storage |
Substitutions and Variations
Can’t Find an Ingredient? Here’s Your Backup Plan
| Instead of This | Use This | The Difference |
|---|---|---|
| Brandy | Rum, bourbon, or apple juice | Less traditional but still tasty |
| Candied cherries | Dried cherries or cranberries | Less sweet, more natural |
| Buttermilk | Milk + 1 tbsp lemon juice | Works in a pinch |
| Brown sugar | White sugar + 2 tbsp molasses | Almost identical results |
| Mixed dried fruit | Any combo you like | Personalize it to your taste |
| Walnuts | Pecans, almonds, or none | Texture changes slightly |
Fun Variations to Try
🍊 Tropical Version: Swap in dried mango, pineapple, and coconut. Use coconut rum for soaking.
🍫 Chocolate Lover’s Twist: Add ½ cup dark chocolate chips and replace ¼ cup flour with cocoa powder.
🌶️ Spiced Up: Add ½ teaspoon cardamom and a pinch of black pepper for warmth.
🍎 Apple Pie Vibe: Use dried apples, increase cinnamon to 2 teaspoons, add diced fresh apple.
Make Ahead Tips
This is one of those magical cakes that gets better with age.
Here’s how to do it right:
Week 1: Bake, cool, brush with brandy. Wrap tightly in plastic wrap, then aluminum foil.
Weeks 2-8: Once a week, unwrap the cake and brush it with more brandy (about 2 tablespoons). Rewrap immediately.
Storage spot: Cool, dark place like a pantry. Not the fridge (it’ll dry out).
By the time you serve it, the flavors will have melded together into something pretty amazing. The alcohol mellows out, the spices deepen, and everything just tastes… richer.
📅 Planning Tip: Bake this 4-6 weeks before you need it for the absolute best flavor. But it’s also perfectly delicious eaten fresh within a week if you’re impatient like me.
Leftovers and Storage
| Storage Method | How Long | Best For |
|---|---|---|
| Room temp (wrapped) | Up to 2 weeks | If you’ll finish it quickly |
| Refrigerator (wrapped) | Up to 1 month | Longer storage needs |
| Freezer (wrapped) | Up to 3 months | Making way ahead |
| Aged (weekly brushing) | Up to 2 months | Maximum flavor development |
Serving Tip: This cake is dense and rich, so cut thin slices. A little goes a long way. I’m talking ½-inch slices max.
Reheating: Not necessary, but if you want it warm, microwave for 10-15 seconds. Don’t overdo it or the sugar will get weird.
Nutritional Breakdown
Per slice (based on 12 servings):
| Nutrient | Amount | % Daily Value* |
|---|---|---|
| Calories | 385 | – |
| Total Fat | 14g | 18% |
| Saturated Fat | 7g | 35% |
| Cholesterol | 70mg | 23% |
| Sodium | 210mg | 9% |
| Total Carbs | 62g | 23% |
| Dietary Fiber | 3g | 11% |
| Sugars | 42g | – |
| Protein | 5g | 10% |
*Based on a 2,000 calorie diet
🥄 Real Talk: This is not a light dessert. It’s a treat. One slice is plenty and it’ll satisfy your sweet tooth for hours.
Pairing Suggestions
This cake goes perfectly with:
Drinks: ☕ Strong black coffee (my personal favorite)
🫖 Hot spiced tea (chai or Earl Grey)
🥃 Whiskey or port wine (if you’re fancy)
🥛 Cold whole milk (unexpectedly good)
Toppings: 🍨 Vanilla ice cream (game changer)
🧈 Salted butter (yes, really)
🧀 Sharp cheddar cheese (trust me on this one)
☁️ Whipped cream with a splash of brandy
For a Full Spread:
Serve this after a roasted dinner with all the fixings. It’s rich enough to be dessert but not so heavy that you can’t finish your slice.
Pairs beautifully with roasted turkey, ham, or beef. The spices complement savory flavors surprisingly well.
FAQ
The Questions Everyone Asks
Q: Can I use fresh fruit instead of dried?
Nope. Fresh fruit has too much moisture and will make the cake soggy and possibly moldy. Stick with dried and candied fruits for the right texture and shelf life.
Q: Why is my cake dry?
Overbaking is usually the culprit. Check your cake at the 90-minute mark and remember that it’ll continue cooking a bit as it cools. Also, make sure you’re brushing it with liquid after it cools.
Every oven is different. Start checking early.
Q: Do I have to use brandy?
Nope! The brandy adds flavor and helps preserve the cake, but you can use rum, bourbon, or even orange juice. The cake will taste different but still good.
Just know that without alcohol, it won’t keep as long.
Q: Can I make this in a bundt pan?
You can, but reduce the baking time. Start checking at 75 minutes. Bundt pans conduct heat differently than regular pans and have more surface area.
Q: How do I know when it’s done?
A toothpick inserted in the center should come out clean or with just a few moist crumbs. The top should be deep golden and spring back when lightly touched.
If it jiggles in the middle, it needs more time.
Q: Can I add chocolate chips?
You could, but then it’s not really a traditional fruit cake anymore. If you want to experiment, go for it. Dark chocolate would probably work better than milk chocolate.
Use ½ cup max so they don’t overpower the fruit.
Q: My batter seems really thick. Is that normal?
Yes! The batter should be thick and packed with fruit. If it’s too runny, it won’t hold all the fruit properly and everything will sink to the bottom.
Q: Can I double this recipe?
Absolutely. Make two separate cakes rather than one giant one. They’ll bake more evenly that way and you’ll have better control over doneness.
Q: Will the alcohol bake off?
Some of it will, but not all. The cake will have a mild boozy flavor. If serving to kids or anyone avoiding alcohol, use juice instead.
Q: Why 300°F instead of 350°F?
Low and slow prevents the outside from overcooking while the inside catches up. Fruit cake is dense and needs gentle heat to bake evenly.
Common Mistakes and How to Avoid Them
| Mistake | What Happens | The Fix |
|---|---|---|
| Skipping the overnight soak | Dry, hard fruit pieces | Plan ahead and soak 8-24 hours |
| Overmixing the batter | Tough, dense cake | Mix until just combined |
| Not lining the pan | Cake sticks and breaks | Use parchment on bottom AND sides |
| Baking too hot | Burnt outside, raw inside | Stick to 300°F, be patient |
| Cutting while warm | Crumbly mess | Wait until completely cool |
| Storing uncovered | Dried out cake | Wrap tightly in plastic + foil |
Why This Recipe Works
Here’s the science-y part for the curious:
The long soak allows the dried fruit to rehydrate and absorb all those delicious flavors. It also prevents them from pulling moisture out of the cake as it bakes.
Low oven temperature ensures even cooking. Dense cakes need time for heat to reach the center without burning the outside.
Brown sugar + spices create complex flavor. Brown sugar has molasses, which adds depth that white sugar can’t match.
Buttermilk tenderizes the crumb and adds subtle tang that balances the sweetness.
Weekly brushing isn’t just tradition. The alcohol preserves the cake and the sugar syrup keeps it moist. It’s basically self-basting.
Wrapping Up
Here’s the thing about fruit cake: when it’s done right, it’s actually incredible.
This version is moist, flavorful, and packed with real ingredients you can actually identify. No weird neon green bits or mystery textures.
The first time I served this to friends, they were skeptical. One of them literally said, “I don’t eat fruit cake.”
She had three slices.
Give it a try and see if it changes your mind about fruit cake. I think it will.
And when you make it, come back and tell me how it turned out. Did you age it or eat it fresh? What fruits did you use? Did anyone ask for seconds?
Drop a comment below with your experience or any questions. I read every single one and I’m here to help if you get stuck 🧡


1 thought on “The Fruit Cake That’ll Change Your Mind About Fruit Cake Forever”