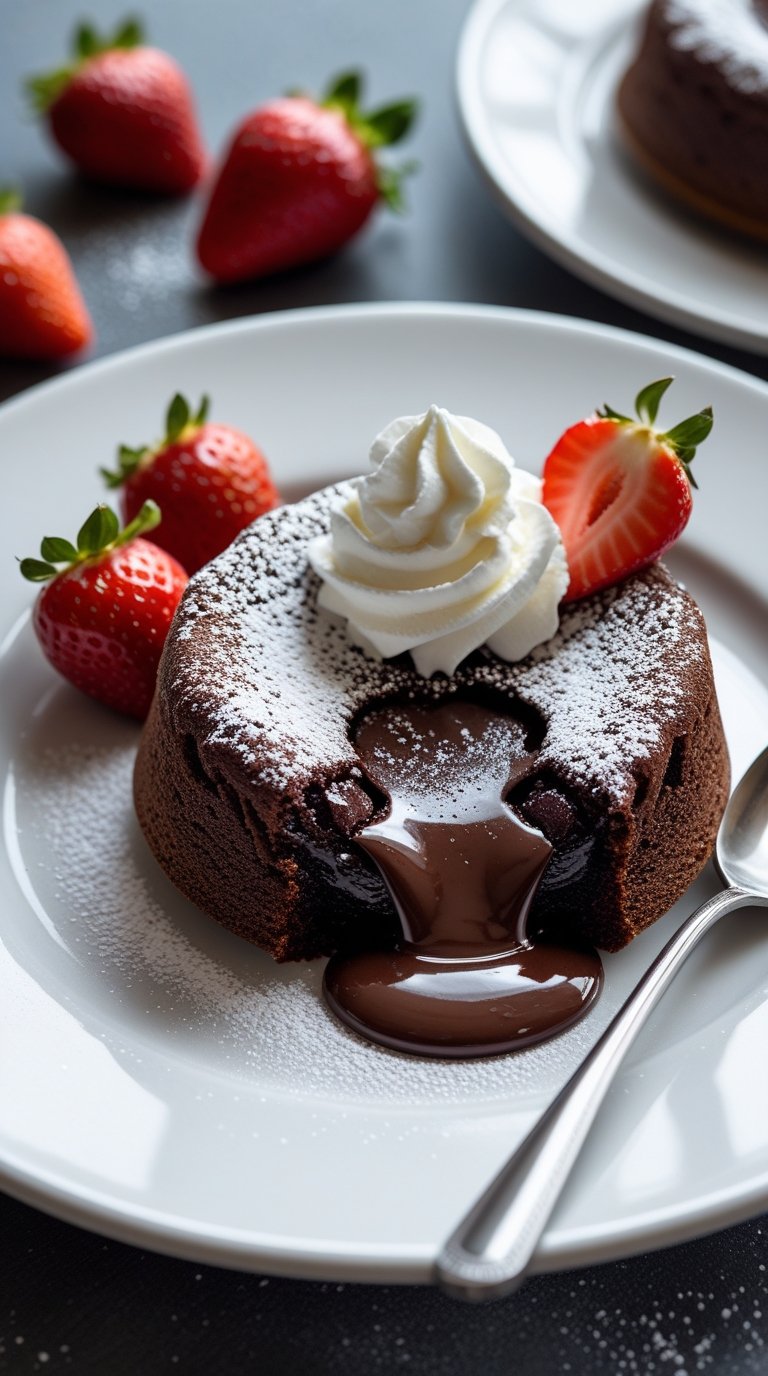
You know that moment when you crack into a chocolate dessert and molten chocolate oozes out like liquid gold?
That’s not luck. That’s lava cake done right.
And I’m about to show you exactly how to nail it every single time. No fancy equipment, no culinary degree, just pure chocolatey perfection that’ll make you look like you went to pastry school.
I’ve made this recipe at least 30 times (yes, really) because once people try it, they keep asking me to make it again. My husband requests it for his birthday instead of actual birthday cake. My friends text me asking for the recipe after dinner parties.
The secret? It’s shockingly simple.
Like, almost embarrassingly easy for how fancy it looks. We’re talking 6 basic ingredients, 20 minutes total, and a dessert that’ll have people thinking you spent hours in the kitchen.
Here’s the kicker: you can make these ahead and just pop them in the oven when you’re ready for dessert.
Let me walk you through exactly how to make lava cakes that come out perfect every time.
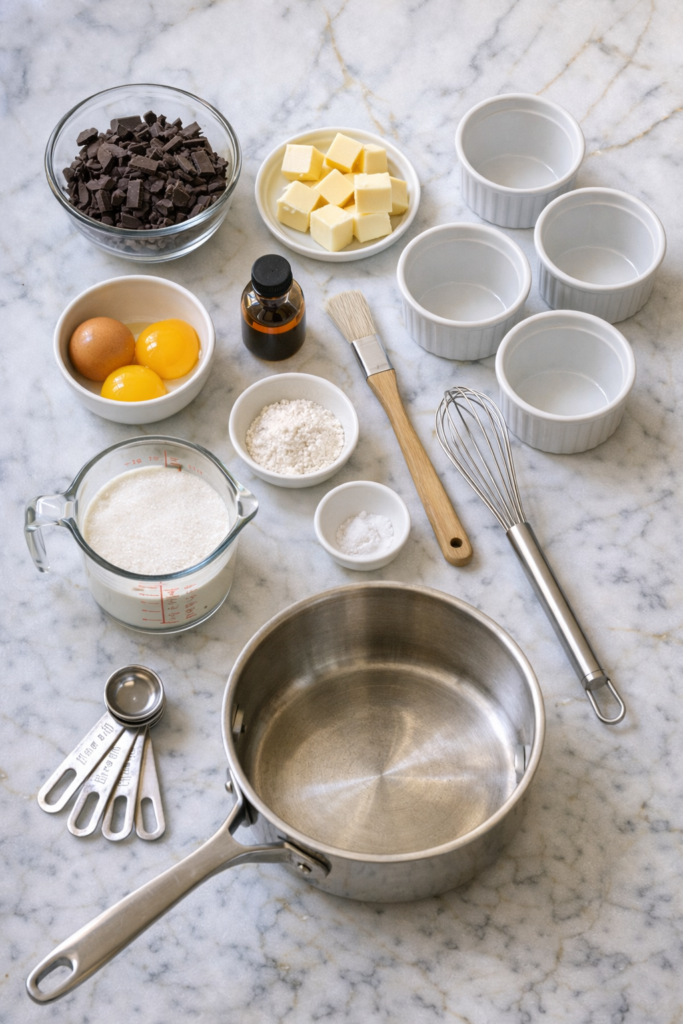
What You’ll Need
The Lava Cake Lineup
| Ingredient | Amount | Why It Matters |
|---|---|---|
| Dark chocolate (60-70% cacao) | 6 oz, chopped | This is your star player – don’t cheap out here |
| Unsalted butter | 6 tablespoons + extra for greasing | Creates that silky texture |
| Large eggs | 2 whole | Structure and richness |
| Egg yolks | 2 extra | Makes it extra decadent |
| Granulated sugar | ¼ cup | Just enough sweetness |
| All-purpose flour | 2 tablespoons | Holds it all together (barely) |
| Salt | Pinch | Amplifies the chocolate flavor |
| Vanilla extract | 1 teaspoon | Depth of flavor |
Optional (But Highly Recommended) Toppings
- Powdered sugar for that restaurant-quality dusting ✨
- Fresh raspberries (the tartness is chef’s kiss)
- Vanilla ice cream (because hot + cold = heaven)
- Whipped cream
- Fresh mint leaves
Tools You’ll Actually Use
You may also like : butter cake recipe
Essential Equipment:
- 4 ramekins (6 oz capacity) – the ceramic ones work best
- Medium saucepan
- Heat-proof bowl for double boiler
- Whisk (not a fork, an actual whisk)
- Small brush for buttering
- Baking sheet
- Timer (USE IT)
- Oven mitts
Nice to Have:
- Kitchen thermometer (for oven temp accuracy)
- Offset spatula (for plating)
- Fine mesh sieve (for dusting powdered sugar)
Pro Tips From Someone Who’s Made These 30+ Times
💎 Tip #1: Chocolate Quality Is Non-Negotiable
Don’t reach for the chocolate chips in your pantry.
I’m talking about a good chocolate bar that you’d actually enjoy eating on its own. The chocolate is literally the star of this show, so using cheap chocolate means a cheap-tasting dessert.
My go-to brands: Ghirardelli, Lindt, or Trader Joe’s Pound Plus (if you’re on a budget)
Quick Test: If you wouldn’t eat it straight, don’t bake with it.
⏱️ Tip #2: Timing Is Your Best Friend (And Your Worst Enemy)
The difference between a perfect molten center and a fully cooked cake is literally 60 seconds.
Set a timer. No, seriously, SET A TIMER.
When you pull them out, the edges should look set but the center should still jiggle slightly when you shake the pan. It feels wrong but trust me on this.
🧈 Tip #3: The Butter-Greasing Technique Changes Everything
Here’s where most people mess up and end up with stuck cakes.
The right way:
- Use COLD butter (it coats better)
- Really get into every corner and crevice
- Dust with cocoa powder, not flour (tastes better)
- Run your finger around the top edge to create a little groove
This helps the cakes rise evenly and release cleanly. No more sad, broken lava cakes.
🥚 Tip #4: Room Temperature Eggs Are Non-Negotiable
Cold eggs won’t incorporate into your melted chocolate mixture smoothly.
You’ll end up with a grainy batter instead of silky smooth perfection.
Forgot to take them out? Put them in a bowl of warm (not hot) water for 5 minutes. Problem solved.
⏸️ Tip #5: The Resting Time Matters
After you fill the ramekins, let them sit for 2-3 minutes before baking.
This helps the batter settle and creates a more even bake. Plus, it gives you time to make sure your oven is actually at 425°F (oven temperatures lie, get a thermometer).
You’ll love these too : black forest cake recipe
How to Make Perfect Lava Cake Every Single Time

Step 1: Prep Your Ramekins (Don’t Skip This)
Get those ramekins ready first.
Use cold butter and brush every single surface. I mean every corner, every crevice. Like you’re painting a masterpiece.
Then add about a tablespoon of cocoa powder and rotate the ramekin around so it coats everything. Tap out the excess.
Place them on a baking sheet. Set aside.
Step 2: Melt the Chocolate and Butter
Fill a saucepan with about an inch of water and bring it to a simmer.
Place your heat-proof bowl on top (it shouldn’t touch the water). Add your chopped chocolate and butter. Stir occasionally until everything’s melted and smooth.
This takes about 3-4 minutes. Don’t rush it.
Remove from heat and let it cool for 5 minutes. This is important because if it’s too hot, it’ll cook your eggs in the next step (and nobody wants scrambled chocolate eggs).
Step 3: Mix Your Eggs and Sugar
While the chocolate’s cooling, whisk together your eggs, egg yolks, and sugar in a separate bowl.
Whisk for about 2 minutes until it’s slightly pale and thick. You want some air incorporated here – it helps create that perfect texture.
Your arm might get tired. Keep going.
Step 4: Combine Everything (The Order Matters)
Pour your chocolate mixture into the egg mixture.
Not the other way around. This prevents the eggs from scrambling.
Whisk until smooth and glossy. It should look like liquid silk.
Add your vanilla, salt, and flour. Fold gently with a rubber spatula until just combined.
Don’t overmix or you’ll deflate all that air you just whisked in. Be gentle.
Step 5: Fill and Rest
Divide the batter evenly among your prepared ramekins.
They should be about ¾ full. Use a measuring cup or ladle for even portions.
Let them sit for 2-3 minutes while your oven finishes preheating to 425°F.
Step 6: Bake (This Is Where the Magic Happens)
Pop them in a 425°F oven for exactly 12-14 minutes.
I always set my timer for 12 minutes, then check. The edges should be firm, the tops should look set, but the center should still jiggle when you gently shake the pan.
This is the scary part because it looks underdone.
But that’s exactly what you want. Trust the process.
Step 7: Let Them Rest (Just One Minute)
Pull them out and let them sit for 1 minute.
Just one minute. This helps the edges pull away from the ramekin slightly and makes inverting way easier.
Recommended for you : funnel cake recipe
Step 8: The Grand Finale
Run a thin knife around the edge of each cake.
Place a plate upside down on top of the ramekin. Flip the whole thing over quickly and confidently (no hesitation).
Lift the ramekin off gently.
Dust with powdered sugar, add your toppings, and serve immediately while it’s still warm and molten inside.
Quick Reference: Baking Times
| Ramekin Size | Baking Time | Makes |
|---|---|---|
| 4 oz (mini) | 9-10 minutes | 6 cakes |
| 6 oz (standard) | 12-14 minutes | 4 cakes |
| 8 oz (large) | 15-16 minutes | 2 cakes |
Substitutions and Variations
Chocolate Swaps
| Instead of Dark Chocolate | Try This | Adjustment Needed |
|---|---|---|
| Milk chocolate | Same amount | Reduce sugar to 3 tablespoons |
| White chocolate | Same amount | Bake for 11 minutes max |
| Mix of dark + milk | 3 oz each | No adjustment needed |
Flavor Twist Ideas 🌟
Coffee Lover’s Version: Add ½ teaspoon espresso powder to intensify that chocolate flavor. It doesn’t make it taste like coffee, just makes the chocolate more… chocolatey.
Orange Chocolate: Add 1 tablespoon of orange zest to the batter. Tastes like those chocolate oranges but way better.
Peanut Butter Lava: Stir in 2 tablespoons of creamy peanut butter before baking. The PB melts into the chocolate. Trust me on this one.
Spicy Chocolate: Add a dash of cayenne pepper. Gives it a subtle kick that makes people go “wait, what is that?”
Mint Chocolate: Swap vanilla for ½ teaspoon peppermint extract. Like a fancy Thin Mint.
Dietary Modifications
Gluten-Free: Use gluten-free all-purpose flour (works perfectly, no texture difference)
Dairy-Free: Swap butter for vegan butter + use dairy-free chocolate
Reduced Sugar: Cut sugar to 2 tablespoons (but it will be less sweet)
Make Ahead Tips (Game Changer for Dinner Parties)
You can prep these completely and refrigerate for up to 24 hours before baking.
Just cover each filled ramekin with plastic wrap.
When you’re ready to bake:
- Let them sit at room temperature for 15 minutes
- Add 2 extra minutes to the baking time
- Done
Freezer-Friendly Option
You can also freeze unbaked lava cakes for up to 2 months.
How to freeze:
- Wrap each ramekin tightly in plastic wrap
- Then wrap in aluminum foil
- Label with the date
How to bake from frozen:
- Don’t thaw
- Bake at 425°F for 18-20 minutes
- Check for that jiggle in the center
I do this all the time for dinner parties. Everything’s ready to go, and I just pop them in the oven while we’re finishing the main course.
Leftovers and Storage
Real talk: these are best served immediately.
The whole point is that molten center, and once they cool down, that magic disappears.
But if you somehow have leftovers (has literally never happened to me), you can refrigerate them in the ramekins covered with plastic wrap for up to 2 days.
To reheat:
- Oven method: 350°F for 5-6 minutes (better texture)
- Microwave: 20-30 seconds (faster but not as good)
They won’t have that molten center anymore. They’ll be more like warm chocolate cakes. Still delicious, just different.
Honestly though, these are so easy to make that I’d rather just make fresh ones when I want them again.
Nutritional Breakdown
| Per Serving (1 cake) | Amount |
|---|---|
| Calories | 385 |
| Total Fat | 28g |
| Saturated Fat | 16g |
| Carbohydrates | 32g |
| Sugar | 24g |
| Protein | 6g |
| Cholesterol | 215mg |
| Sodium | 85mg |
These are indulgent desserts. They’re meant for special occasions, date nights, or when you just really need chocolate in your life.
Perfect Pairings (Take It to the Next Level)
Ice Cream Combos That Slap
| Ice Cream Flavor | Why It Works |
|---|---|
| Vanilla bean | Classic for a reason – the simple flavor lets the chocolate shine |
| Salted caramel | Sweet + salty + chocolate = perfection |
| Raspberry sorbet | Tart + fruity cuts through the richness |
| Coffee | For the ultimate chocolate-coffee lovers |
| Peanut butter | Because chocolate + PB is a love story |
Drink Pairings
Wine lovers: Try a Cabernet Sauvignon or Port
Coffee people: Espresso or a strong dark roast
Non-alcoholic: Hot chocolate (yes, really) or cold milk
Complete Dinner Party Menu
Keep your main course light if you’re serving these for dessert.
Good pairings:
- Grilled salmon with lemon
- Roasted chicken with herbs
- Pasta primavera
- Light Caesar salad
Avoid pairing with:
- Heavy beef dishes
- Cream-based pastas
- Rich casseroles
You don’t want your guests too full to enjoy these beauties.
Troubleshooting Guide
“My lava cake came out completely liquid in the center” 😰
The problem: You underbaked them.
The fix: Add 1-2 more minutes to your baking time. Also, check if your oven is actually at 425°F. Oven temperatures can be way off (mine runs 25 degrees cooler than it says).
“My cake was completely cooked through with no molten center” 😭
The problem: You overbaked them. This is the #1 mistake.
The fix: Reduce baking time by 1-2 minutes. Remember, the center should still jiggle when you pull them out. If they look fully set, you’ve gone too far.
“My cake stuck to the ramekin and broke when I tried to flip it”
The problem: Not enough butter/cocoa powder coating.
The fix: Really go to town with the butter. Every surface needs a thick coat. The cocoa powder dusting helps too. Also make sure you run a knife around the edge before inverting.
“The batter seems too thick/thin”
The problem: Either your chocolate was too hot when you added the eggs, or you undermixed.
The fix:
- Too thick: Whisk more vigorously
- Too thin: Your eggs might have been cold or the chocolate was too hot
“They deflated immediately after I took them out”
The problem: Overbaked or not enough air incorporated.
The fix: Next time, whisk the eggs longer and reduce baking time slightly.
FAQ
Can I make these without ramekins?
Yes! You can use a muffin tin (reduce baking time to 8-9 minutes) or small oven-safe coffee mugs. Just make sure whatever you use is well-buttered and coated with cocoa powder.
Do I have to use a double boiler?
Nope. You can microwave the chocolate and butter in 20-second intervals, stirring between each one. Just be careful not to burn it. I prefer the double boiler because it’s easier to control the temperature.
What’s the best chocolate to use?
60-70% cacao dark chocolate. Brands like Ghirardelli, Lindt, or Valrhona work great. Avoid chocolate chips – they have stabilizers that prevent smooth melting.
Can I use milk instead of cream?
This recipe doesn’t use cream at all, just butter! But if you’re thinking of adding cream, don’t. It’ll throw off the ratios.
How do I know when they’re done?
The edges should be firm and pulling away slightly from the sides. The center should still jiggle when you gently shake the pan. It looks underdone but it’s not.
Can I add a filling to the center?
You can! Try placing a square of chocolate, a spoonful of Nutella, or a piece of caramel in the center of the batter before baking. Just know it changes the texture slightly.
Why did my chocolate seize up and get grainy?
Water got into your chocolate. Even a tiny drop can cause this. Make sure your bowl is completely dry when melting chocolate.
Can I use this recipe to make one large cake?
Technically yes, but the timing gets tricky. You’d need to bake it longer and you might lose that perfect molten center. I’d stick with individual portions.
Time-Saving Hack
Pro move: Make a double batch of batter, freeze half in already-greased ramekins, and you’ve got instant fancy dessert ready to go whenever you need it. Just add 4-6 extra minutes to the baking time if cooking from frozen.
Wrapping Up
There’s something about breaking into a warm chocolate cake and watching that molten center flow out that just feels special.
And now you know exactly how to make it happen.
This recipe has been my go-to for years because it works. Every single time. No complicated techniques, no specialty ingredients you can’t pronounce, just straightforward steps that lead to an impressive dessert.
The best part? People will think you slaved away in the kitchen for hours. But you and I both know it took you 20 minutes and minimal effort.
So grab some good chocolate, preheat that oven, and make these tonight. Your future self (and anyone you’re sharing with) will thank you.
Have you tried making lava cakes before? What toppings do you use? Drop a comment below and let me know how yours turned out! 👇


1 thought on “The Only Lava Cake Recipe You’ll Ever Need (Foolproof & Ready in 20 Minutes)”