
Did you know that bread and butter pickles got their name during the Great Depression when people literally traded them for staples like bread and butter?
I’m not saying you’ll start a pickle economy in your neighborhood, but these crispy, sweet-tangy slices might just become your most requested homemade gift.
The crunch when you bite into a fresh bread and butter pickle is unreal.
Store-bought versions don’t even come close.
Once you make your own batch, those sad supermarket jars will stay on the shelf.
I started making these after tasting my grandmother’s recipe at a family cookout. She’d been making them for 40 years and refused to buy them from a store.
Now I get it.
The smell alone when these are simmering on the stove is worth the effort.
Your whole kitchen smells like a cozy deli, and you’ll be sneaking bites straight from the jar before they’re even properly cooled.
Fun fact: The sweet and tangy flavor combo in bread and butter pickles was designed to make them perfect for sandwiches. The sweetness balances salty meats while the tang cuts through rich spreads. Pure genius in a jar.
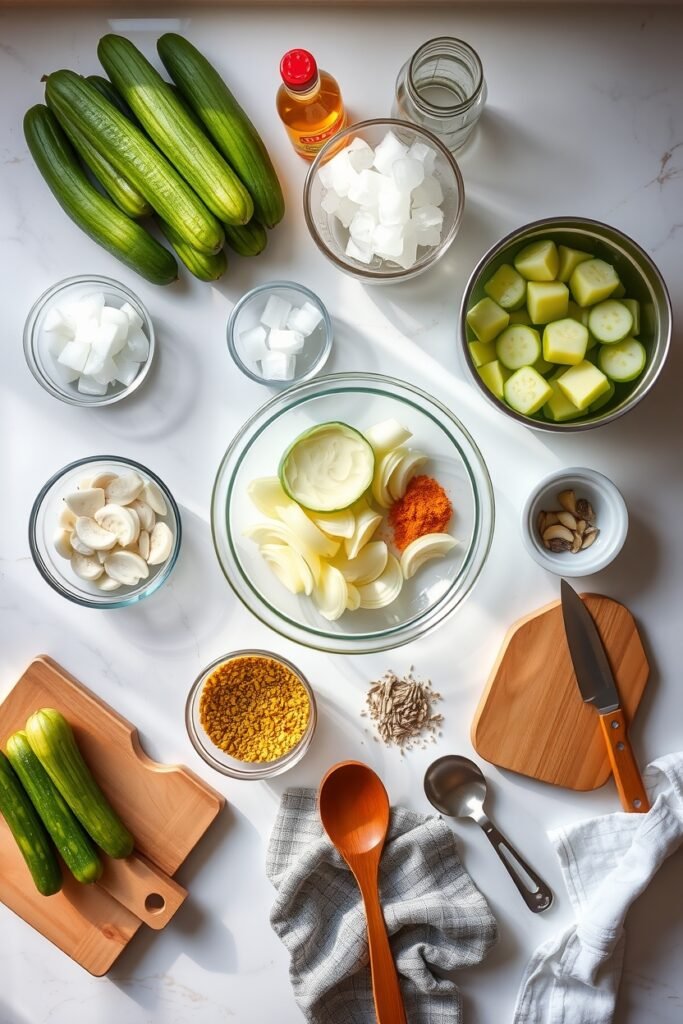
What You’ll Need
The Cucumbers & Veggies
| Ingredient | Amount | Notes |
|---|---|---|
| Pickling cucumbers | 4 pounds | Sliced 1/4-inch thick |
| Yellow onions | 2 medium | Thinly sliced |
| Kosher salt | 1/4 cup | For the ice bath |
| Ice cubes | 4 cups | Keeps them crispy! |
The Brine Magic ✨
| Ingredient | Amount | Why It Matters |
|---|---|---|
| Apple cider vinegar | 3 cups | The tangy base |
| Granulated sugar | 2 1/2 cups | Sweet & balanced |
| Yellow mustard seeds | 2 tablespoons | Classic pickle flavor |
| Celery seeds | 1 tablespoon | Earthy depth |
| Ground turmeric | 1 teaspoon | Golden color |
| Ground cloves | 1/2 teaspoon | Warm spice note |
| Garlic cloves | 4 cloves | Smashed for flavor |
Quick tip: Don’t skip the turmeric! It’s what gives these pickles their signature golden color.
Tools You’ll Need
Must-haves:
- Large mixing bowl (big enough for 4 pounds of cucumbers)
- Large pot (at least 6-quart capacity)
- Wooden spoon for stirring
- Sharp knife and cutting board
- Clean glass jars with lids (6-8 pint jars)
- Slotted spoon
- Ladle
Nice-to-haves:
- Mandoline slicer (for perfectly even slices)
- Jar funnel (makes filling easier)
- Kitchen timer (so you don’t forget the 3-hour soak)
Pro Tips
🥒 Pick the Right Cucumbers
Kirby or pickling cucumbers work best because they stay crispy.
If you can only find regular cucumbers, skip the waxy ones at the store and go for the unwaxed English cucumbers instead.
The crunch factor matters. Nobody wants a soggy pickle.
🧊 Don’t Skip the Ice Bath Step
This is what keeps your pickles from turning into sad, soggy slices.
The salt and ice draw out excess moisture and help them stay crunchy for weeks.
I learned this the hard way when I tried to rush a batch. They were edible but limp. Not cute.
👅 Taste Your Brine Before Pouring
Everyone’s sweet-to-tangy preference is different.
| If you want… | Do this |
|---|---|
| Sweeter pickles | Add another 1/4 cup sugar |
| More tang | Add 1/2 cup more vinegar |
| Perfect balance | Taste and adjust gradually |
Just make sure you heat it again to dissolve any added sugar.
⏰ Let Them Rest
I know it’s tempting to crack open a jar right away, but these need at least 24 hours in the fridge for the flavors to really develop.
The waiting game:
- After 1 day = Good
- After 3 days = Amazing
- After 1 week = Absolutely perfect
💧 Save the Brine
After you finish the pickles, don’t dump that liquid.
It makes an incredible base for salad dressing, marinade for chicken, or even a unique cocktail ingredient if you’re feeling adventurous.
My friend uses it in her potato salad and people ask for the recipe every single time.
How to Make Bread and Butter Pickles

Step 1: Prep the Cucumbers
Wash your cucumbers really well under cold water. You want to get rid of any dirt or debris.
Slice them into 1/4-inch thick rounds.
Pro move: Try to keep them consistent so they pickle evenly.
Toss the cucumber slices and onions into your large bowl.
Step 2: Salt and Ice Bath (This Is Important!)
Sprinkle the kosher salt all over the cucumbers and onions.
Mix it around with your hands.
Pour the ice cubes on top. Mix everything together again.
Set a timer for 3 hours.
The salt and ice are doing important work here, pulling out moisture so your pickles stay crispy instead of limp.
What’s happening: The salt draws water out of the cucumbers while the ice keeps everything cold and crisp. It’s science, and it works beautifully.
Step 3: Make the Brine
About 15 minutes before your cucumbers are done with their ice bath, start your brine.
Combine the vinegar, sugar, mustard seeds, celery seeds, turmeric, cloves, and garlic in your large pot.
Bring everything to a boil over medium-high heat, stirring occasionally to make sure the sugar dissolves completely.
Once it’s boiling and the sugar has dissolved, turn off the heat and let it cool slightly while you finish with the cucumbers.
Your kitchen should smell amazing right now. 🤤
Step 4: Drain and Rinse
After 3 hours, drain your cucumbers and onions in a colander.
Rinse them really well under cold water to get rid of excess salt.
Let them drain for a few minutes. You want them pretty dry before adding them to the brine.
Step 5: Combine Everything
Add your drained cucumbers and onions to the pot with the brine.
Turn the heat back to medium-high and bring everything to a simmer.
Don’t let it boil hard or you’ll end up with mushy pickles.
Let it simmer for about 5 minutes.
The cucumbers will turn from bright green to more of an olive color. That’s normal and actually a good sign.
Step 6: Pack the Jars
Using your slotted spoon, pack the hot cucumber mixture into your clean jars.
Leave about 1/2 inch of space at the top.
Pour the hot brine over the cucumbers, making sure they’re completely covered.
Leave that same 1/2 inch of headspace.
Quick trick: Tap the jars gently on your counter to release any air bubbles.
Wipe the rims of the jars with a clean towel and seal them with the lids.
Step 7: Cool and Store
Let the jars cool to room temperature on your counter.
Once they’re cool, stick them in the refrigerator.
They need at least 24 hours before you dig in, but honestly, waiting 3 days makes them so much better.
Total time breakdown:
| Task | Time Needed |
|---|---|
| Prep & slicing | 20 minutes |
| Ice bath | 3 hours |
| Making brine | 15 minutes |
| Cooking & jarring | 20 minutes |
| Cooling | 2 hours |
| Fridge time (minimum) | 24 hours |
Substitutions and Variations
Sweetener Swaps
| Instead of… | Use this | Notes |
|---|---|---|
| White sugar | Honey (1:1 ratio) | Slightly different flavor but delicious |
| White sugar | Coconut sugar | More caramel-like taste |
| 2 1/2 cups sugar | 2 cups sugar | For less sweet pickles |
Spice It Up 🌶️
Add heat: Toss in 1 teaspoon of red pepper flakes for a kick.
Go classic: Throw in fresh dill sprigs for a more traditional pickle vibe.
Get cozy: A cinnamon stick in each jar adds a warm, unexpected note that’s perfect for fall.
Veggie Alternatives
No cucumbers? Use zucchini instead. Slice them up and follow the same recipe. The texture is slightly different but they’re just as addictive.
Want more color? Add thinly sliced red or yellow bell peppers. They add sweetness and make your jars look gorgeous.
Spicy lovers: Mix in sliced jalapeños with the cucumbers. They’re perfect on burgers and sandwiches.
Different Vinegars
| Vinegar Type | Flavor Profile | Best For |
|---|---|---|
| Apple cider vinegar | Fruity, mellow | Traditional B&B pickles |
| White vinegar | Sharp, clean | Extra tangy pickles |
| Rice vinegar | Mild, sweet | Asian-inspired version |
Don’t use: Balsamic or red wine vinegar. They’ll turn your pickles a weird color and the flavor won’t be right.
Make Ahead Tips
Prep the night before:
You can slice your cucumbers and onions the night before. Just keep them in the ice bath in your fridge overnight.
Drain and rinse them the next day when you’re ready to make the brine.
Brine in advance:
The brine can also be made ahead and stored in the fridge for up to 3 days.
Just reheat it before adding your cucumbers.
Time-saver: Make a double batch of brine and freeze half. Thaw and reheat when you’re ready for your next pickle batch.
Leftovers and Storage
How Long Do They Last?
| Storage Method | Shelf Life | Notes |
|---|---|---|
| Refrigerator (unopened) | 2 months | Keep submerged in brine |
| Refrigerator (opened) | 2 weeks | Best flavor & crunch |
| Water bath canned | 1 year | Follow proper canning safety |
Storage Tips 💡
Keep them submerged. If you notice the liquid level getting low, you can make a quick batch of extra brine and top them off.
Use clean utensils. Always use a clean fork or spoon when grabbing pickles from the jar. This prevents contamination.
Check for freshness. If you see mold, cloudy brine, or off smells, toss them out.
Want to Can Them?
If you want to preserve these for longer, you can process them in a water bath for 10 minutes.
Just make sure you follow proper canning safety guidelines from the USDA.
Canning supplies you’ll need:
- Canning jars with new lids
- Water bath canner or large pot
- Jar lifter
- Canning funnel
How to Serve These Pickles
On Sandwiches & Burgers 🍔
Layer them on BBQ pulled pork sandwiches for the perfect sweet-tangy crunch.
The sweetness balances the smoky meat like a dream.
Add them to your burger stack. They cut through rich beef and cheese beautifully.
Upgrade your grilled cheese game. The sweet-sour combo with melted cheese is chef’s kiss.
In Salads & Sides
| Dish | How to Use | Why It Works |
|---|---|---|
| Potato salad | Chop fine and mix in | Sweetness balances mayo |
| Tuna salad | Dice and stir through | Adds crunch and flavor |
| Chicken salad | Replace regular pickles | Sweet twist on classic |
| Coleslaw | Chop and add to slaw | Extra flavor dimension |
On Charcuterie Boards 🧀
Serve them alongside sharp cheddar, gouda, and aged cheeses.
They cut through rich, creamy cheeses like nobody’s business.
Add them to your relish tray at cookouts and watch them disappear first.
Creative Uses
Make flavored mayo: Dice them fine and stir into aioli or tartar sauce for fish tacos or fried seafood.
Top your hot dogs: Skip the relish and use these instead.
Add to deviled eggs: Finely chop and mix into the yolk filling for a sweet surprise.
Pizza topping: I know it sounds weird, but trust me. Try them on a burger pizza or BBQ chicken pizza.
Nutrition Information (Per 1/4 Cup Serving)
| Nutrient | Amount | % Daily Value |
|---|---|---|
| Calories | 45 | 2% |
| Total Fat | 0g | 0% |
| Sodium | 210mg | 9% |
| Total Carbs | 11g | 4% |
| Sugars | 10g | – |
| Protein | 0g | 0% |
Based on a 2,000 calorie diet. Your daily values may be higher or lower.
Keep in mind: These are sweet pickles, so the sugar content is higher than dill pickles. But they’re still a low-calorie snack that adds tons of flavor to meals.
FAQ
Why are my pickles mushy?
Two main culprits:
- You skipped the ice bath step
- You boiled them too hard
The ice bath is crucial for maintaining crispness, and you want a gentle simmer, not a rolling boil, when you add the cucumbers to the brine.
Think of it like this: cucumbers are delicate. Treat them gently and they’ll reward you with that perfect crunch.
Can I use regular cucumbers instead of pickling cucumbers?
Yes, but they won’t be quite as crispy.
Regular cucumbers have more water content and fewer seeds.
Best alternatives:
| Cucumber Type | Crispness Rating | Notes |
|---|---|---|
| Pickling/Kirby | ⭐⭐⭐⭐⭐ | Best choice |
| English | ⭐⭐⭐⭐ | Good backup |
| Regular waxed | ⭐⭐ | Skip these |
Do I have to use apple cider vinegar?
Apple cider vinegar gives the best flavor, but white vinegar works too.
Just know that white vinegar has a sharper taste.
Don’t use: Balsamic or red wine vinegar for this recipe. They’ll mess with the color and flavor.
How long do these need to sit before eating?
The waiting game:
- 24 hours minimum = Edible
- 3 days = Really good
- 5-7 days = Peak flavor 🎯
The flavors really come together as they sit. I know it’s hard to wait, but it’s worth it.
Can I reduce the sugar?
You can cut it down to 2 cups if you want them less sweet, but remember: bread and butter pickles are supposed to be sweet.
If you want tangy pickles, try a dill pickle recipe instead.
Sugar guide:
| Amount | Result |
|---|---|
| 2 cups | Less sweet, more tangy |
| 2 1/2 cups | Traditional B&B flavor |
| 3 cups | Extra sweet |
Why are my pickles turning dark?
That’s usually from the turmeric or from cooking them too long.
A little darkening is normal and doesn’t affect taste.
Brown pickles? You probably:
- Simmered them for too long
- Used old spices
- Overcooked the brine
Can I double this recipe?
Absolutely!
Just make sure you have:
- A pot big enough to hold everything
- Enough jars ready to go
- Patience for the ice bath (it might take longer to cool down)
I usually make a triple batch because these go fast in my house.
What if I don’t have mustard seeds?
You can use 1 tablespoon of prepared yellow mustard instead, but the seeds add a better texture and more authentic flavor.
The seeds also look prettier in the jar, if we’re being honest. 🌟
Can I make these without canning equipment?
Yes!
This recipe is designed for refrigerator pickles. No special canning equipment needed.
Just clean jars, hot brine, and fridge space.
If you want shelf-stable pickles, that’s when you’d need proper canning supplies and a water bath canner.
Wrapping Up
Making your own bread and butter pickles is easier than you think, and the flavor blows store-bought versions out of the water.
The combination of sweet and tangy with that perfect crunch makes these pickles addictive.
You’ll find yourself eating them straight from the jar at midnight. No judgment here. 🥒
Here’s what makes them special:
- That satisfying crunch that store-bought pickles never have
- The ability to customize sweetness and spice to your taste
- They make fantastic gifts (seriously, people will request them)
- You know exactly what’s in them
Plus, there’s something deeply satisfying about opening your fridge and seeing rows of golden pickle jars that you made with your own hands.
One jar won’t last long, so I recommend making at least a double batch.
What are you going to put these pickles on first?
Burgers? Sandwiches? Or are you a straight-from-the-jar type of person?
Drop a comment below and let me know if you have any questions about the recipe. I read every single one and love hearing about your pickle adventures!


