You know that moment when you order teriyaki chicken and it’s either swimming in sauce or dry as cardboard?
I got tired of that lottery.
So I started making it at home, and let me tell you, it’s been a game changer. 🍗
Here’s what nobody tells you about teriyaki: the bottled stuff tastes nothing like the real thing. It’s basically liquid sugar with soy sauce vibes. The homemade version? It’s got layers. It’s got depth. It’s got that sticky, glossy coating that makes you want to lick your fingers.
I’ve made this at least 30 times now, tweaking it until it was just right.
The cool thing is, it comes together in about 30 minutes. So you can have restaurant-quality teriyaki on a random Tuesday without the delivery fee or the 45-minute wait.
| ⏰ Prep Time | 🍳 Cook Time | 🍽️ Servings |
|---|---|---|
| 10 minutes | 15 minutes | 4 servings |
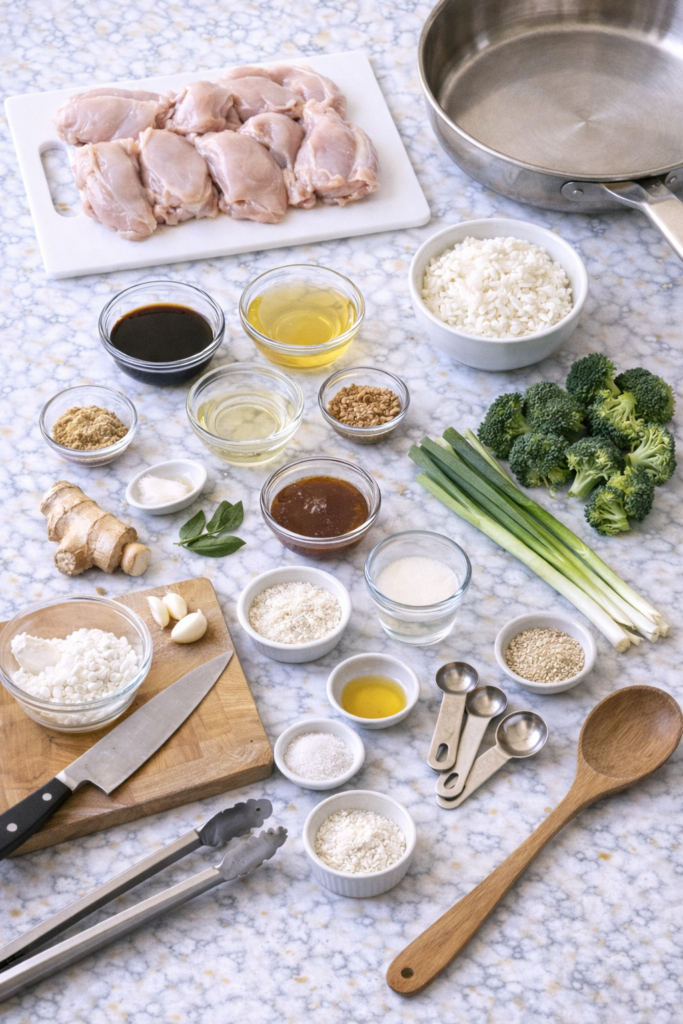
What You’ll Need
🍗 For the Chicken
| Ingredient | Amount | Notes |
|---|---|---|
| Boneless, skinless chicken thighs | 1½ lbs | Cut into bite-sized pieces |
| Vegetable oil | 1 tablespoon | For searing |
| Salt and pepper | To taste | Just a pinch |
| Cornstarch | 1 tablespoon | Creates crispy edges |
🥢 For the Teriyaki Sauce
| Ingredient | Amount | Why It Matters |
|---|---|---|
| Soy sauce (low sodium) | ¼ cup | The salty base |
| Mirin | 3 tablespoons | Adds sweetness + shine |
| Sake | 2 tablespoons | Depth of flavor |
| Brown sugar | 2 tablespoons | Caramelization |
| Honey | 1 tablespoon | Natural sweetness |
| Garlic | 2 cloves, minced | The aromatic punch |
| Fresh ginger | 1 teaspoon, grated | Warm spice notes |
| Cornstarch | 1 tablespoon | Thickens the sauce |
| Water | 2 tablespoons | For the slurry |
🍚 For Serving
- 2 cups cooked white or brown rice
- 1 tablespoon sesame seeds
- 2 green onions, sliced
- Steamed broccoli (optional, but recommended)
Quick Tip: Get everything measured and prepped before you start cooking. Once that pan gets hot, things move fast!
Tools You’ll Need
You may also like : chicken tacos recipe
| Kitchen Tool | What I Use | Do You Really Need It? |
|---|---|---|
| Large skillet or wok | 12-inch non-stick | YES – Need space for even browning |
| Small mixing bowl | Any size | YES – For mixing the sauce |
| Sharp knife | Chef’s knife | YES – Safety first when cutting chicken |
| Cutting board | Plastic or wood | YES – Please don’t cut on your counter 😅 |
| Measuring cups/spoons | Standard set | YES – Precision matters with sauce |
| Whisk or fork | Either works | YES – To mix that cornstarch slurry |
| Spatula | Heat-resistant | YES – For stirring and flipping |
Pro move: Have a small prep bowl ready for your cornstarch slurry. You’ll thank me later when things start moving fast.
Pro Tips
💡 Tip #1: Use Chicken Thighs, Not Breasts
I know everyone defaults to chicken breasts, but thighs stay juicy and don’t dry out.
They also soak up the sauce better and have way more flavor.
Breast meat: Lean, dries out easily, needs babysitting
Thigh meat: Juicy, forgiving, flavor powerhouse ✨
Trust me on this one.
💡 Tip #2: Don’t Skip the Cornstarch on the Chicken
That light coating creates little crispy edges that catch the sauce.
It’s what gives you that restaurant texture instead of boiled chicken vibes. Skip this and your chicken will be sad and slippery.
“The cornstarch is basically like giving your chicken a tiny crispy jacket that sauce can cling to. It’s non-negotiable.”
💡 Tip #3: Let the Sauce Actually Thicken
A lot of people panic and take it off the heat too soon.
Give it a minute to bubble and thicken up. That’s when it turns glossy and coats the chicken like it should. You’ll know it’s ready when the sauce coats the back of a spoon.
💡 Tip #4: High Heat Is Your Friend
You want a good sear on that chicken before the sauce goes in.
Medium-high heat. Don’t crowd the pan or you’ll end up steaming the chicken instead of browning it.
If your pan is too small, cook in two batches. I promise it’s worth it.
💡 Tip #5: Taste as You Go
Every soy sauce is different. Some are saltier than others.
Add the brown sugar gradually and adjust based on what you’re working with. Start with less, taste, then add more if needed. You can always add, but you can’t subtract.
Recommended for you : chicken shawarma recipe
How to Make Chicken Teriyaki

Step 1: Prep the Chicken ✂️
Cut your chicken thighs into bite-sized pieces, about 1-2 inches each.
Pat them dry with a paper towel (this helps them brown better).
Season with a pinch of salt and pepper, then toss with 1 tablespoon of cornstarch until lightly coated.
Time needed: 5 minutes
Step 2: Make the Teriyaki Sauce 🥣
In a small bowl, whisk together:
- Soy sauce
- Mirin
- Sake
- Brown sugar
- Honey
- Garlic
- Ginger
In a separate tiny bowl, mix the cornstarch with 2 tablespoons of water to make a slurry.
Set both aside.
Time needed: 3 minutes
Why the slurry? Mixing cornstarch with water first prevents clumps. Trust me, you don’t want lumpy sauce.
Step 3: Sear the Chicken 🔥
Heat your skillet over medium-high heat.
Add the vegetable oil and let it get hot (you’ll see it shimmer).
Add the chicken pieces in a single layer. Don’t move them around. Let them sit for 2-3 minutes to get a nice golden-brown sear on one side.
Flip the pieces and cook another 2-3 minutes on the other side.
The chicken should be about 80% cooked through at this point.
Time needed: 5-6 minutes
| What You Want | What to Avoid |
|---|---|
| Golden-brown sear | Grey, steamed chicken |
| Crispy edges | Soggy, pale pieces |
| Single layer | Crowded, overlapping pieces |
Step 4: Add the Sauce 🍯
Pour the teriyaki sauce mixture over the chicken.
Stir everything together and let it come to a simmer. The sauce will start bubbling and the kitchen will smell incredible.
Time needed: 2 minutes
Step 5: Thicken It Up 💫
Give your cornstarch slurry a quick stir (it settles), then pour it into the pan.
Stir constantly for about 1-2 minutes.
The sauce will go from thin and watery to thick and glossy. That’s the magic moment.
You’ll know it’s ready when:
- ✓ The sauce coats the back of a spoon
- ✓ It clings to the chicken pieces
- ✓ It’s shiny and sticky
Time needed: 2 minutes
You’ll love these too : lemon chicken recipe
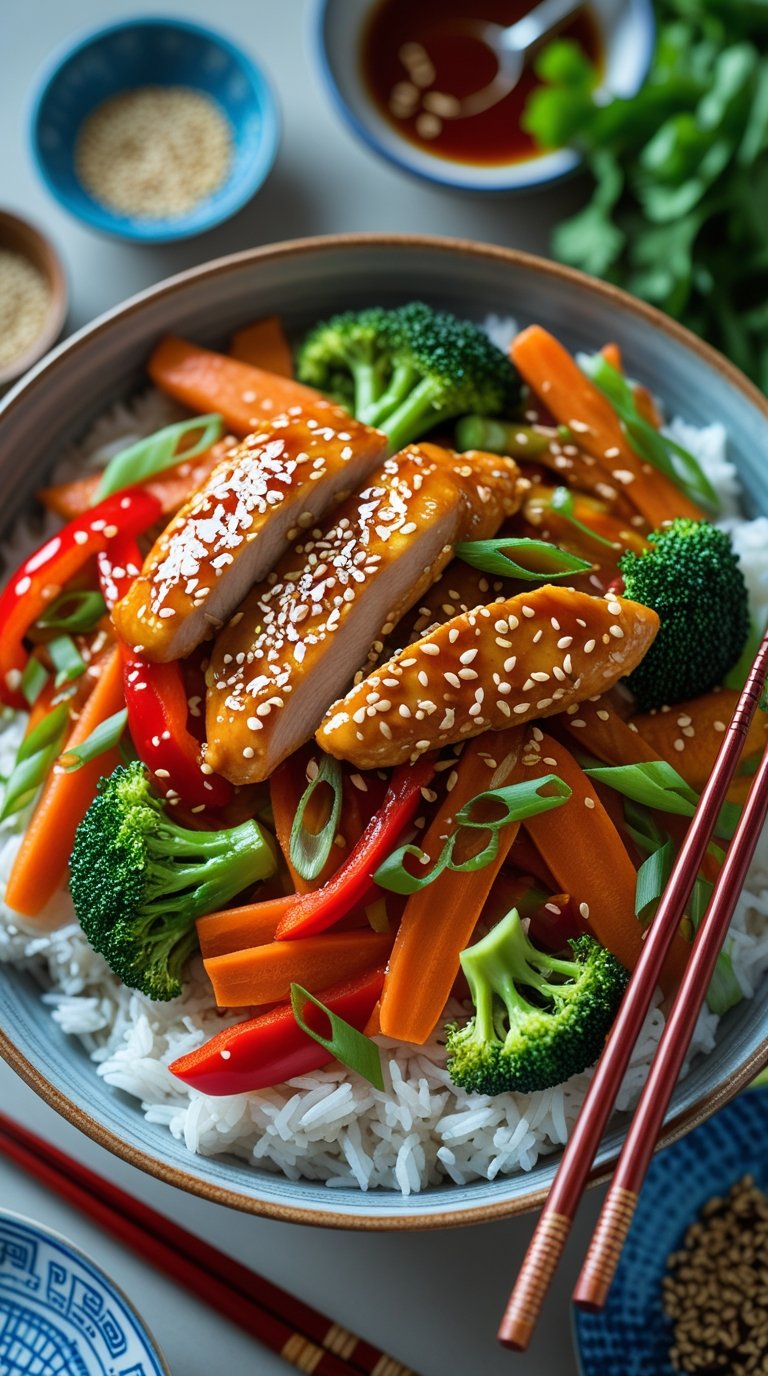
Step 6: Finish and Serve 🍚
Once the sauce coats the back of a spoon and clings to the chicken, turn off the heat.
The chicken should be fully cooked through (internal temp of 165°F if you want to check).
Serve over rice, sprinkle with sesame seeds and sliced green onions.
Add steamed broccoli on the side if you want some green.
Time needed: 2 minutes (plating)
Total Active Cooking Time: About 20 minutes from start to finish
Substitutions and Variations
🔄 Don’t Have These Ingredients? Here’s What Works
| Missing This | Use This Instead | Taste Difference |
|---|---|---|
| Mirin | 3 tbsp rice vinegar + 1 tbsp sugar | Slightly less sweet, but works |
| Sake | Dry white wine OR apple juice | Wine is closer, juice is sweeter |
| Chicken thighs | Chicken breasts (watch closely!) | Drier, less flavor |
| Fresh ginger | ½ tsp ground ginger | Less punch, but acceptable |
| Brown sugar | White sugar OR honey | Less molasses flavor |
| Cornstarch | Arrowroot powder | Same thickening power |
🌶️ Want to Mix Things Up?
Spicy Teriyaki: Add ½ to 1 teaspoon of red pepper flakes to the sauce. Or drizzle with sriracha before serving.
Extra Garlicky: Double the garlic. I do this all the time. No regrets.
Protein Swap: This sauce works great with salmon, shrimp, or even tofu. Just adjust your cooking time accordingly.
Veggie Loaded: Throw in sliced bell peppers, snap peas, or carrots when you add the sauce. They’ll cook in the sauce and soak up all that flavor.
Pineapple Teriyaki: Add ½ cup of diced pineapple in Step 4. Sweet, tangy, and weirdly delicious. 🍍
🥗 Dietary Swaps
| Diet | Swap These | Keep These |
|---|---|---|
| Gluten-Free | Use coconut aminos for soy sauce, skip sake or use wine | Everything else stays |
| Paleo | Coconut aminos + arrowroot powder | Honey, ginger, garlic |
| Low-Carb/Keto | Use sugar substitute (like erythritol) | Everything else |
| Vegetarian | Use firm tofu, pressed and cubed | All sauce ingredients |
Make Ahead Tips
The sauce can be made up to 3 days ahead. Just store it in an airtight container in the fridge and give it a good stir before using.
You can also prep the chicken (cut, seasoned, cornstarch-coated) and keep it covered in the fridge for up to 24 hours. When you’re ready to cook, just heat the pan and go.
Honestly, this dish is so quick that I don’t usually bother with make-ahead. But it’s nice to know you have options if you’re meal prepping.
Nutritional Information
Per Serving (Based on 4 servings, chicken only)
| Nutrient | Amount | % Daily Value* |
|---|---|---|
| Calories | 385 | ~19% |
| Protein | 32g | 64% |
| Carbs | 28g | 9% |
| Fat | 14g | 18% |
| Fiber | 1g | 4% |
| Sugar | 15g | – |
| Sodium | 890mg | 39% |
*Based on a 2,000 calorie diet
Note: This doesn’t include the rice. Add about 200 calories per cup of cooked white rice.
📊 How Does This Compare to Takeout?
| Homemade | Typical Takeout | |
|---|---|---|
| Calories | ~385 | 600-800 |
| Sodium | 890mg | 1,500-2,000mg |
| Sugar | 15g | 25-35g |
| Weird additives | 0 | Too many to count |
Real talk: Making it at home means you control what goes in. Less sugar, less sodium, no mystery ingredients.
Pairing Suggestions
🍱 What to Serve With This
Classic Sides:
- Steamed edamame (sprinkled with sea salt)
- Miso soup (warm and comforting)
- Cucumber salad with rice vinegar (cool and crisp)
- Sesame green beans (crunchy and garlicky)
- Stir-fried bok choy (quick and easy)
Make It a Bowl:
| Layer | What to Add |
|---|---|
| Base | Fluffy white or brown rice |
| Protein | Your gorgeous teriyaki chicken |
| Veggies | Shredded carrots, edamame, cucumber |
| Toppings | Pickled ginger, avocado slices, soft-boiled egg |
| Crunch | Sesame seeds, crispy wontons |
| Sauce | Extra teriyaki drizzle |
🍷 What to Drink
If You Want Alcohol:
- Sake (obviously)
- Crisp lager beer
- Dry Riesling
- Japanese whisky highball
If You Don’t:
- Green tea (hot or iced)
- Sparkling water with yuzu
- Ramune (Japanese soda)
- Iced oolong tea
My go-to pairing: Ice-cold Japanese lager and a side of gyoza. Simple, classic, perfect.
Leftovers and Storage
🥡 Storage Guide
| Storage Method | How Long | Best For |
|---|---|---|
| Fridge (airtight container) | 3-4 days | Next day lunches |
| Freezer | Not recommended | Texture gets weird |
| Room temp | Don’t do it | Food safety risk |
♨️ How to Reheat Like a Pro
Stovetop Method (Best):
- Add chicken to pan with a splash of water or broth
- Heat over medium, stirring occasionally
- The sauce will loosen up and taste fresh again
- Takes about 5 minutes
Microwave Method (Faster):
- Add a tablespoon of water to the container
- Cover with a damp paper towel
- Heat in 30-second intervals, stirring between
- Takes about 1-2 minutes
Pro tip: The stovetop method is worth the extra few minutes. The chicken tastes way better and the sauce gets glossy again.
🔄 Creative Ways to Use Leftovers
Teriyaki Fried Rice: Chop up the chicken, toss it into fried rice with eggs and veggies. Game changer.
Ramen Topper: Add it to instant ramen or homemade broth. Suddenly your $2 ramen is restaurant quality.
Salad Protein: Chop it up, toss it on a salad with crispy wontons and sesame dressing.
Wrap It Up: Throw it in a tortilla with lettuce, avocado, and sriracha mayo for a fusion wrap.
Rice Bowl Meal Prep: Portion it out with rice and veggies for grab-and-go lunches all week.
Frequently Asked Questions
❓ Can I use chicken breast instead of thighs?
You can, but I really recommend thighs.
Breasts tend to dry out and don’t have as much flavor. If you’re set on using breasts, cook them for less time and watch them closely.
Pull them off the heat as soon as they hit 165°F.
| Chicken Thighs | Chicken Breasts |
|---|---|
| ✓ Stays juicy | ✗ Dries out easily |
| ✓ More flavor | ✗ Milder taste |
| ✓ Forgiving | ✗ Needs precision |
| ✓ Better texture | ✗ Can get rubbery |
❓ Why is my sauce not thickening?
Quick fixes:
- Make sure it’s actually simmering. You should see bubbles. If not, turn up the heat.
- Give it more time. Sometimes it just needs another 30-60 seconds.
- Add more slurry. Mix ½ tablespoon cornstarch with ½ tablespoon water and stir it in.
- Check your cornstarch. Old cornstarch loses its thickening power.
❓ Is teriyaki sauce the same as the bottled kind?
Not even close.
Bottled teriyaki is usually loaded with extra sugar, preservatives, and weird ingredients.
Homemade teriyaki:
- Fresher taste
- Better balance of sweet and savory
- No weird additives
- You control the sugar and salt
Bottled teriyaki:
- Overly sweet
- Too salty
- Mysterious ingredients
- Artificial flavor
❓ Can I make this in advance for meal prep?
Yes, but store the chicken and rice separately.
The chicken will stay good for 3-4 days in the fridge. Reheat with a splash of water to loosen the sauce.
Meal Prep Schedule:
| Day | What to Do |
|---|---|
| Sunday | Cook chicken, prep rice, chop veggies |
| Monday-Thursday | Reheat portions, add fresh toppings |
| Friday | Make a fresh batch if you want more |
❓ What if I don’t have fresh ginger?
You can use ½ teaspoon of ground ginger instead.
Fresh is better (way more flavor), but ground works in a pinch. Or just skip it if you really don’t have it, though the flavor will be a bit flatter.
Fresh ginger hacks:
- Store it in the freezer and grate while frozen
- Buy ginger paste in a tube (lasts forever)
- Use a spoon to peel it (easier than a knife)
❓ Can I double this recipe?
Absolutely.
Just make sure you’re using a large enough pan. If your pan is too crowded, cook the chicken in two batches.
Crowded pan = steamed chicken = sad times
Two batches = crispy chicken = happy mouth 😋
❓ Is this recipe kid-friendly?
Totally.
Most kids love teriyaki because of the sweet-savory thing. If you’re worried about the soy sauce being too salty for little ones, use low-sodium soy sauce and cut back on the salt when seasoning the chicken.
Kid-approved serving ideas:
- Over plain white rice
- Cut into smaller pieces
- Mixed with noodles
- With mild veggies like carrots
❓ How do I know when the chicken is done?
Three ways to check:
- Use a meat thermometer: Internal temp should be 165°F
- Cut one open: No pink inside, juices run clear
- Touch test: Feels firm, not squishy
When in doubt, use a thermometer. Food poisoning is not cute.
Wrapping Up
There’s something really satisfying about nailing a teriyaki recipe at home.
Maybe it’s the way the sauce bubbles and turns all glossy in the pan.
Or how the chicken gets those crispy edges that soak up all that sticky sweetness.
Or just knowing you can make it better than takeout without changing out of your sweatpants. 🍜
I hope this recipe becomes one of those things you make on repeat.
It’s dead simple, crazy flavorful, and comes together faster than scrolling through delivery apps trying to decide what to order.
Give it a shot this week.
And when you do, come back and tell me:
- Did you add extra ginger?
- Throw in some veggies?
- Mess with the sauce ratios?
- Make it spicy?
Drop a comment below and let me know how it turned out. Or if you have questions, ask away. I’ll answer as many as I can.
Happy cooking! ✨


2 thoughts on “Chicken Teriyaki Recipe That’ll Make You Ditch Takeout”