You know that crusty loaf from your favorite bakery that costs $8 and sells out by noon?
You can make it at home. For like, a dollar.
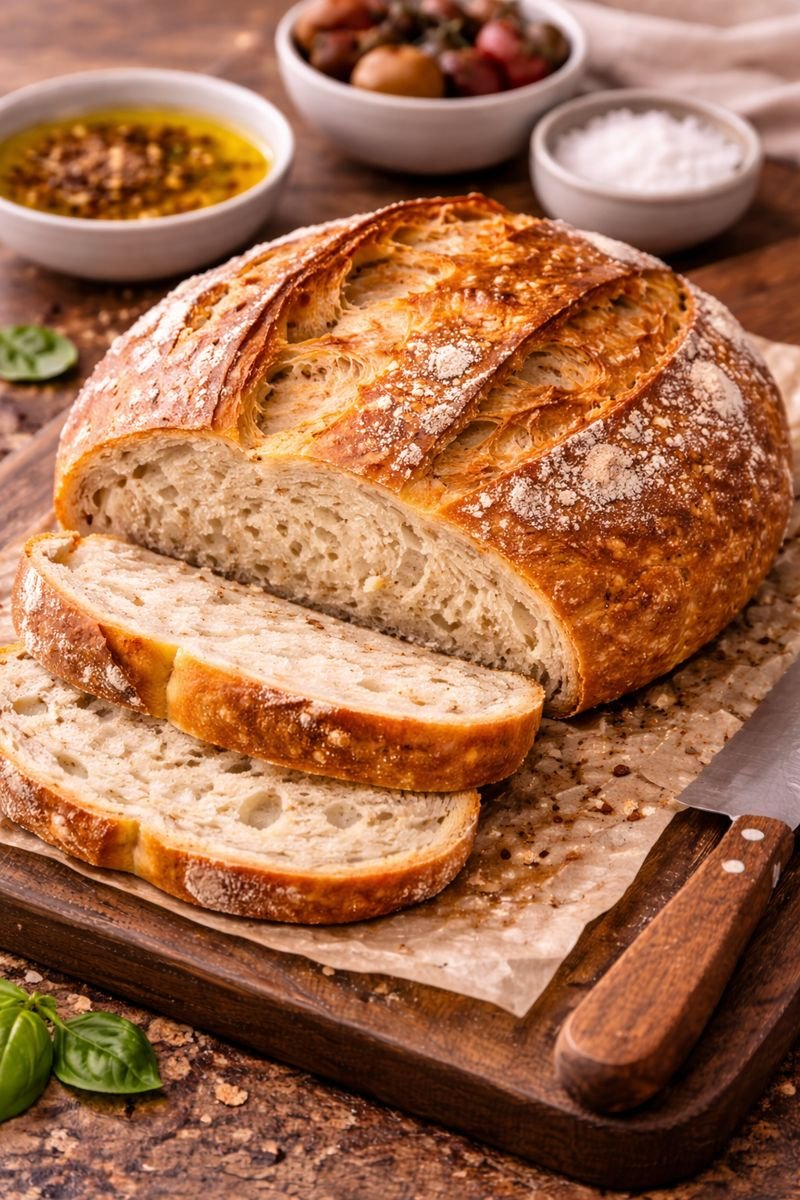
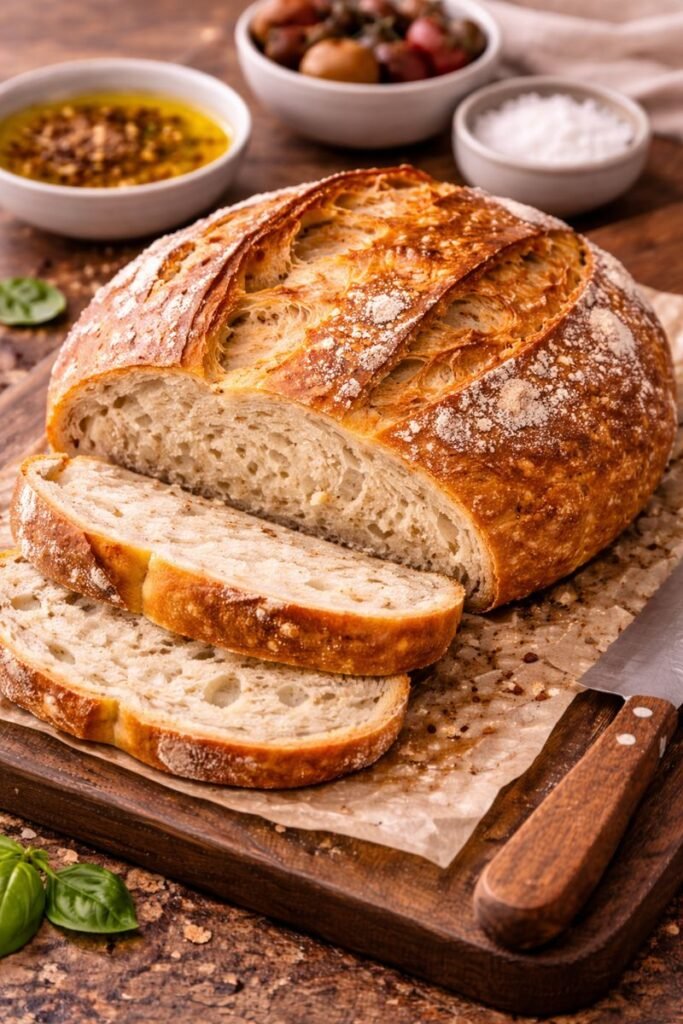
I’m talking about that gorgeous, golden-brown crust that crackles when you slice it. The kind of bread where you can hear the crunch from across the room. And inside? Soft, chewy, with those perfect irregular holes that soak up butter like nobody’s business.
The crazy part is how ridiculously simple this is.
Four ingredients. Most of them you already have.
No fancy equipment. No kneading until your arms fall off. No starter you have to feed like a pet.
Just flour, water, salt, and yeast doing their thing while you binge your favorite show.
I started making this when I realized I was spending more on bread than wine each month (and that’s saying something). My husband thought I was being extra until he tried the first loaf.
Now he gets genuinely upset if we run out.
What You’ll Need
The Ingredients
| Ingredient | Amount | Why It Matters |
|---|---|---|
| All-purpose flour | 3 cups (375g) | Creates structure and chewiness |
| Lukewarm water | 1¾ cups (420ml) | Activates yeast and hydrates flour |
| Salt | 1½ teaspoons | Controls yeast and adds flavor |
| Instant yeast | ¼ teaspoon | Makes the magic happen |
💡 Temperature Check: Your water should be lukewarm (around 100°F). Too hot kills the yeast. Too cold and nothing happens. Think baby bottle temperature.
Your Toolkit
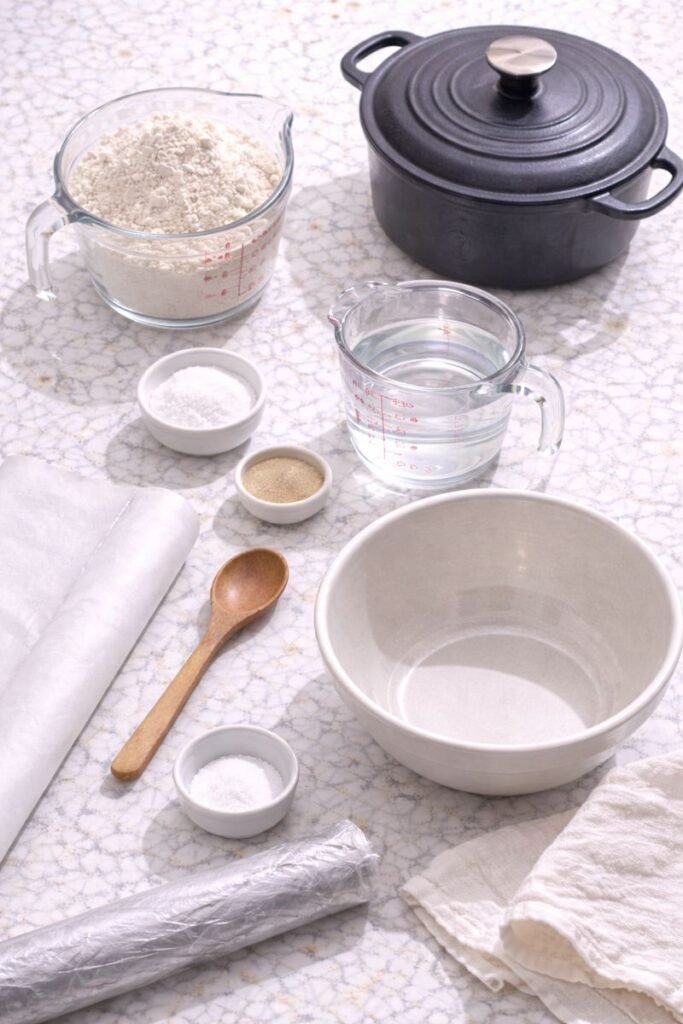
✓ Large mixing bowl (glass or ceramic works great)
✓ Wooden spoon or spatula
✓ Plastic wrap or clean kitchen towel
✓ Dutch oven with lid (this is your secret weapon)
✓ Parchment paper
✓ Sharp knife or bread lame
✓ Cooling rack
Don’t have a Dutch oven? Any heavy pot with an oven-safe lid works. Even a large metal bowl flipped over a baking sheet.
Timeline at a Glance
Here’s what you’re actually committing to:
| Phase | Active Time | Waiting Time | What Happens |
|---|---|---|---|
| Mixing | 5 minutes | 12-18 hours | Dough rises and develops flavor |
| Shaping | 5 minutes | 1-2 hours | Second rise for structure |
| Baking | 5 minutes | 40-45 minutes | Crust forms, bread bakes |
| Cooling | 0 minutes | 1 hour | Interior sets properly |
| Total | 15 minutes | 14-22 hours | Fresh homemade bread |
Yeah, it takes a while. But you’re only working for 15 minutes total.
Pro Tips From Someone Who’s Made This 100+ Times
🔥 Time is your friend here.
The long fermentation time (12-18 hours) creates those amazing flavors and the open crumb structure. Don’t rush it. I’ve tried and it always turns out dense and boring.
🫕 Your Dutch oven is basically a mini bread oven.
The covered pot traps steam, which gives you that incredible crackling crust. The first time I made this without one, the bread was still good but the crust was sad and soft.
💧 The dough should be sticky.
Like, really sticky. Way stickier than you think bread dough should be. Fight the urge to add more flour. This wet dough is the secret to those beautiful air pockets.
⏰ Preheat your Dutch oven empty.
I learned this the hard way after cracking a cold pot by putting it in a hot oven. Heat the pot while your oven preheats for 30 minutes minimum. Don’t skip this.
🔪 Score it right before baking.
That slash across the top isn’t just pretty (though it is). It controls where the bread expands, so you get that gorgeous rustic look instead of a weird blob.
The Simple Process (Seriously, Anyone Can Do This)
Step 1: Mix the Dough (5 minutes of actual work)
In your large bowl, mix together the flour, salt, and yeast. Just stir them around with your fingers.
Pour in the lukewarm water.
Use your wooden spoon to stir everything until there’s no dry flour left. The dough will look shaggy and sticky. This is perfect.
Don’t knead it. Don’t touch it with your hands. Just make sure everything’s combined.
⚠️ Common Mistake: Adding too much flour because the dough seems too wet. Resist this urge. Wet dough = airy bread.
Step 2: Let It Rise (12-18 hours of ignoring it)
Cover your bowl with plastic wrap or a damp kitchen towel.
Leave it on your counter. Not in the fridge. Not anywhere special.
Just your regular counter.
Go live your life for 12-18 hours.
When you come back, the dough should have doubled in size and be covered in bubbles. It’ll look alive, which I know sounds weird, but that’s the yeast doing its magic.
| What Good Dough Looks Like | What Bad Dough Looks Like |
|---|---|
| Doubled in size | Same size or barely risen |
| Covered in bubbles | Smooth surface, no bubbles |
| Jiggly when you shake the bowl | Dense and heavy |
| Smells slightly tangy and yeasty | No smell or smells off |
Step 3: Shape the Dough (another 5 minutes)
Dust your counter with flour. Like, be generous here because this dough is sticky.
Turn the dough out onto the floured surface. It’ll deflate a bit and that’s fine.
With floured hands, fold the edges of the dough toward the center. Do this like 4-5 times, rotating the dough as you go. You’re creating surface tension.
Flip it over so the smooth side is up.
Cup your hands around it and gently pull it toward you a few times to create a round ball.
Don’t worry about making it perfect. Rustic is the vibe here.
Step 4: Second Rise (1-2 hours)
Cut a piece of parchment paper and place it in a bowl or on your counter.
Put your dough ball seam-side down on the parchment paper.
Cover it again with that towel.
Let it rise for another 1-2 hours. It should look puffy and almost doubled again.
💡 Finger Test: Gently poke the dough. If the indent slowly springs back halfway, it’s ready. If it springs back completely, give it more time. If it doesn’t spring back at all, you’ve over-proofed it (bake it anyway, it’ll still taste good).
Step 5: Preheat Your Oven (30 minutes before baking)
About 30 minutes before your second rise is done, stick your Dutch oven in the oven.
Preheat everything to 450°F (230°C).
This step is crucial. A cold pot won’t give you that crust.
Set a timer. Seriously. I’ve forgotten and started baking with a lukewarm pot before.
Step 6: Score and Bake (40-45 minutes total)
When your dough is ready and your oven is scorching hot, carefully (and I mean carefully) remove the Dutch oven.
Use oven mitts. Both hands. The pot is insanely hot.
Using the parchment paper, lift your dough and lower it into the hot pot. The paper goes in too.
Take your sharpest knife and make one long slash across the top, about ¼ inch deep. Move quickly and confidently.
Put the lid on and slide it into the oven.
Bake covered for 30 minutes.
Remove the lid and bake for another 10-15 minutes until it’s deep golden brown.
The darker, the better (within reason). You want that caramelized, almost burnt look.
Step 7: Cool Down (the hardest part)
Take the bread out and immediately remove it from the pot onto a cooling rack.
Listen to it crackle. It’s literally singing to you. 🎶
Now comes the torture: you have to wait at least 1 hour before cutting it.
I know.
But if you cut it too early, the inside will be gummy and the texture won’t be right.
Substitutions and Variations
Flour Swaps
| Type | Amount to Replace | What Changes |
|---|---|---|
| Whole wheat | Up to 50% | Nuttier flavor, denser texture (add 2-3 tbsp more water) |
| Bread flour | 100% | Chewier texture, more structure |
| Rye flour | Up to 25% | Earthier flavor, tighter crumb |
Flavor Add-Ins
Herbs and Garlic 🌿
After the first rise, fold in 2 tablespoons chopped fresh rosemary and 3 minced garlic cloves before shaping.
Seeded Crust
Before the second rise, brush the top with water and sprinkle with sesame seeds, poppy seeds, or everything bagel seasoning.
Olive and Herb
Fold in ½ cup chopped kalamata olives and 1 tablespoon dried Italian herbs after the first rise.
Jalapeño Cheddar 🧀
Add 1 cup shredded sharp cheddar and 2 diced jalapeños (seeds removed) after the first rise.
Equipment Alternatives
No Dutch oven?
Place dough on a baking sheet and cover with a large metal bowl during the first 30 minutes of baking. Or use a roasting pan with aluminum foil as a lid.
No parchment paper?
Dust the bottom of your Dutch oven heavily with cornmeal or flour instead.
Make Ahead Tips
This bread is basically made ahead by default because of the long rise time.
Overnight Method:
Mix dough at 8pm → Let rise overnight → Bake at 10am for fresh lunch bread
All-Day Method:
Mix dough at 7am → Let rise all day → Bake at 6pm for dinner
Extended Cold Rise:
After shaping, do the second rise in the fridge for up to 24 hours. Just let it sit at room temperature for 30 minutes before baking.
Nutritional Breakdown
Per slice (assuming 12 slices per loaf):
| Nutrient | Amount | % Daily Value |
|---|---|---|
| Calories | 116 | 6% |
| Carbohydrates | 24g | 8% |
| Protein | 3g | 6% |
| Fat | 0.3g | 0% |
| Fiber | 1g | 4% |
| Sodium | 292mg | 13% |
| Sugar | 0g | 0% |
It’s basically just carbs and happiness. Perfect. 😊
Leftovers and Storage
Storing Your Bread
Room Temperature (2-3 days):
Store cut-side down on a cutting board or in a paper bag. Don’t use plastic – it’ll make the crust soft and sad.
Freezing (up to 3 months):
Wrap tightly in plastic wrap, then aluminum foil. Thaw at room temperature and refresh in a 350°F oven for 10 minutes.
What to Do With Stale Bread
After day three, it starts getting stale, but that’s when it becomes perfect for:
✓ French toast that’ll change your life
✓ Croutons for salads (cube, toss with olive oil and garlic, bake at 375°F for 15 minutes)
✓ Bread crumbs (just toast and blitz in a food processor)
✓ Panzanella salad
✓ Bread pudding
✓ Bruschetta base
Troubleshooting Guide
Common Problems and Fixes
| Problem | Likely Cause | Solution |
|---|---|---|
| Dense, heavy bread | Didn’t rise long enough or old yeast | Check yeast expiration date; let it rise until doubled |
| Flat bread that didn’t rise | Water too hot (killed yeast) | Use lukewarm water (100°F) |
| Gummy interior | Cut too soon | Wait full hour before slicing |
| Pale, soft crust | Oven not hot enough | Preheat Dutch oven 30+ minutes; increase temp to 475°F |
| Burnt bottom | Oven too hot or rack too low | Move rack to middle position; reduce temp slightly |
| Dough too sticky to handle | Normal for this recipe! | Use more flour on hands and work quickly |
Visual Doneness Checks
Your bread is done when:
✓ It’s deep golden brown (almost looks too dark)
✓ It sounds hollow when you tap the bottom
✓ Internal temperature reads 200-210°F
✓ The crust is hard and crispy
FAQ
Why is my bread dense?
Usually this means you didn’t let it rise long enough, or your yeast was old. Check the expiration date on your yeast and make sure your water is lukewarm, not hot (hot water kills yeast).
Also, make sure you’re measuring flour correctly. Spoon it into the measuring cup and level it off instead of scooping directly from the bag.
Can I use active dry yeast instead of instant?
Yes, but you’ll need to use ½ teaspoon instead of ¼ teaspoon. Both will work fine. The instant yeast is just a bit more potent.
What if I don’t have a Dutch oven?
Any heavy pot with a lid works. Cast iron, ceramic, even a large Pyrex bowl flipped over a baking sheet. The key is trapping steam during the first part of baking.
My dough is SO sticky I can’t handle it.
That’s completely normal. Use lots of flour on your hands and work quickly. The stickiness creates the texture you want. If you add more flour to the dough itself, you’ll end up with dense bread.
Can I add things like cheese or olives?
Absolutely. Fold them in after the first rise. About 1 cup of add-ins works well. Just don’t go overboard or the dough won’t hold together.
Why didn’t my bread get crusty?
Your oven might not have been hot enough, or you took the lid off too early. Make sure you’re preheating that Dutch oven for a full 30 minutes. Also, don’t store the bread in plastic – use paper bags or store it cut-side down.
How do I know when it’s done?
It should be deep golden brown (darker than you think) and sound hollow when you tap the bottom. Internal temperature should be around 200-210°F if you’re using a thermometer.
Can I make this in a stand mixer?
You can, but you don’t need to. The whole point is that it’s a no-knead recipe. The long rise does the work for you. Save yourself the cleanup.
What’s the difference between this and sourdough?
Sourdough uses a starter (wild yeast) instead of commercial yeast. It has a tangier flavor and takes even longer. This recipe gives you similar texture and crust with way less commitment.
Can I double the recipe?
Sure, but make two separate loaves instead of one giant one. They’ll bake more evenly.
Wrapping Up
There’s something deeply satisfying about pulling a perfect loaf of bread from your oven.
Like, you made that.
From four ingredients and basically no effort.
The smell fills your whole house. The crust crackles under your knife. And when you tear off that first piece while it’s still warm (I won’t tell if you can’t wait the full hour), slather it with butter, and take a bite?
You’ll understand why people have been baking bread for thousands of years.
This recipe has saved me so much money and honestly just makes me happy. It’s one of those things that feels way harder than it actually is, so when you nail it, you feel like a kitchen genius.
Make this bread. Take a picture of your first loaf.
Drop a comment below telling me how it turned out or if you ran into any issues. I want to hear about your bread victories (or help troubleshoot if something went wrong).
Did your crust crackle? Did you burn yourself taking the Dutch oven out? (It happens to everyone.) What did you eat it with?
Now go preheat that oven. 🍞


