You know that $12 loaf at fancy bakeries?
The one that’s so buttery it practically melts on your tongue?
Yeah, you can make that.
And no, you don’t need culinary school or a French grandmother teaching you secret techniques. You need butter, eggs, and a little patience.
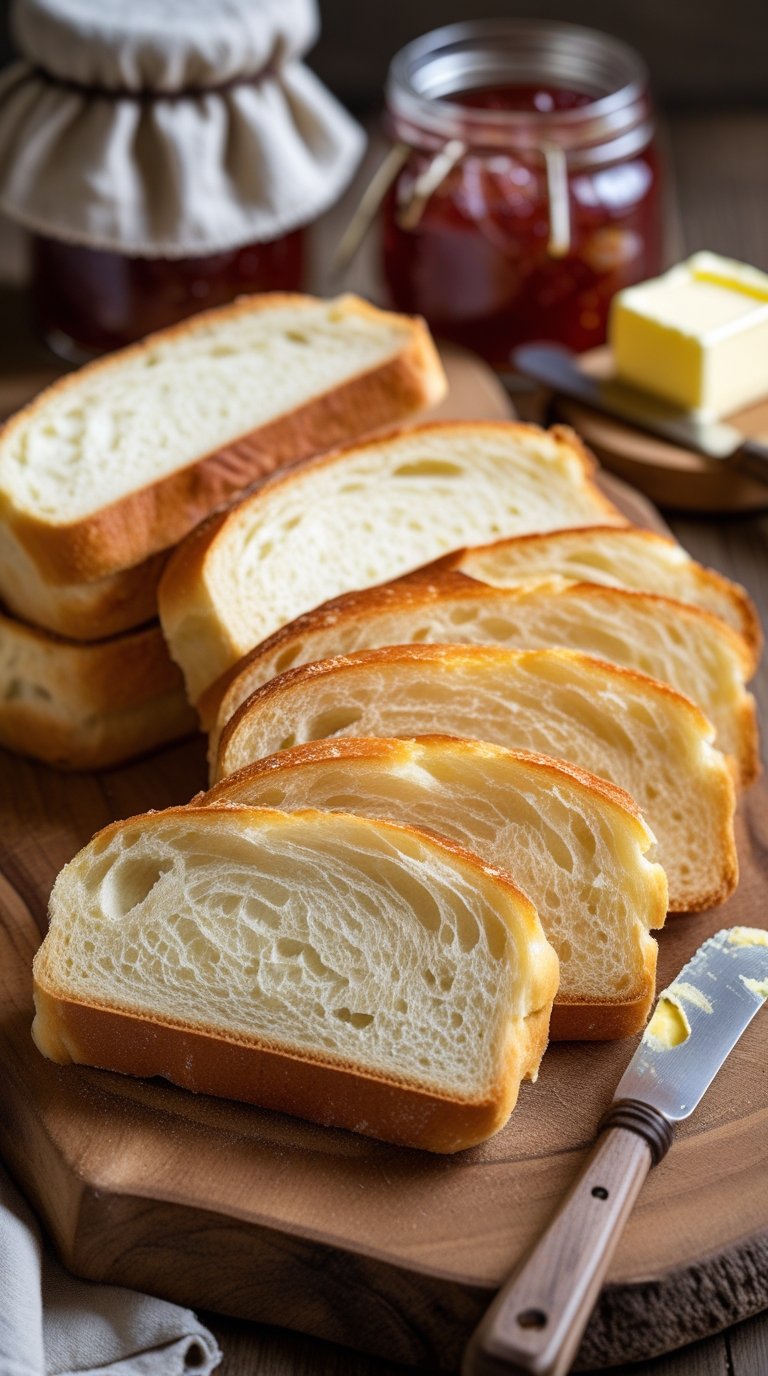
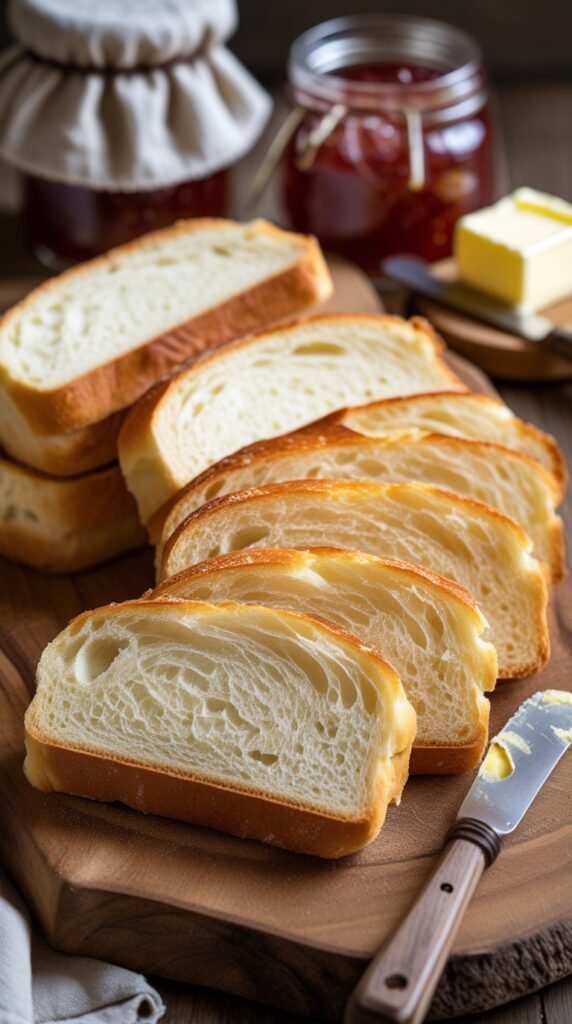
I’m talking about brioche – that golden, cloud-like French bread that makes regular sandwich bread feel like cardboard.
The smell alone will have your neighbors knocking on your door.
The Brioche Secret (Spoiler: It’s Butter)
Here’s what most people don’t know:
Traditional brioche recipes use a 1:1 ratio of butter to flour.
Equal parts.
That’s not a typo. That’s why it tastes like heaven.
“Brioche is what happens when bread decides to become cake, but changes its mind halfway there.” – Every baker who’s ever made it
| Regular Bread | Brioche |
|---|---|
| Water, flour, yeast | Butter, eggs, flour, yeast |
| Lean dough | Enriched dough |
| Chewy texture | Soft, pillowy texture |
| $3 at store | $12+ at bakery |
| Good | Mind-blowing |
The French have been perfecting this since the 1400s.
Six hundred years of butter expertise.
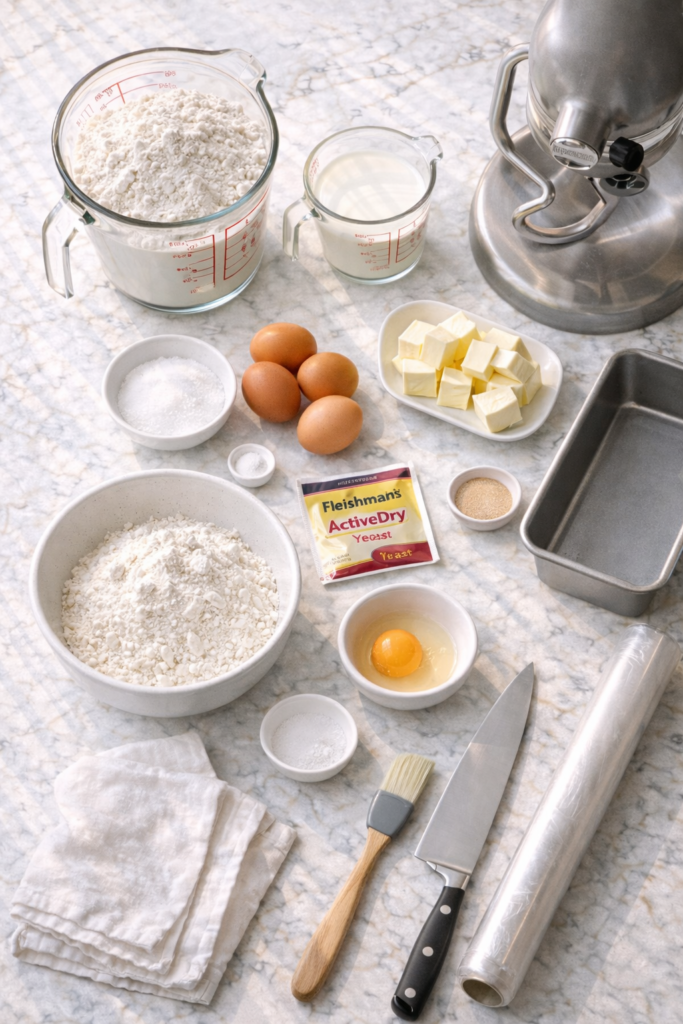
What You’ll Need
The Dough Squad
| Ingredient | Amount | Why It Matters |
|---|---|---|
| All-purpose or bread flour | 3 1/2 cups (440g) | The foundation |
| Granulated sugar | 1/3 cup (65g) | Feeds the yeast + adds sweetness |
| Active dry or instant yeast | 2 1/4 tsp (7g) | Makes it rise |
| Salt | 1 tsp | Flavor + controls fermentation |
| Large eggs | 4 (room temp) | Rich texture + color |
| Whole milk | 1/2 cup (120ml, warm) | Activates yeast |
| Unsalted butter | 3/4 cup (170g, room temp) | The star of the show ⭐ |
For That Golden Glow
- 1 large egg
- 1 tablespoon milk or water
Temperature check: Everything should be room temp except the milk (warm to 110°F).
Cold butter = chunky disaster.
Hot milk = dead yeast.
Room temp = perfection.
Your Kitchen Arsenal
Essential:
✓ Stand mixer with dough hook (or biceps of steel)
✓ 9x5 inch loaf pan
✓ Kitchen thermometer
✓ Large mixing bowl

Nice to Have:
✓ Brioche mold (for that classic mushroom shape)
✓ Bench scraper
✓ Digital scale (baking by weight = accuracy)

Don't Skip:
✓ Pastry brush
✓ Plastic wrap
✓ Sharp knife or lame
✓ Wire cooling rack
Pro Tips
These are the lessons I learned after my first brioche turned into expensive butter soup:
🌡️ Temperature is Your Best Friend
The rule: Butter and eggs = room temperature. Always.
Cold butter won’t mix. It’ll just sit there in sad little chunks while you cry into your stand mixer.
Pull everything out one hour before you start.
Your kitchen is 65°F? Make it two hours.
| Too Cold | Just Right | Too Hot |
|---|---|---|
| Chunky butter bits | Smooth, silky dough | Melted butter mess |
| Won’t incorporate | Perfect emulsion | Greasy disaster |
| Dense bread | Cloud-like texture | Flat, heavy loaf |
⏰ Patience Isn’t Optional
Brioche is a slow dance, not a sprint.
First rise: 1.5-2 hours Fridge rest: 4-24 hours (yes, really) Second rise: 1.5-2 hours
Try to rush it? You’ll end up with dense, butter-logged bread.
The cold fridge rest isn’t just for convenience. It’s when the magic happens:
- Butter firms up (so you can actually shape the dough)
- Flavors develop (slow fermentation = complex taste)
- Gluten relaxes (easier to work with)
Skip this step and you’ll have buttery goo all over your hands. Ask me how I know. 😅
❄️ The Fridge Trick Nobody Tells You
After that first rise, the dough MUST go in the fridge.
Not “should.” Not “it’s nice if you remember.”
MUST.
Warm brioche dough is like trying to shape melted ice cream. The fridge transforms it from sticky nightmare into workable perfection.
Bonus: You can leave it there for up to 24 hours, which means you can fit brioche into your actual life instead of clearing your entire Sunday.
✨ Double Egg Wash = Bakery Shine
One coat of egg wash: meh, looks homemade
Two coats: people think you’re a professional
Here’s the technique:
- First coat: brush gently, let dry 2 minutes
- Second coat: brush again with confidence
- Result: that deep golden, glossy crust that screams “I know what I’m doing”
Beat the egg really well. No streaks. You want it completely smooth or you’ll have yellow and white patches on your bread.
🎯 Know Your Doneness Signals
Three things should happen:
Visual: Deep golden brown (not pale, not burnt) Temperature: 190°F in the center (use that thermometer!) Sound: Hollow when you tap the bottom
If even one is missing, it’s not done.
Pale and 190°F? Give it more time. Golden but only 180°F? Back in the oven.
Underbaked brioche = gummy center = sad breakfast.
Substitutions and Variations
Life happens. Ingredients run out. You want to switch things up.
Here’s your cheat sheet:
Flour Swaps
| Instead of… | Use… | What Changes |
|---|---|---|
| All-purpose flour | Bread flour | Slightly chewier, more structure |
| All-purpose flour | Half AP, half whole wheat | Nuttier flavor, denser texture |
My take: Bread flour makes a slightly sturdier brioche that’s perfect for French toast. All-purpose is more tender and delicate.
Dairy Alternatives
Milk substitutes:
- 2% milk → works great, slightly less rich
- Almond milk → adds subtle nutty flavor
- Oat milk → closest to whole milk texture
Butter substitutes:
- European butter (higher fat %) → even richer, more flavorful
- Dairy-free butter → works but texture won’t be identical
Fair warning: Vegan butter has more water content. Your dough might be stickier and need more flour.
Size & Shape Options
Same dough, different vibes:

→ Dinner Rolls
  Divide into 12 pieces
  Shape into balls
  Bake 15-18 minutes

→ Burger Buns
  Divide into 6 pieces
  Shape into flat rounds
  Bake 18-20 minutes

→ Brioche Buns (the fancy mushroom ones)
  Use a brioche mold
  Make the classic topknot shape
  Look like a bakery expert

→ Cinnamon Swirl
  Roll out dough
  Spread cinnamon sugar
  Roll up tight
  Bake as normal
Flavor Boosters
Sweet variations:
- Orange zest (1 tbsp) + vanilla (1 tsp)
- Lemon zest (1 tbsp) + poppy seeds (2 tbsp)
- Cardamom (1 tsp) for Nordic vibes
Savory twists:
- Reduce sugar to 2 tbsp
- Add fresh rosemary (2 tbsp, chopped)
- Add garlic powder (1 tsp) + herbs
Mix-ins (fold in during last minute of mixing):
- Chocolate chips: 1 cup
- Dried fruit: 3/4 cup
- Nuts: 3/4 cup, toasted
The dough is your canvas. Go wild.
PEOPLE ALSO LIKE: corn beef and cabbage recipe
Make Ahead Tips
The beauty of brioche: it works around YOUR schedule.
Timeline Options
Option 1: The Weekend Baker
Saturday morning: Mix and first rise
Saturday afternoon: Fridge rest starts
Sunday morning: Shape, second rise, bake
Sunday brunch: Fresh brioche 🎉
Option 2: The Weeknight Wonder
Monday night: Mix and first rise
Monday night: Into fridge (up to 24 hours)
Tuesday after work: Shape and second rise
Tuesday dinner: Warm brioche on the table
Option 3: The Overnight Genius
Night before: Mix, rise, shape, into fridge
Morning: Let sit 30 min while oven preheats
30 minutes later: Fresh bread without waking at dawn
The Breakdown
| Stage | Fridge Time | What Happens |
|---|---|---|
| After 1st rise | Up to 24 hours | Flavor develops, easier to shape |
| After shaping | 8-12 hours (overnight) | Slow rise = better taste |
| After baking | Up to 3 months (frozen) | Always have brioche ready |
Pro move: Make two loaves. Freeze one. Future you will be very grateful.
Freezing Like a Boss
To freeze:
- Cool completely (warm bread = ice crystals = sadness)
- Wrap tightly in plastic wrap
- Wrap again in aluminum foil
- Label with date (you won’t remember in 2 months)
- Freeze up to 3 months
To thaw:
- Leave on counter 2-3 hours
- Warm in 300°F oven for 10 minutes
- Tastes like you just baked it
Or slice before freezing and toast straight from frozen. Game changer for busy mornings.
How to Make Brioche Bread
Step 1: Wake Up the Yeast
Pour warm milk (110°F) into your stand mixer bowl.
Sprinkle yeast on top.
Add a pinch of sugar.
Walk away for 5-10 minutes.
You’re looking for: Foamy, bubbly surface that smells yeasty and alive
If nothing happens: Your yeast is dead or your milk was too hot (over 120°F = yeast murder). Start over with fresh yeast and test your milk temp.
Step 2: Build the Base
Add to the yeast mixture:
- All the flour
- Remaining sugar
- Salt
- All 4 eggs
Attach the dough hook.
Mix on low speed for 2-3 minutes.
What you’ll see: Shaggy, rough dough that looks kind of messy
This is normal. We’re just getting everything combined. The magic comes next.
Step 3: The Butter Transformation (This Takes Time)
With mixer running on medium-low, add butter one tablespoon at a time.
Wait until each piece mostly disappears before adding the next.
| Minute | What’s Happening |
|---|---|
| 0-3 min | Dough looks broken and greasy 😰 |
| 4-7 min | Still looks wrong, keep going |
| 8-10 min | Starting to come together |
| 10-15 min | BOOM Smooth, glossy, elastic dough ✨ |
The moment you’re waiting for: Dough pulls away from bowl sides, looks shiny, and passes the windowpane test (stretch a small piece thin without tearing).
Too wet? Add flour 1 tbsp at a time Too dry? Add milk 1 tsp at a time
Step 4: First Rise (The Patience Part)
Transfer dough to a greased bowl.
Cover with plastic wrap.
Find a warm spot (about 75°F).
Set a timer for 1.5-2 hours.
Testing doneness: Poke the dough. If the indent slowly springs back, you’re golden. If it stays deflated, give it more time.
Size check: Should double in volume and feel puffy, soft, almost fragile.
Step 5: The Crucial Chill
Punch down the dough (literally punch it to release air).
Cover bowl tightly.
Refrigerate minimum 4 hours, up to 24 hours.
“This is where impatient bakers fail. Cold dough = shapeable dough. Warm dough = buttery hand soup.”
Why this matters:
- Butter firms up → you can actually work with it
- Slow fermentation → complex flavor develops
- Gluten relaxes → easier to shape
Set a timer and go live your life.
Step 6: Shape Your Loaf
Butter your 9×5 inch pan generously. Don’t be shy.
Turn cold dough onto lightly floured surface.
Option A: Classic Braided Loaf
1. Divide dough into 3 equal pieces
2. Roll each into a 12-inch rope
3. Braid the three ropes together
4. Tuck ends underneath
5. Place in pan
Option B: Simple Rolled Loaf
1. Pat dough into 8x10 inch rectangle
2. Roll up tightly from short end (like a jelly roll)
3. Pinch seam closed
4. Place seam-side down in pan
Both are delicious. The braid is prettier. The roll is faster.
Your call.
Step 7: Second Rise (More Patience)
Cover pan loosely with plastic wrap.
Back to your warm spot for 1.5-2 hours.
What you’re looking for:
- Dough rises about 1 inch above pan rim
- Feels very soft and puffy
- Light finger poke → slow spring back
Don’t skip this rise. This is what creates that light, airy texture. Rush it and you get dense bread.
Step 8: The Golden Touch
Preheat oven to 375°F (start 20 min before rise is done).
Beat 1 egg with 1 tbsp milk until completely smooth.
First coat: Gently brush egg wash over entire surface Wait: 2 minutes for it to dry slightly Second coat: Brush again (this double coat = bakery shine)
Optional but fancy: Sprinkle with pearl sugar or sliced almonds
Step 9: Bake to Perfection
Into the oven for 35-40 minutes.
Timing guide:
- 25 min → check color, tent with foil if browning too fast
- 35 min → check internal temp (should read 190°F)
- 190°F reached → it’s done, even if timer says otherwise
Your senses:
- Eyes: Deep golden brown, not pale
- Nose: Buttery, toasty aroma filling your kitchen
- Thermometer: 190°F in the center
- Ears: Sounds hollow when you tap the bottom
All four = perfect brioche.
Step 10: The Hardest Part
Cool in pan for 10 minutes.
Turn out onto wire rack.
Cool completely before slicing. Minimum 30 minutes.
I know. The smell is torturous.
But hot bread is gummy inside. You’ve waited this long. Wait 30 more minutes.
Slicing tip: Use a serrated knife and saw gently. Don’t press down or you’ll squish all that beautiful airiness you worked so hard to create.
Leftovers and Storage
Brioche is so good you probably won’t have leftovers.
But if you do:
Storage Guide
| Method | Duration | Best For |
|---|---|---|
| Room temperature (airtight container) | 2-3 days | Immediate eating |
| Refrigerator | DON’T | Dries it out faster |
| Freezer (whole loaf) | Up to 3 months | Long-term storage |
| Freezer (sliced) | Up to 3 months | Quick breakfast access |
The golden rule: Room temp or freezer. Nothing in between.
Freezing Individual Slices (Life Hack)
1. Slice the entire loaf
2. Wrap each slice in plastic wrap
3. Put all slices in a freezer bag
4. Freeze flat so they don't stick together
5. Pull out exactly what you need
Morning routine: Frozen slice → toaster → 3 minutes → perfect toast
You won’t even know it was frozen.
Reviving Day-Old Brioche
Oven method (best):
- Preheat to 300°F
- Wrap loaf in foil
- Heat for 10 minutes
- Unwrap and enjoy warm
Microwave method (quick but not ideal):
- Wrap slice in damp paper towel
- Microwave 10-15 seconds
- Eat immediately
When It Goes Stale (The Good News)
Stale brioche is actually a gift:
French Toast 🍳
- Day-old brioche > fresh brioche
- Absorbs egg mixture without falling apart
- Crisps up better in the pan
- Stays custardy inside
Bread Pudding
- Cube stale brioche
- Mix with custard
- Bake until golden
- Basically dessert for breakfast
Panzanella
- Tear into chunks
- Toss with tomatoes, mozzarella, basil
- The fanciest salad you’ll ever make
Croutons
- Cube and toss with olive oil
- Bake until crispy
- Makes every soup better
“Stale brioche is just brioche with new career opportunities.”
Don’t throw it away. Transform it.
Nutritional Information
Let’s be real: this is rich bread.
It’s not your everyday sandwich bread. This is “I deserve something special” bread.
Per Slice (12 slices per loaf)
| Nutrient | Amount | % Daily Value* |
|---|---|---|
| Calories | 285 | – |
| Total Fat | 15g | 19% |
| – Saturated Fat | 9g | 45% |
| Cholesterol | 115mg | 38% |
| Sodium | 220mg | 10% |
| Total Carbohydrates | 31g | 11% |
| – Dietary Fiber | 1g | 4% |
| – Sugars | 6g | – |
| Protein | 6g | 12% |
| Vitamin A | – | 10% |
| Vitamin D | – | 8% |
| Iron | – | 6% |
*Based on a 2,000 calorie diet
The Good News
Yes, it’s high in butter and eggs.
But that also means:
- Vitamin A for vision and immune health
- Vitamin D for bone health
- B vitamins from the flour
- Protein from eggs
- Iron for energy
It’s not health food. But it’s not empty calories either.
Portion control tip: Cut thicker slices. One really good piece is more satisfying than two mediocre pieces of regular bread.
Enjoy it. Savor it. Don’t eat the whole loaf in one sitting (learned that one the hard way 😅).
Pairing Suggestions
Brioche is the Swiss Army knife of breads.
It works with everything.
Breakfast Champions
Classic Toast
- Brioche + butter + jam = perfection
- Keep it simple
- The bread is the star
French Toast Level: Expert 🍴
- Thick slices (1.5 inches)
- Soak in eggs, cream, vanilla
- Cook low and slow
- Top with berries and maple syrup
- Basically dessert for breakfast
Avocado Toast (But Make It Fancy)
- Toasted brioche
- Mashed avocado
- Poached egg
- Everything bagel seasoning
- Your brunch guests will be impressed
Lunch & Dinner Moves
| Dish | Why Brioche Works |
|---|---|
| Grilled cheese | Gets gloriously crispy, handles melty cheese |
| Burger buns | Sturdy enough for juicy burgers, soft enough to bite |
| Club sandwich | Rich enough to stand up to multiple fillings |
| Panini | That butter creates the best crust |
Pro tip for burgers: Toast the cut sides on the grill first. Game changer.
Soup’s Best Friend
Brioche + soup = chef’s kiss
Best pairings:
- French onion soup (duh, it’s French)
- Tomato bisque (that buttery richness works)
- Butternut squash soup (sweet + savory magic)
- Lobster bisque (fancy on fancy)
How to serve: Toasted cubes on top or thick slices on the side for dipping.
Dessert Mode Activated
Bread Pudding
- Cube brioche
- Soak in custard (eggs, cream, sugar, vanilla)
- Bake until golden
- Serve with ice cream
- Die happy
Pain Perdu (French Toast’s Fancy Cousin)
- Same concept as French toast
- But you say it with a French accent
- Suddenly it’s elegant
- Serve with crème fraîche and berries
Cheese Board Addition
Slice brioche thin.
Toast lightly.
Add to your cheese board.
Why it works:
- Buttery flavor complements cheese
- Soft texture is neutral canvas
- Fancy people expect bread anyway
- You look like you know what you’re doing
Best cheese pairings:
- Brie (creamy meets buttery = yes)
- Aged cheddar (sharp + rich = balance)
- Blue cheese (bold flavors need rich bread)
- Goat cheese (tangy pairs with sweet butter notes)
FAQ
Q: Why is my brioche dough so sticky?
Short answer: That’s normal.
Long answer: Brioche dough should be soft and slightly sticky because of all the butter and eggs. But if you literally cannot handle it at all, something’s off.
The fix:
- Add flour 1 tablespoon at a time while mixing
- Make sure you’re chilling it before shaping (cold = manageable)
- Use a bench scraper to work with it instead of just your hands
- Lightly flour your surface (emphasis on lightly)
If it’s still impossible to work with, your kitchen might be too warm. Chill everything.
Q: Can I make brioche without a stand mixer?
Yes. But RIP your arms. 💪
What you’re in for:
- 15-20 minutes of hand kneading
- Your forearms will burn
- Use the slap and fold method (Google it)
- It’s a workout, not a baking session
My take: If you make brioche more than once, buy a stand mixer. Your future self will thank you.
Q: My brioche didn’t rise. What happened?
Three usual suspects:
- Dead yeast
- Check expiration date
- Test it: yeast + warm water + sugar → should foam in 10 min
- No foam = dead yeast = buy new yeast
- Temperature issues
- Too hot (over 120°F) = you killed the yeast
- Too cold = yeast is just sleeping, give it more time
- Use a thermometer, don’t guess
- Wrong environment
- Yeast needs warmth (75°F is ideal)
- Cold kitchen = slow/no rise
- Try: oven with just the light on, or near a heater
Pro tip: If after 3 hours nothing has happened, start over. Don’t waste more time hoping it’ll magically work.
Q: Can I use a different pan size?
Sure, but adjust the baking time.
| Pan Size | What Changes |
|---|---|
| 8×4 inch | Taller loaf, add 5-10 minutes |
| 9×5 inch | Standard, use recipe time |
| Round cake pan | Wider, subtract 5 minutes |
| Muffin tin | Mini brioche buns, 15-18 minutes |
Golden rule: Don’t go by time alone. Use the internal temperature (190°F) as your guide.
Q: How do I know when the brioche is done?
The Three-Point Test:
✓ Visual: Deep golden brown (think caramel, not pale yellow) ✓ Temperature: 190°F in the center (get a thermometer, seriously) ✓ Sound: Tap the bottom, it should sound hollow
All three must be true. If even one fails, it’s not done.
What underbaked looks like: Pale top, gummy center, doughy smell What overbaked looks like: Dark brown (almost burnt), dry texture, house smells slightly burnt
Aim for that sweet spot in the middle.
Q: Can I make this dairy-free?
You can try. Results vary.
The swaps:
- Regular butter → dairy-free butter
- Whole milk → almond/oat milk
The reality:
- Vegan butter has more water = stickier dough
- May need extra flour
- Texture won’t be identical
- Flavor will be different (butter is butter for a reason)
My honest take: If you need dairy-free, this recipe can work, but it won’t be traditional brioche. The butter is kind of the whole point.
Q: Why does my brioche have a dense layer at the bottom?
Most common reason: Underproofed.
What happened:
- Dough went in the oven too early
- Yeast didn’t create enough air pockets
- Bottom stayed heavy and dense
The fix:
- Give it more time in the second rise
- Dough should be very puffy, almost wobbly
- Do the poke test: gentle press → slow spring back = ready
Other possible reasons:
- Oven too hot (yeast died before it could finish rising)
- Too much butter pooled at bottom (room temp ingredients fix this)
Q: Can I add chocolate chips or other mix-ins?
Absolutely!
How much: Up to 1 cup of add-ins
When to add: Last minute of mixing (fold in gently)
Best mix-ins:
- Chocolate chips (dark, milk, or white)
- Dried fruit (cranberries, raisins, apricots)
- Nuts (toasted pecans, walnuts, almonds)
- Orange zest + chocolate chips = 👨🍳💋
For filled brioche:
- Roll out dough after cold rest
- Spread filling (Nutella, cinnamon sugar, jam)
- Roll up tight
- Continue with second rise and baking
Warning: Don’t overload. Too many add-ins = dough can’t hold structure = flat bread.
Q: My brioche is pale. Did I do something wrong?
Two things determine color: egg wash and oven temp.
Fix #1: Better egg wash
- Beat the egg really well (no streaks)
- Apply two coats
- Don’t skip this step
Fix #2: Check your oven
- Is it actually 375°F? (ovens lie)
- Use an oven thermometer
- Position rack in center (not top or bottom)
Fix #3: Give it time
- Don’t pull it early just because timer went off
- That golden color takes time to develop
- Wait for 190°F internal temp
Pale brioche still tastes good, but that golden crust is where the flavor lives.
Q: Can I make the dough in a bread machine?
Yes, but only for mixing.
The process:
- Add ingredients to bread machine
- Use dough setting for mixing only
- Stop machine after mixing (don’t let it bake)
- Transfer to bowl for first rise
- Continue with recipe as written
Why not bake in the machine: Brioche needs that cold rest and proper shaping. The machine can’t give you that braided loaf or proper texture.
Use the machine as a fancy mixer, not a baker.
Wrapping Up
Here’s the truth about homemade brioche:
It seems fancy and complicated until you actually make it.
Then you realize it’s just butter, eggs, flour, and patience. The stand mixer does the heavy lifting. You just have to trust the process and not rush it.
That first moment when you pull a golden, perfectly risen loaf from your oven? When your whole house smells like a Parisian bakery? When you take that first bite and realize you’ll never buy expensive bakery bread again?
That’s when you get it.
This is the kind of bread that ruins you for all other bread. The kind you can’t stop eating even though you’re full. The kind that makes you text your friends “you have to try this.”
Six hundred years of French baking expertise went into perfecting this recipe.
And now you can make it in your kitchen on a random Tuesday.
The braided loaf looks impressive on your counter. The smell makes everyone in a three-block radius jealous. The taste speaks for itself.
Make it on a lazy Sunday when you’re home anyway. Make it for holiday gifts (wrap it in parchment paper with a ribbon, instant fancy). Make it because you deserve bread that actually tastes like something.
Your first loaf might not be perfect. That’s fine. It’ll still taste incredible.
Your second loaf will be better. By your third, you’ll be the person everyone asks to bring bread to dinner.
So grab your butter, set aside a few hours, and let’s make some magic happen.
Then come back here and drop a comment. Tell me:
What are you putting on your first slice? Butter and jam? Nutella? Making French toast? Or are you brave enough to eat it plain and let that buttery flavor shine?
Did you braid it or roll it? How fast did your family devour it? Any disasters I can help troubleshoot?
I want to hear all about it. Every triumph, every question, every “I can’t believe I made this myself” moment.
Drop your experience below. Let’s talk bread.


