Ever stood in line for 45 minutes just to get a cup of dessert?
That’s what people do at Magnolia Bakery in New York City. Not for cupcakes. Not for cake. For banana pudding.
And after you taste it, you get why.
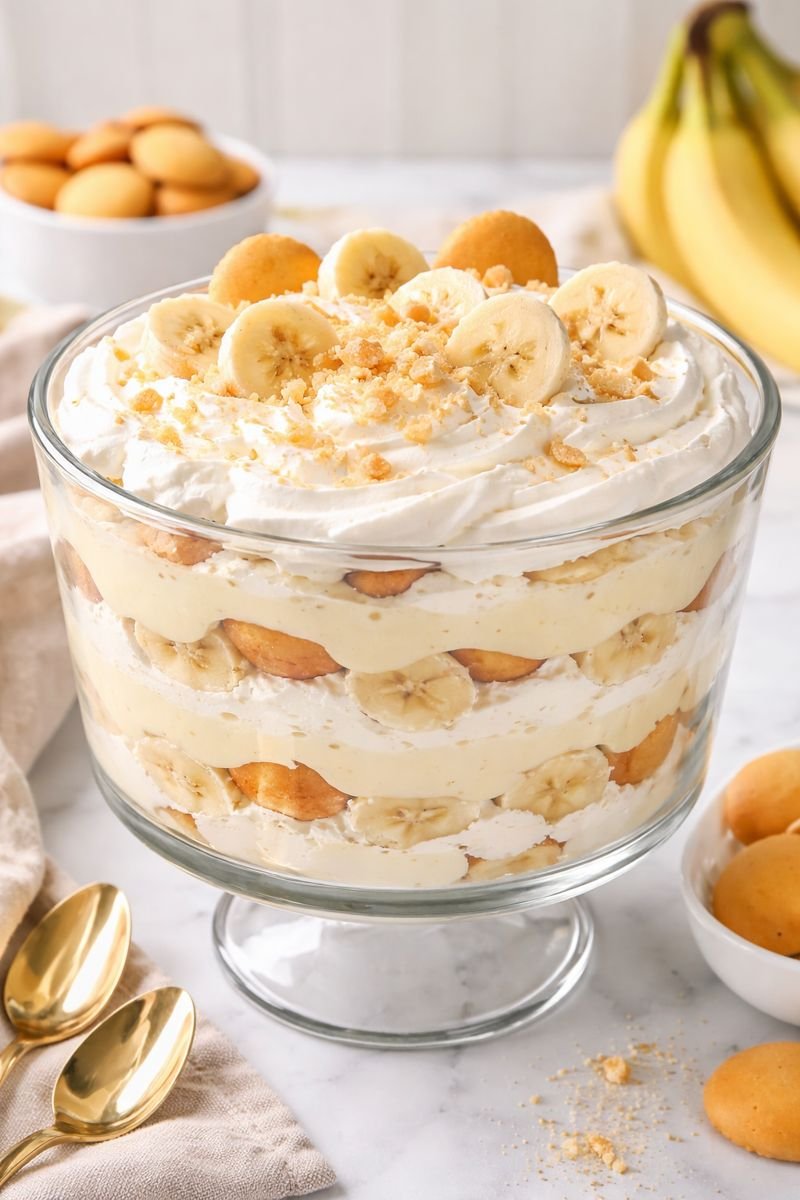
This isn’t your grandma’s banana pudding (no offense to grandma). This is layers of vanilla wafers, fresh bananas, and the creamiest, dreamiest pudding that somehow tastes like childhood but elevated.
The kind of dessert that makes you close your eyes and forget you’re standing in a crowded bakery.
Here’s the thing: you can make it at home. Same taste. No line. No $8 tiny cup.
I’m walking you through the exact recipe that made Magnolia Bakery famous. Not some knockoff version. The real thing.
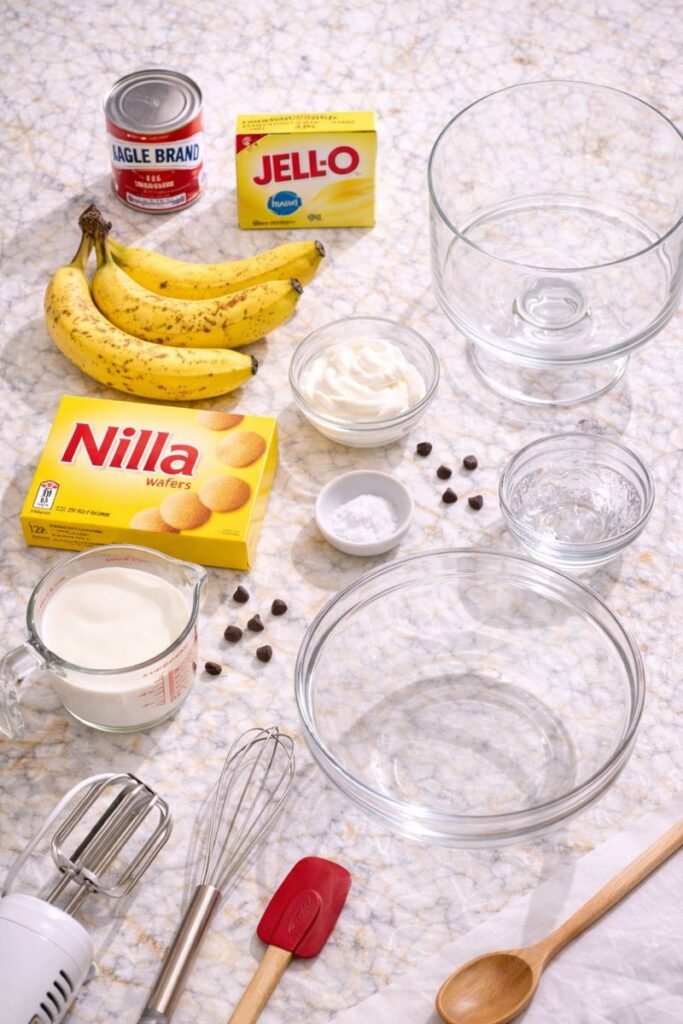
What You’ll Need
Pudding Ingredients
| Ingredient | Amount | Notes |
|---|---|---|
| Sweetened condensed milk | 1 (14-oz) can | Don’t use regular milk |
| Ice-cold water | 1½ cups | Must be ICE cold |
| Instant vanilla pudding mix | 1 (3.4-oz) box | Jell-O brand works best |
| Heavy cream | 3 cups | Must be cold from fridge |
| Ripe bananas | 4-5 medium | Yellow with few spots |
| Nilla Wafers | 1 (12-oz) box | You’ll use about ¾ box |
Essential Tools
You’ll love these too : banana muffin recipe
- Large mixing bowl (for pudding base)
- Electric mixer (hand or stand mixer)
- Medium bowl (for whipping cream)
- Wire whisk
- Large trifle dish or 9×13 baking dish (or individual cups)
- Rubber spatula (for folding)
- Sharp knife (for slicing bananas)
The Secret Behind Magnolia’s Success
“We’ve been making this banana pudding the same way since 1996. People fly across the country for it.” – Magnolia Bakery
What makes their version different?
The texture. Most banana puddings are dense and heavy. This one is light, fluffy, almost mousse-like.
The ratio. More whipped cream than pudding. That’s the secret.
The overnight rest. The wafers transform into something between cookies and cake.
Let me show you exactly how to nail it.
Pro Tips (Read These First!)
1. Whip That Cream Like Your Life Depends On It
Your whipped cream needs to be stiff peaks. Not soft peaks. Not medium peaks. STIFF.
Here’s how to test: Turn off the mixer. Lift the beaters straight up. The peaks should stand straight up like little mountains. If they flop over even slightly, keep beating.
This takes about 3-4 minutes with an electric mixer.
Why it matters: Floppy cream = runny pudding. Stiff cream = that signature cloud-like texture.
2. Your Banana Ripeness Guide
| Too Green | Perfect ✓ | Too Ripe |
|---|---|---|
| All yellow, no spots | Yellow with 5-10 small brown spots | Brown and mushy |
| Tastes like cardboard | Sweet and firm | Makes pudding brown |
| Hard to slice | Slices clean | Falls apart |
Pro move: If your bananas are too green, put them in a paper bag with an apple overnight. The ethylene gas speeds up ripening.
3. The Overnight Rule Is Non-Negotiable
I know you want to eat it right away. I get it.
But here’s what happens when you let it sit overnight:
Hour 1: Wafers are still crunchy
Hour 4: Wafers start softening
Hour 8: Magic begins
Hour 12+: Wafers turn into soft, cake-like layers that melt in your mouth
Skip this and you’re eating good banana pudding. Wait overnight and you’re eating Magnolia Bakery banana pudding.
Big difference.
4. Use a Clear Dish (Trust Me)
| Opaque Dish | Clear Dish ✓ |
|---|---|
| Looks like any dessert | Shows off gorgeous layers |
| People serve themselves cautiously | People’s eyes light up |
| “Oh, banana pudding” | “WOW, what is THAT?” |
The visual impact is real. Those layers deserve to be seen.
5. Don’t You Dare Skip the Sweetened Condensed Milk
Some recipes try to swap it for:
- Regular milk ❌
- Half-and-half ❌
- More cream ❌
None of these work.
Sweetened condensed milk gives you:
- That signature richness
- Just-sweet-enough flavor (not too sweet!)
- The right consistency
- The authentic Magnolia taste
There’s no substitute. Don’t even try.
Recommended for you : banana pepper recipe
Step-by-Step Instructions:
Step 1: Make the Pudding Base (5 minutes)
Grab your large mixing bowl.
Pour in the sweetened condensed milk and ice-cold water. Whisk them together until smooth and combined. About 30 seconds.
Add the instant vanilla pudding mix. Whisk for 2 full minutes. Set a timer. Don’t cheat.
The mixture will thicken up and get creamy. That’s what you want.
Pop it in the fridge while you move to step 2.
Step 2: Whip the Cream (4 minutes)
Pour 3 cups of heavy cream into your medium bowl.
Start your mixer on medium speed. After 30 seconds, increase to medium-high.
Beat for 3-4 minutes until you see stiff peaks.
How to tell you’re done:
- Turn off mixer
- Lift beaters straight up
- Peaks stand straight without drooping
- Cream looks thick and glossy
If it’s not there yet, keep going. This is crucial.
Step 3: Combine (3 minutes)
Pull your pudding base from the fridge.
Add about ⅓ of the whipped cream to the pudding. Using your rubber spatula, gently fold it in. This lightens the pudding and makes the next step easier.
Now add the rest of the whipped cream. Fold gently, scraping from the bottom and turning the mixture over on itself.
Don’t stir or whisk. You’ll deflate all that beautiful air you just created.
Stop when you no longer see white streaks. The mixture should be pale yellow and incredibly fluffy.
Step 4: Prep Your Bananas (2 minutes)
Peel your bananas. Slice them into ¼-inch rounds.
Thickness matters:
- Too thin (⅛ inch or less): They disappear into the pudding
- Just right (¼ inch): Perfect texture and visibility
- Too thick (½ inch or more): Layers won’t stack nicely
You may also like : banana brownie recipe
Step 5: Layer Like a Boss (8 minutes)
Here’s your layering blueprint:
Bottom Layer:
- Spread ⅓ of the pudding mixture evenly across the bottom of your dish
- Arrange vanilla wafers in a single layer (break them in half if needed to fit)
- Top with half your banana slices
Middle Layer:
- Spread another ⅓ of the pudding mixture
- Another layer of vanilla wafers
- Remaining banana slices
Top Layer:
- Final ⅓ of pudding mixture
- Smooth the top with your spatula
The Finishing Touch: Crush 8-10 vanilla wafers into small pieces. Sprinkle them over the top. Or stick a few whole wafers standing up around the edges for that bakery look.
Step 6: The Waiting Game (4+ hours)
Cover your dish tightly with plastic wrap. Make sure it’s touching the surface to prevent a skin from forming.
Refrigerate for at least 4 hours, but overnight is where the magic lives.
During this time:
- Wafers soften and become cake-like
- Flavors meld together
- Everything sets up perfectly
- Your patience is rewarded
Substitutions and Variations
Flavor Twists
| Variation | What to Change | Result |
|---|---|---|
| Chocolate Banana | Swap vanilla pudding for chocolate | Rich, like chocolate-covered bananas |
| Peanut Butter Banana | Drizzle melted PB between layers | Elvis would approve |
| Banana Foster | Add 2 tbsp rum extract to pudding | Grown-up version |
| Strawberry Banana | Add sliced strawberries with bananas | Fruity and fresh |
| Salted Caramel | Drizzle caramel sauce between layers + sea salt on top | Sweet and salty perfection |
Dietary Swaps (Proceed with Caution)
Dairy-Free:
Replace heavy cream with coconut cream (the thick stuff from a can of coconut milk, chilled overnight). Use dairy-free vanilla wafers.
Fair warning: I haven’t tested this myself. The texture might not be identical.
Lower Sugar:
Use sugar-free instant pudding. Everything else stays the same.
Reality check: It’s still dessert. It’s still got sweetened condensed milk and cookies. Don’t fool yourself too much.
Presentation Options
Individual Servings:
- Mason jars (8 oz size)
- Parfait glasses
- Clear plastic cups for parties
The Single-Serve Advantage:
- Perfect portion control
- Easy to grab and go
- Instagram-worthy
- No fighting over who gets the corner piece
Make Ahead Strategy
This is one of those rare desserts that gets better with time.
Timeline Guide
| When to Make | Result |
|---|---|
| Day of serving | Good, but wafers still crunchy |
| 1 day ahead | Better, wafers softening nicely ✓ |
| 2 days ahead | Best, perfect texture ✓ |
| 3+ days ahead | Bananas start browning ❌ |
My recommendation: Make it exactly 24 hours before you need it. That’s the sweet spot.
Party Prep Pro Tips
For a Saturday dinner party:
- Make it Friday evening
- Serve Saturday night
- Everyone loses their minds
- You look like a genius
For meal prep:
- Make Sunday night
- Enjoy Monday and Tuesday
- Maybe Wednesday if you’re lucky
- After that, the bananas get funky
Leftovers and Storage
How to Store
Keep it covered tightly in the fridge. Plastic wrap directly on the surface prevents drying out.
Shelf life: 3 days maximum
After that, the bananas break down and release water. The whole thing gets watery and sad.
The Banana Brown Problem
Here’s what nobody tells you: bananas oxidize. They turn brown. It happens.
Ways to slow it down:
- Toss banana slices in 1 tablespoon lemon juice before layering
- Press plastic wrap directly onto the pudding surface
- Store in an airtight container
Real talk: Once everything is layered and chilled, you barely notice the browning. The taste is still perfect.
Leftover Hacks
If you know you’ll have leftovers (unlikely, but possible):
Option 1: Make it in individual cups. Give away the extras. Be everyone’s favorite person.
Option 2: Hold back on adding bananas to certain sections. Those portions last longer.
Option 3: Just accept that leftovers are temporary. This stuff disappears FAST.
Nutritional Breakdown
Per Serving (based on 12 servings)
| Nutrient | Amount | % Daily Value |
|---|---|---|
| Calories | 385 | |
| Total Fat | 21g | 27% |
| Saturated Fat | 13g | 65% |
| Carbohydrates | 47g | 16% |
| Sugar | 35g | |
| Protein | 4g | 8% |
| Cholesterol | 75mg | 25% |
| Sodium | 180mg | 8% |
| Potassium | 280mg | 6% |
Is it healthy?
No. Absolutely not.
Is it worth every single calorie?
Yes. Every. Single. One.
Perfect Pairings
What to Serve With It
This pudding is rich. You need balance.
The Coffee Rule:
Strong black coffee cuts through the sweetness perfectly. Espresso is even better.
The Fresh Fruit Strategy:
A handful of raspberries or strawberries on the side adds tart contrast. Blueberries work too.
The Meal Pairing:
| After This Meal | Banana Pudding Works Because |
|---|---|
| Grilled chicken | Light main, room for rich dessert ✓ |
| Fish and veggies | Same logic, perfect balance ✓ |
| BBQ or ribs | Too heavy, skip dessert ❌ |
| Pasta with cream sauce | Carb and cream overload ❌ |
The Sharing Factor
This is not a solo dessert.
Make it for:
- Family dinners
- Potlucks (you’ll be the star)
- Birthday parties
- Random Tuesdays when you need to feel special
- Anytime you want people to love you 😊
Time Breakdown
| Phase | Time Required |
|---|---|
| Prep work | 20 minutes |
| Assembly | 10 minutes |
| Minimum chill time | 4 hours |
| Ideal chill time | Overnight (8-24 hours) |
| Total active time | 30 minutes |
| Total time with chilling | 4+ hours |
| Serves | 10-12 people |
The bottom line: 30 minutes of work for a dessert that’ll make you legendary.
FAQ
Can I use Cool Whip instead of making whipped cream?
You can, but you shouldn’t.
Cool Whip has stabilizers and artificial flavors. Real whipped cream tastes completely different. Plus, whipping cream takes 4 minutes. It’s worth it.
If you absolutely must use Cool Whip (no judgment), use 8 oz of thawed Cool Whip in place of the whipped heavy cream.
Why is my pudding runny?
Three possible reasons:
- Your whipped cream wasn’t stiff enough. Go back and read Pro Tip #1. Soft peaks don’t cut it.
- You didn’t chill it long enough. The pudding needs time to set up properly. Minimum 4 hours, remember?
- Your bananas were too ripe. Mushy bananas release water. Use firm bananas with just a few spots.
Can I freeze banana pudding?
Short answer: No.
Long answer: Technically you can freeze anything. But should you? Also no.
Here’s what happens:
- Bananas get mushy and gross when thawed
- The pudding separates
- The wafers turn soggy in a bad way
- The texture is completely ruined
Just make it 1-2 days ahead instead. Problem solved.
Do I have to use instant pudding or can I make it from scratch?
The Magnolia Bakery recipe specifically uses instant pudding. That’s part of the magic.
If you use homemade pudding:
- Different texture (denser)
- Different flavor profile
- Different setting time
- Different dessert
It might still be good! But it won’t be the Magnolia Bakery version you’re after.
My bananas turned brown. Did I ruin it?
Nope! Bananas naturally oxidize. It’s just what they do.
The fix: Toss your banana slices in 1 tablespoon of lemon juice before layering. This slows the browning.
The reality: Once everything is mixed together and chilled, you barely notice. The taste is completely unaffected.
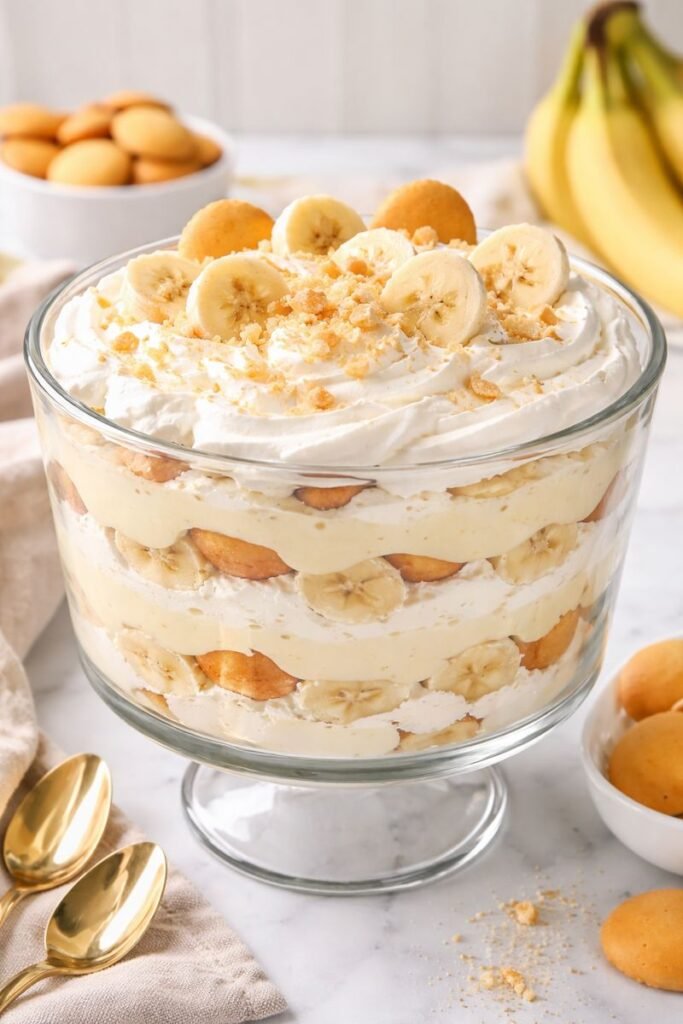
Can I make this in a trifle bowl?
YES.
Actually, a trifle bowl is one of the best ways to show off those gorgeous layers. The clear glass shows everything off beautifully.
Just follow the same layering instructions. It’ll look stunning.
How do I know when my whipped cream is ready?
Here’s the foolproof test:
- Turn off your mixer completely
- Lift the beaters straight up out of the cream
- Look at the peaks left behind
What you’re looking for:
- Peaks that stand up straight without flopping over
- Thick, glossy appearance
- Holds its shape when you move the bowl
Not ready yet:
- Peaks that droop or fold over (keep beating!)
- Looks thin or runny (definitely keep beating!)
Can I add other fruits?
Sure! But you’ll be creating a different dessert.
Fruits that work:
- Strawberries (sliced)
- Blueberries (whole)
- Raspberries (whole, but they’re delicate)
Fruits that don’t work:
- Watermelon (too watery)
- Oranges (too acidic)
- Pineapple (texture clash)
My take: Bananas are classic for a reason. Stick with the original your first time. Then experiment.
Wrapping Up
There’s a reason people line up around the block for this dessert.
It’s simple but special. Nostalgic but somehow feels fancy. And most importantly, it’s absolutely delicious.
Those layers of vanilla wafers that soften into something almost cake-like. The fresh bananas that add natural sweetness. That fluffy, dreamy pudding situation happening throughout.
It all just works.
Make this for your next gathering and prepare for people to ask you for the recipe. Make it on a random Tuesday because you deserve something sweet. Make it and share it with people you love.
The best part? You now have the exact recipe that made a New York bakery famous. No plane ticket required. No 45-minute wait. Just you, six ingredients, and 30 minutes of work.
Come back here and tell me about it. Did you add your own twist? Did you make it in individual cups? Did people lose their minds over it?
Drop a comment below. I want to hear all about your banana pudding adventures. 🍌


1 thought on “Magnolia Bakery Banana Pudding Recipe (The Real Deal)”