
Is fall baking really complete if you haven’t made at least one questionable dessert decision that turns out absolutely perfect?
That’s the whole vibe with dump cakes. You literally dump everything in a pan and somehow it comes out tasting like you spent hours in the kitchen. And this pumpkin version? It’s the kind of thing that makes people ask for seconds before they’ve finished their first slice.
I’m talking warm spiced pumpkin filling topped with buttery cake pieces and pecans that get all caramelized and crunchy. The whole thing takes maybe 10 minutes to throw together, and your kitchen will smell like a fall candle came to life.
You don’t need to be good at baking. You don’t even need to really like baking. You just need a can of pumpkin and the ability to open boxes.
Let’s get into it.
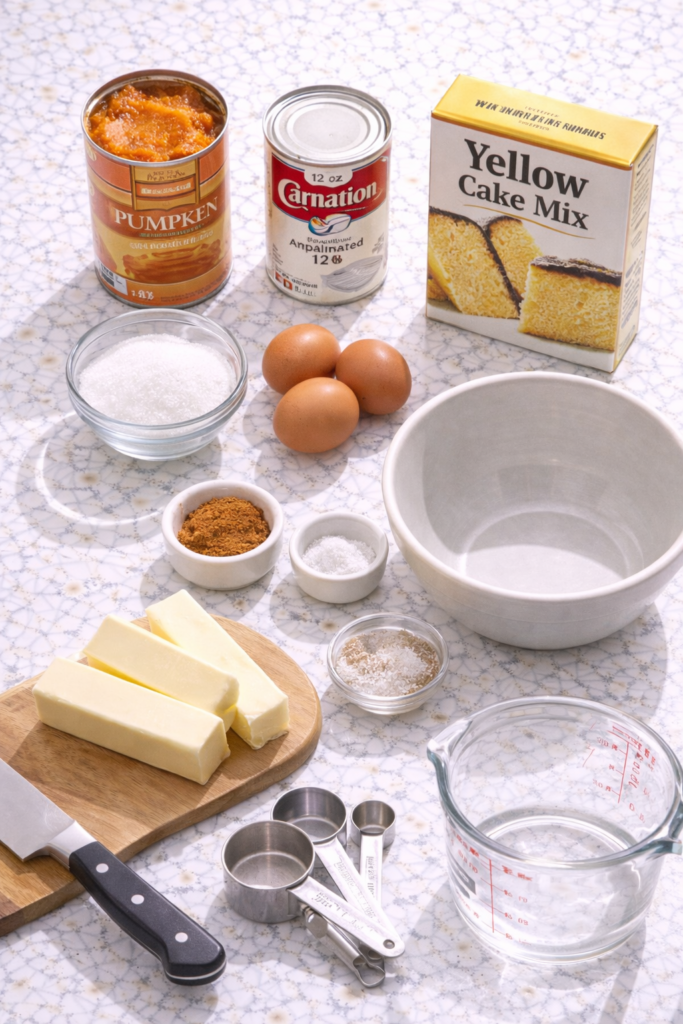
What You’ll Need
For the Pumpkin Layer
| Ingredient | Amount | Notes |
|---|---|---|
| Pumpkin puree | 1 can (15 oz) | NOT pumpkin pie filling |
| Evaporated milk | 1 can (12 oz) | Regular milk won’t work |
| Eggs | 3 large | Room temp is best |
| Granulated sugar | 1 cup | White sugar only |
| Pumpkin pie spice | 2 teaspoons | Or make your own blend |
| Salt | 1/2 teaspoon | Enhances all the flavors |
For the Topping
| Ingredient | Amount | Notes |
|---|---|---|
| Yellow cake mix | 1 box (15.25 oz) | Any brand works |
| Unsalted butter | 1 cup (2 sticks) | Must be melted |
| Chopped pecans | 1 cup | Walnuts work too |
| Toffee bits | 1/2 cup | Optional but amazing |
For Serving
Vanilla ice cream or whipped cream (non-negotiable, trust me)
Tools You’ll Need
You may also like : strawberry cake recipe
You probably have all of this already:
9×13 inch baking dish (glass or metal, doesn’t matter)
Large mixing bowl (for the pumpkin mixture)
Whisk (or a fork if you’re feeling rebellious)
Measuring cups and spoons (accuracy matters here)
Small microwave-safe bowl (for melting butter)
That’s it. No mixer, no fancy equipment, no stress.
Pro Tips
💡 Don’t skip the evaporated milk. Regular milk won’t give you that rich, creamy texture. The evaporated milk is what makes this taste like actual pumpkin pie instead of just pumpkin-flavored cake.
💡 Use real butter, not margarine. The butter creates these little pockets of crispy, golden cake on top. Margarine just makes everything sad and greasy. You want those crispy bits.
💡 Let it cool for at least 20 minutes before serving. I know it’s hard. The smell alone will make you want to dive in immediately. But the filling needs time to set up or you’ll just have pumpkin soup with cake bits floating in it.
💡 Toast the pecans first if you have time. Five minutes in a 350°F oven makes them so much better. More flavor, better crunch. Worth the extra step if you’re not in a total rush.
💡 Check your cake mix box. Some brands are 15.25 oz, some are 16.5 oz. Either works fine, but if yours is bigger, you might need a little extra butter to keep everything moist.
Substitutions and Variations
Nut Options
| Instead of Pecans | Try This |
|---|---|
| Walnuts | Same amount, similar flavor |
| Almonds | Chop them small |
| No nuts | Skip entirely or use granola |
Flavor Twists
Chocolate lovers: Use chocolate cake mix instead of yellow. Pumpkin and chocolate is an underrated combo that people sleep on.
Make it boozy: Add 2 tablespoons of bourbon to the pumpkin mixture. Very fall, very adult, very good.
Spice it your way: Not into pumpkin pie spice? Use this blend instead:
- 1 teaspoon cinnamon
- 1/2 teaspoon ginger
- 1/4 teaspoon nutmeg
- 1/4 teaspoon cloves
Add chocolate chips: Sprinkle 1/2 cup over the cake mix before adding butter. Game changer.
Dietary Swaps
| Need | Use This Instead |
|---|---|
| Gluten-free | Gluten-free yellow cake mix |
| Dairy-free | Coconut milk + vegan butter |
| Less sugar | Reduce sugar to 3/4 cup |
Make Ahead Tips
Prep in advance: Mix the pumpkin layer, pour it in the pan, cover, and refrigerate for up to 4 hours. Add the cake mix, butter, and pecans right before baking. Add 5 extra minutes to baking time.
Next-day magic: Some people swear this tastes even better the second day after all the flavors have melded together. Store covered at room temperature for 24 hours or refrigerate for up to 4 days.
You’ll love these too : Orange cake recipe
How to Make Pumpkin Dump Cake

Step 1: Prep Your Pan
Preheat your oven to 350°F.
Grease a 9×13 inch baking dish with butter or cooking spray. Don’t skip this or you’ll be scraping bits of cake off the bottom of your pan later.
Step 2: Make the Pumpkin Layer
In a large bowl, whisk together:
- Pumpkin puree
- Evaporated milk
- Eggs
- Sugar
- Pumpkin pie spice
- Salt
Whisk until completely smooth. It should look like thick batter, kind of like if pumpkin pie filling and cake batter had a baby.
Step 3: Layer It Up
Pour it in: Spread the pumpkin mixture evenly in your prepared baking dish. Use a spatula to make sure it’s level.
Add the cake mix: Sprinkle the dry cake mix evenly over the pumpkin layer. Don’t mix it in. This is the “dump” part. You’re just creating layers.
⚠️ Important: Do NOT stir the cake mix into the pumpkin. Just sprinkle and leave it alone.
Step 4: The Butter Magic
Drizzle the melted butter evenly over the cake mix. Try to get it as distributed as possible. Some dry spots are fine, but you want most of the cake mix moistened.
Top with pecans: Sprinkle the chopped pecans (and toffee bits if using) over everything. They’ll sink in a little as it bakes and get all toasty and perfect.
Step 5: Bake to Golden Perfection
| Baking Time | Visual Cues |
|---|---|
| 50-60 minutes | Edges bubbling vigorously |
| Top is golden brown | |
| Center slightly jiggly (will firm up) | |
| Toothpick comes out mostly clean |
Recommended for you : yellow cake recipe
Step 6: Cool and Serve
Let it sit for at least 20 minutes. I know you’ll want to dig in immediately, but patience pays off here.
Scoop it into bowls (this isn’t a neat slice-and-serve situation) and top with vanilla ice cream or whipped cream.
Watch that ice cream melt into all the warm, spiced pumpkin goodness and try not to eat the whole pan. 🍨
What Makes This Different From Regular Pumpkin Pie?
| Pumpkin Pie | Pumpkin Dump Cake |
|---|---|
| Need to make crust | No crust needed |
| One texture throughout | Multiple textures (creamy + crispy) |
| Slices neatly | Scoops like cobbler |
| Takes 2+ hours | Takes 1 hour total |
| Needs to chill completely | Serve warm |
| Traditional holiday dessert | Casual crowd-pleaser |
Leftovers and Storage
Storage Guide
| Method | Duration | Best For |
|---|---|---|
| Room temperature (covered) | 24 hours | Next-day snacking |
| Refrigerator (covered) | 4 days | Meal prep |
| Freezer (wrapped portions) | 3 months | Long-term storage |
Reheating Instructions
Microwave method: Scoop into a bowl, heat 30-45 seconds
Oven method: Cover with foil, warm at 300°F for 15 minutes
Pro move: Reheat with a scoop of ice cream on top so it melts as it warms. You’re welcome.
Nutrition Snapshot
Per serving (1/12 of pan):
Calories: ~380 | Fat: 18g | Carbs: 52g | Protein: 5g | Sugar: 35gNote: Add another 150 calories if you’re doing the ice cream thing (which you should)
FAQ
Can I use pumpkin pie filling instead of pumpkin puree?
Technically yes, but you’ll want to skip the sugar and spices in the recipe since the pie filling already has them. I’d still recommend using pure pumpkin puree for better control over sweetness and spice levels.
Why is it called a dump cake?
Because you literally dump the ingredients in layers without mixing. It’s the least fancy name for something that tastes this good.
The concept started in the 1970s when someone realized you could make dessert by just dumping canned fruit, cake mix, and butter in a pan. Genius.
Can I make this in a smaller pan?
Sure! Use an 8×8 or 9×9 pan and cut all ingredients in half.
Baking time will be closer to 40-45 minutes. Keep an eye on it.
Do I really need to melt the butter?
Yes. Some people slice cold butter and dot it over the top, but melted butter distributes better and creates more of those crispy golden bits we’re after.
Cold butter = uneven coverage = sad dry patches of cake mix that never get crispy.
Can I add other toppings?
Absolutely! Try these:
Shredded coconut (1/2 cup sprinkled with the pecans)
Crushed gingersnaps (1/2 cup for extra spice)
Streusel topping (if you’re feeling fancy)
Mini marshmallows (add in the last 10 minutes of baking)
How do I know when it’s done?
Look for these signs:
- Edges bubbling vigorously ✓
- Top golden brown ✓
- Center still slightly jiggly (it’ll set as it cools) ✓
- Toothpick comes out with moist crumbs, not wet batter ✓
Can I make this dairy-free?
Absolutely!
| Dairy Ingredient | Dairy-Free Swap |
|---|---|
| Evaporated milk | Full-fat coconut milk |
| Butter | Vegan butter (melted) |
Everything else stays the same. Works great.
Will this work in a slow cooker?
I haven’t tried it, but people online say yes. Cook on low for 3-4 hours. The top won’t get as crispy, but it’ll still taste good.
Can I double this recipe?
You can, but you’ll need two 9×13 pans. Don’t try to make it in one huge pan or the middle won’t cook through.
Serving Ideas That Slap
| Pairing | Why It Works |
|---|---|
| Vanilla ice cream | Classic for a reason |
| Whipped cream | Lighter option, still delicious |
| Caramel sauce drizzle | Extra sweetness, extra wow factor |
| Coffee or chai latte | The spices complement perfectly |
| Bourbon or rum | Adult dinner party vibes |
Wrapping Up
This pumpkin dump cake is one of those recipes you’ll come back to every fall. It’s stupid easy, tastes amazing, and makes your whole house smell incredible.
The best part? People will think you actually tried. Like really tried. Let them believe it.
Make it for Thanksgiving. Make it for a random Tuesday. Make it because you bought a can of pumpkin in September and it’s been sitting in your pantry judging you ever since.
📝 Your turn: After you make it, come back and tell me what you thought. Did you add anything extra? Did you eat it straight from the pan at midnight? Did your family demand you make it every week until New Year’s?
Drop a comment below. I wanna hear how it turned out for you.


1 thought on “Pumpkin Dump Cake (That’ll Make You Forget Every Other Fall Dessert)”