You know what’s wild?
Most people have never actually tasted a truly great chocolate chip cookie.
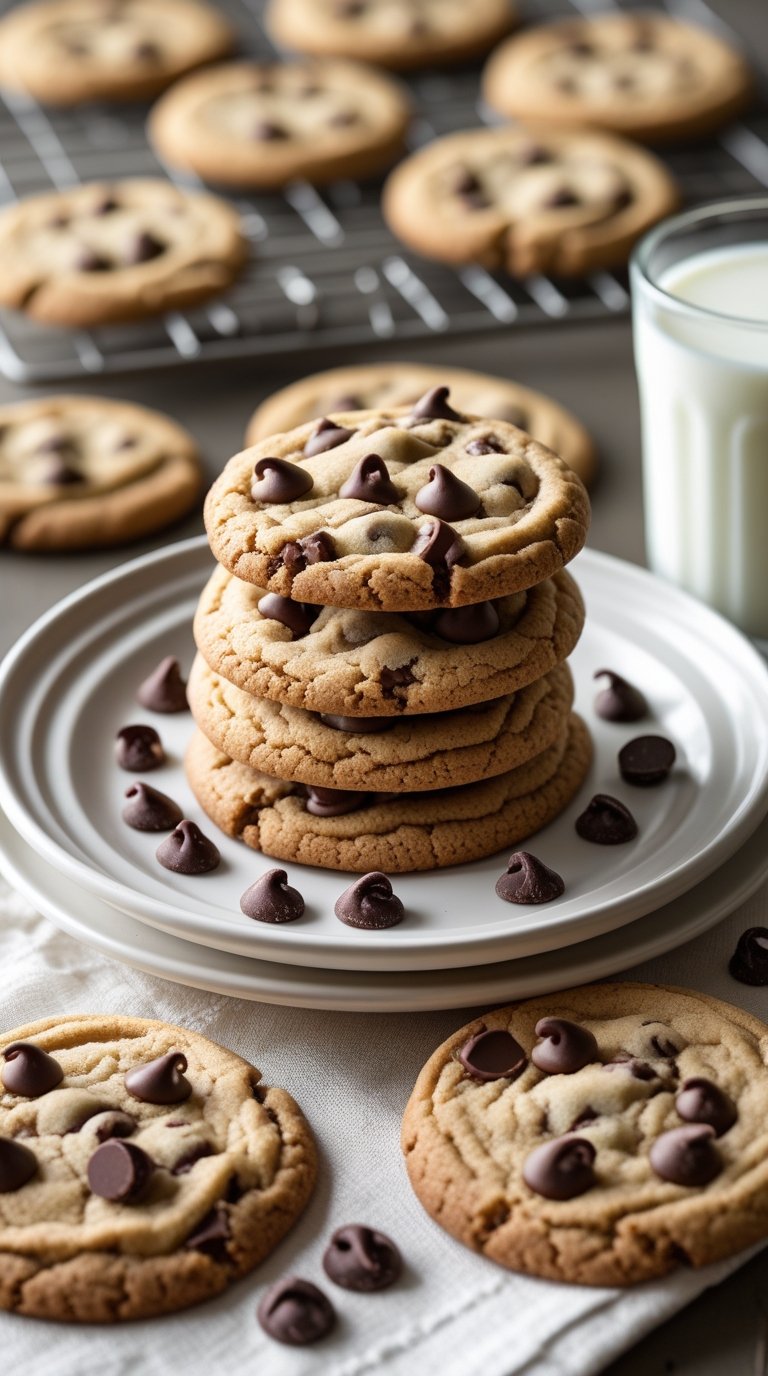
I’m talking about the kind with crispy edges that shatter when you bite down. The kind with a center so soft and gooey it’s basically edible cloud. The kind where the chocolate melts into little pools of heaven and the butter flavor is so rich you can taste it three bites later.
This recipe? It does all that.
I spent years making cookies that were just okay. They were fine. They were good enough. But they weren’t the cookies I wanted to eat three of in one sitting (which I absolutely do not recommend, but also absolutely did).
Then I figured out the secret. And I’m about to share every single detail with you.
The Cookie Blueprint: What Makes These Different
| Traditional Recipe | This Recipe | The Result |
|---|---|---|
| Room temp dough | Chilled 2+ hours | Thicker, chewier cookies |
| All chocolate chips | Chips + chunks | Dramatic chocolate pools |
| Standard vanilla | Quality vanilla extract | Deeper, richer flavor |
| No salt topping | Flaky sea salt finish | Sweet-salty perfection |
| 10 min bake | 10-12 min (looks underdone) | Soft, gooey centers |
What You’ll Need
The Dry Team
| Ingredient | Amount | Why It Matters |
|---|---|---|
| All-purpose flour | 2 ¼ cups (281g) | Creates structure |
| Baking soda | 1 tsp | Makes them rise + spread |
| Sea salt | 1 tsp | Enhances every flavor |
The Wet Squad
| Ingredient | Amount | Pro Tip |
|---|---|---|
| Unsalted butter | 1 cup (227g) | Must be room temp, not melted |
| Granulated sugar | ¾ cup (150g) | Creates crispy edges |
| Brown sugar (dark) | ¾ cup (165g) | Adds chewiness + depth |
| Large eggs | 2 | Room temp blends better |
| Vanilla extract | 2 tsp | Real extract only, no imitation |
The Chocolate Situation 🍫
| Type | Amount | What It Does |
|---|---|---|
| Semi-sweet chips | 2 cups (340g) | Even distribution |
| Dark chocolate chunks | 1 cup (170g) | Secret weapon for pools of melted chocolate |
Optional Game-Changers
- ½ cup (60g) chopped walnuts or pecans
- 1 tsp instant espresso powder (makes chocolate taste MORE chocolate)
- Flaky sea salt for topping (non-negotiable in my book)
Tools You’ll Need

You may also like : hot chocolate recipe
Essential Equipment
| Tool | Why You Need It |
|---|---|
| 2 large mixing bowls | One for wet, one for dry |
| Electric hand mixer or stand mixer | Proper creaming is key |
| Whisk | For combining dry ingredients |
| Rubber spatula | Folding in chocolate |
| 2 baking sheets | Rotate batches efficiently |
| Parchment paper or silicone mats | No sticking, easy cleanup |
| Wire cooling rack | Prevents soggy bottoms |
Makes Life Easier
- Cookie scoop (2 tbsp size): Perfectly uniform cookies every time
- Kitchen scale: For precision (especially helpful with flour)
- Oven thermometer: Most ovens lie about their temp
Pro Tips
🕐 Tip #1: Chill the Dough (This Is Non-Negotiable)
Minimum: 2 hours | Sweet spot: Overnight | Maximum flavor: 72 hours
Here’s what happens when you chill:
- Flour hydrates completely
- Butter firms up (less spreading, thicker cookies)
- Flavors develop and deepen
- Sugars dissolve into butter for better texture
Real talk: I know you want cookies NOW. But this is literally the difference between a good cookie and a life-changing cookie. Set a timer and do something else. Your future self will thank you.
🌡️ Tip #2: Room Temperature = Everything
Cold butter won’t cream properly. Cold eggs won’t incorporate smoothly.
The test: Press your finger into the butter. It should leave an indent but not feel greasy or melty.
The shortcut: Cut butter into small cubes and let sit 15-20 minutes. Put eggs in warm water for 5 minutes.
🍫 Tip #3: Mix Chips AND Chunks
This was my game-changer moment.
| Chocolate Type | What It Does |
|---|---|
| Chips | Consistent chocolate in every bite |
| Chunks | Dramatic melted pools + bakery vibes |
| Together | Chef’s kiss perfection |
⏰ Tip #4: They Look Underdone? Perfect.
Your cookies should look slightly pale in the center when you pull them out.
They’ll keep cooking on the hot pan for 5 more minutes. If they look fully baked in the oven, they’ll be dry and overcooked when cool.
Visual guide:
- Edges: Golden brown ✓
- Center: Slightly puffy, pale ✓
- Totally set and brown: You’ve gone too far ✗
☕ Tip #5: Trust Me on the Espresso Powder
“But I don’t like coffee!”
You won’t taste coffee. Not even a little bit.
Espresso powder makes chocolate taste more intensely chocolate. It’s basically magic in powder form. Skip it if you must, but you’re missing out on 30% more flavor depth.
You’ll love these too : chocolate ganache recipe
How to Make the Best Chocolate Chip Cookies

Timeline At-A-Glance
| Stage | Time | Can You Walk Away? |
|---|---|---|
| Prep ingredients | 10 min | Yes |
| Mix dough | 10 min | No |
| Chill dough | 2-72 hours | Yes (go live your life) |
| Portion + bake | 12 min per batch | Kinda |
| Cool | 5 min | Yes |
Total active time: 20 minutes
Total time (with chill): 2+ hours
Step 1: Prep Everything
Take your butter and eggs out of the fridge.
Let them sit on the counter until the butter is soft enough to leave an indent when you press it, but not greasy or melty.
Line your baking sheets with parchment paper. This prevents sticking and makes cleanup so much easier.
Time-saver: Do this step the night before or first thing in the morning.
Step 2: Mix the Dry Ingredients
In a medium bowl, whisk together:
- Flour
- Baking soda
- Salt
- Espresso powder (if using)
Set this aside. You’ll add it later.
Why whisk? It distributes the baking soda evenly so you don’t get random pockets of salty or bitter flavor.
Step 3: Cream the Butter and Sugars
This is where the magic starts.
In a large bowl, beat the softened butter with both sugars using an electric mixer on medium speed.
Beat for 3-4 minutes until it’s light, fluffy, and pale in color.
| What It Should Look Like | Why It Matters |
|---|---|
| Pale, almost white | Sugar crystals have dissolved |
| Fluffy, increased volume | Air pockets = chewy texture |
| Sticks to bowl sides | Properly emulsified |
Don’t rush this step. Seriously.
Step 4: Add Eggs and Vanilla
Beat in the eggs one at a time, mixing well after each addition.
Then add the vanilla extract.
The mixture might look a little curdled. That’s totally normal. It’ll come together when you add the flour.
Pro move: Crack eggs into a small bowl first. Fish out any shell pieces before they get into your dough.
Step 5: Combine Wet and Dry
Turn your mixer to low speed.
Gradually add the flour mixture, mixing just until no white streaks remain.
Stop mixing the second you can’t see flour anymore.
Overmixing develops gluten = tough, cakey cookies. Nobody wants that.
Step 6: Fold in the Chocolate
Using a rubber spatula, fold in:
- Chocolate chips
- Chocolate chunks
- Nuts (if using)
Make sure they’re evenly distributed throughout the dough.
Taste test alert: This is your legal obligation to eat a spoonful of cookie dough. For quality control purposes only. 😏
Step 7: Chill the Dough
Cover the bowl tightly with plastic wrap and refrigerate.
| Chill Time | Flavor Development | Texture Result |
|---|---|---|
| 2 hours | Good | Thick, chewy |
| Overnight (8-12 hrs) | Better | Bakery-quality |
| 72 hours | Best | Complex, caramelized notes |
You can chill it for up to 5 days. Some people swear by 72-hour cookie dough.
Step 8: Portion and Bake
When you’re ready to bake, preheat your oven to 375°F (190°C).
Use a cookie scoop or spoon to portion the dough into balls, about 2 tablespoons each.
Place them on your prepared baking sheets, spacing them 3 inches apart.
They’ll spread, so give them room.
Step 9: Add Finishing Touches
Before baking:
- Press a few extra chocolate chunks on top of each cookie
- Sprinkle a tiny pinch of flaky sea salt on each one
This makes them look bakery-perfect and taste even better.
Step 10: Bake
Bake for 10-12 minutes, rotating the pan halfway through.
| What to Look For | ✓ Good | ✗ Too Far |
|---|---|---|
| Edges | Golden brown, set | Dark brown |
| Center | Pale, slightly puffy | Fully brown, flat |
| Overall | Looks underdone | Looks fully baked |
They’ll look underdone. Pull them out anyway.
Recommended for you : chocolate chip cookies recipe
Step 11: Cool
Let the cookies cool on the baking sheet for 5 minutes.
This is when they finish cooking and set up properly.
Then transfer them to a wire rack to cool completely.
Or don’t wait and eat one warm with a glass of cold milk. I won’t judge.
Substitutions and Variations
Dietary Swaps That Actually Work
| Original | Substitute | What Changes |
|---|---|---|
| All-purpose flour | 1:1 gluten-free blend | Slightly more delicate texture |
| Unsalted butter | Salted butter | Reduce added salt to ½ tsp |
| Unsalted butter | Vegan butter (Miyoko’s) | Nearly identical results |
| 2 eggs | 2 flax eggs* | Chewier, slightly denser |
| Semi-sweet chips | Dark chocolate (70%) | More intense, less sweet |
*Flax eggs: 2 tbsp ground flaxseed + 6 tbsp water, let sit 5 min
Sugar Personality Test
Your sugar ratio determines your cookie’s personality:
| Sugar Mix | Cookie Personality |
|---|---|
| 50% white / 50% brown | Balanced (crispy edges + chewy center) ← This recipe |
| 100% brown sugar | Super chewy with molasses depth |
| 100% white sugar | Extra crispy edges, crunchier overall |
| Add 2 tbsp honey | Soft and cake-like |
Chocolate Choose Your Own Adventure
Classic combo: Semi-sweet chips + dark chunks (this recipe)
All milk chocolate: Sweeter, more nostalgic vibes
Triple chocolate: Semi-sweet chips + dark chunks + white chips
Fancy pants: Chopped Valrhona or Guittard bars
Candy bar chaos: Chop up Snickers, Reese’s, or Kit Kats
Size Matters
| Cookie Size | Portion | Bake Time | Yield |
|---|---|---|---|
| Mini | 1 tbsp | 8-10 min | ~72 |
| Standard | 2 tbsp | 10-12 min | ~48 |
| Bakery giant | ¼ cup | 14-16 min | ~24 |
Wild Card Add-Ins
Pick one (or go rogue and combine):
- Nutty: ½ cup chopped walnuts, pecans, or macadamias
- Fruity: ⅓ cup dried cherries or cranberries
- Salty-sweet: ½ cup crushed pretzels or potato chips (seriously, try it)
- Extra: 2 tbsp toffee bits or butterscotch chips
- Nostalgic: ½ cup M&Ms or Reese’s Pieces
Make Ahead Tips
Freeze the Dough (My Favorite Method)
How:
- Portion chilled dough into balls
- Freeze on a baking sheet until solid (2 hours)
- Transfer to a freezer bag
Storage: Up to 3 months
Bake from frozen: Add 2-3 extra minutes to baking time
Why this is genius: Fresh-baked cookies whenever you want them. No waiting for dough to chill. Just pop them in the oven.
Freeze Baked Cookies
How:
- Let cookies cool completely
- Layer in airtight container with parchment paper between layers
- Freeze
Storage: Up to 3 months
To serve: Thaw at room temperature (20 min) or warm in 300°F oven (5 min)
Refrigerate the Dough
Store unbaked dough in the fridge for up to 5 days.
| Day | Flavor Profile |
|---|---|
| Day 1-2 | Good, standard cookie flavor |
| Day 3 | Better, deeper flavor |
| Day 4-5 | Best, toffee-like notes develop |
The longer it sits, the better the flavor develops.
Some people swear by 72-hour cookie dough. I’m one of them.
Additional Details
Nutritional Breakdown (Per Cookie)
| Nutrient | Amount | % Daily Value* |
|---|---|---|
| Calories | 185 | – |
| Total Fat | 9g | 12% |
| Saturated Fat | 5g | 25% |
| Carbohydrates | 25g | 8% |
| Sugar | 16g | – |
| Protein | 2g | 4% |
| Sodium | 125mg | 5% |
*Based on 2,000 calorie diet
Yield: 48 cookies
What to Serve These With
| Meal Type | Perfect Pairing |
|---|---|
| After dinner | Vanilla ice cream + warm cookie = heaven |
| Breakfast (don’t judge) | Cold brew coffee |
| Afternoon snack | Cold whole milk |
| Dessert party | Mix of warm + cold cookies on a platter |
| Gift giving | Tied up in a clear bag with ribbon |
Meal Pairing Suggestions
These cookies are perfect after:
- Light dinners (rotisserie chicken + salad)
- Summer BBQs (they’re great with grilled food)
- Cozy soup nights (contrast the warmth)
- Holiday dinners (make a batch, freeze, serve fresh)
They’re also great for:
- Bringing to dinner parties (instant popularity)
- Packing in lunches (trade value: extremely high)
- Bake sales (price them higher, they’re worth it)
- Keeping a secret stash in your freezer
Time Efficiency Breakdown
| Task | Active Time | Passive Time |
|---|---|---|
| Prep ingredients | 10 min | 30 min (room temp) |
| Mix dough | 10 min | – |
| Chill | 0 min | 2-72 hours |
| Bake + cool | 5 min | 17 min |
| Total | 25 min hands-on | 2+ hours waiting |
Pro schedule:
- Morning: Mix dough, start chilling
- All day: Chill while you work/live life
- Evening: Bake fresh cookies for dessert
Or make a double batch, freeze half, and have cookie dough ready whenever the craving hits.
Leftovers and Storage
Storage Method Showdown
| Method | Duration | Best For | Pro Tip |
|---|---|---|---|
| Room temp | 5 days | Eating within a week | Add bread slice to container |
| Refrigerator | 10 days | Humid climates | Let come to room temp before eating |
| Freezer | 3 months | Long-term storage | Thaw or warm to refresh |
Room Temperature Storage
Store cookies in an airtight container at room temperature for up to 5 days.
The bread trick: Add a slice of bread to the container to keep them soft.
The bread will get stale but the cookies stay chewy. I know it sounds weird, but it works.
Refrigerator Storage
If you live somewhere humid, refrigerate the cookies to prevent them from getting too soft.
They’ll last up to 10 days.
Let them come to room temperature before eating for the best flavor (or eat them cold if you’re into that).
Freezer Storage
Freeze baked cookies for up to 3 months.
To serve:
- Thaw at room temperature (20 minutes)
- Warm in oven at 300°F (5 minutes) for that fresh-baked taste
How to Refresh Stale Cookies
Cookies gone a bit stale? Don’t throw them out.
The fix: Warm them in a 300°F oven for 5-7 minutes.
They’ll crisp back up and taste almost fresh again. Sometimes I like them better this way.
FAQ
🍪 Why are my cookies spreading too much?
Most likely culprit: Your butter was too warm or you didn’t chill the dough long enough.
| Problem | Solution |
|---|---|
| Butter too soft | Should leave indent, not be greasy |
| Dough not chilled | Minimum 2 hours, no shortcuts |
| Flour measured wrong | Spoon into cup, don’t scoop |
| Old baking soda | Replace every 6 months |
The fix: Chill dough properly next time. For this batch, pop the dough back in the fridge for 30 minutes.
🧈 Can I use salted butter instead of unsalted?
Yes, just reduce the added salt to ½ teaspoon.
I prefer unsalted because it gives me more control over the final saltiness. But salted works in a pinch.
😢 Why did my cookies turn out flat?
Possible reasons:
| Cause | How to Prevent |
|---|---|
| Old baking soda | Check date, replace if 6+ months old |
| Dough not chilled | Chill minimum 2 hours |
| Oven too low | Use oven thermometer, should be 375°F |
| Overmixed dough | Mix just until flour disappears |
| Too much butter | Measure carefully, use scale if possible |
⏰ Can I skip the chilling step?
You can, but your cookies won’t be as good.
What you’ll lose:
- Thicker cookies (they’ll spread more)
- Deeper flavor (no time to develop)
- Perfect chewy texture (butter firms up when chilled)
If you’re really in a rush, chill for at least 30 minutes. But trust me, the wait is worth it.
🤔 How do I know when the cookies are done?
Visual checklist:
| Part of Cookie | What to Look For |
|---|---|
| Edges | Golden brown, set |
| Center | Pale, slightly puffy |
| Overall appearance | Looks slightly underdone |
They’ll finish cooking on the pan after you remove them from the oven. If they look fully baked in the oven, they’ll be overcooked when cool.
🍫 Can I use chocolate bars instead of chips?
Absolutely. Chop them into chunks.
I actually prefer this method because you get irregular pieces that create those amazing chocolate pools. Plus, you can use fancier chocolate.
Good brands: Valrhona, Guittard, Ghirardelli, or even Trader Joe’s pound plus bars
😐 Why do my cookies taste bland?
Common culprits:
| Issue | Fix |
|---|---|
| Imitation vanilla | Use real vanilla extract |
| No salt | Don’t skip it, it enhances everything |
| Dough not chilled | Flavors develop during chill time |
| Old ingredients | Fresh butter, fresh baking soda |
Make sure you’re using real vanilla extract, not imitation. And don’t skip the salt (it enhances all the other flavors).
💪 Can I make these without a mixer?
Yes, but it’ll take some arm strength.
You need to cream the butter and sugar really well, which is easier with a mixer. But a wooden spoon and some determination will work.
Tip: Make sure your butter is soft (not melted) so it’s easier to cream by hand.
🎂 Why are my cookies cakey instead of chewy?
Possible reasons:
| Problem | Solution |
|---|---|
| Too much flour | Measure correctly (spoon + level) |
| Overbaked | Pull out when centers look pale |
| Too many eggs | Stick to 2 large eggs |
| Overmixed | Mix just until combined |
Make sure you’re measuring flour correctly: spoon it into the measuring cup and level it off. Don’t pack it down.
🎨 Can I add other mix-ins?
Go wild.
Some tested combos:
- Dried cranberries + white chocolate
- Toffee bits + pecans
- M&Ms + peanut butter chips
- Crushed Oreos (yes, really)
- Potato chips (trust me on this)
- Crushed pretzels + caramel bits
Just keep the total add-ins to about 3 cups. More than that and the dough won’t hold together properly.
🌡️ What if I don’t have a thermometer?
Most ovens run 25°F hotter or cooler than they claim.
The workaround:
- Bake one test cookie
- Adjust time up or down based on results
- Bake the rest accordingly
Or just buy an oven thermometer. They’re like $8 and solve so many baking mysteries.
Wrapping Up
You’re about to make cookies that’ll ruin all other cookies for you.
I’m not exaggerating. These have the crispy edges, the gooey centers, the perfect amount of chocolate, and that buttery flavor that makes you close your eyes on the first bite.
They’re simple to make. They use ingredients you probably already have. And they freeze beautifully, so you can always have amazing cookies on hand.
Make a batch this weekend. Your future self will thank you.
Have you tried this recipe yet? Drop a comment and tell me how they turned out. And if you have any questions about the process, I’m here to help!


1 thought on “The Chocolate Chip Cookie Recipe That Made Me Forget Store-Bought Existed”