
Did you know you can make creamy, dreamy ice cream with just frozen bananas and nothing else?
I’m talking about zero added sugar, no fancy ice cream maker, and absolutely no weird ingredients you can’t pronounce.
Just bananas. That’s it.
The first time I tried this, I was skeptical. Like, how could frozen fruit turn into something that tastes like actual ice cream?
But one taste and I was completely sold.
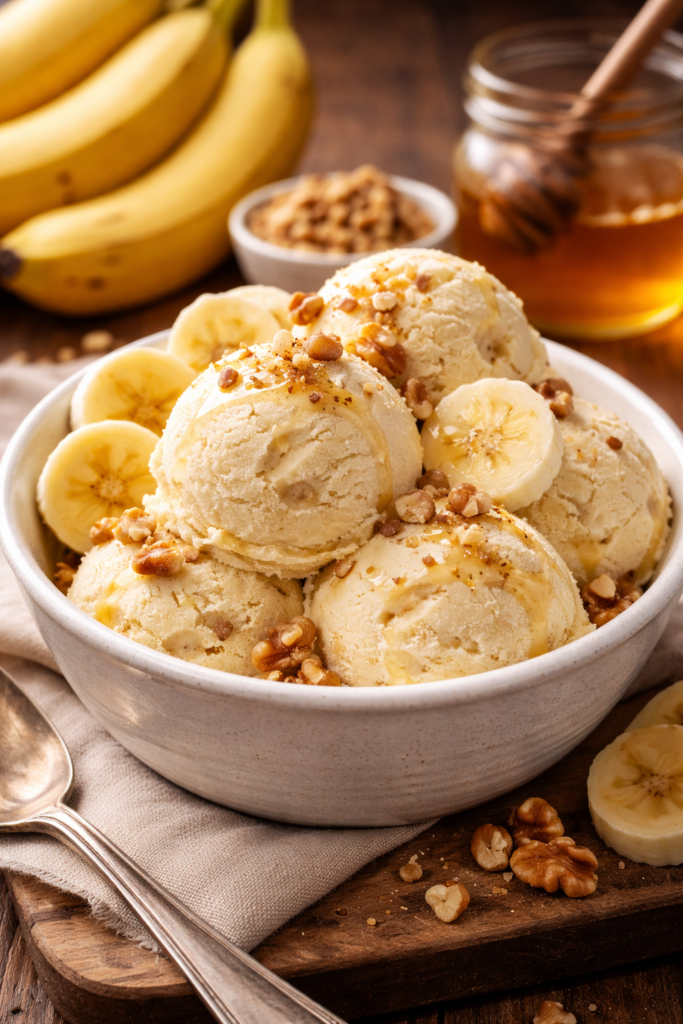
It’s smooth, naturally sweet, and honestly tastes like soft-serve from your favorite ice cream shop.
Here’s what blew my mind: it takes 5 minutes from frozen bananas to ice cream in your bowl.
No churning. No waiting. No expensive equipment.
And you can customize it with literally anything. Peanut butter? Check. Chocolate? Absolutely. Fresh berries? Go for it.
If you’ve been craving something sweet but don’t want the sugar crash, this is your answer.
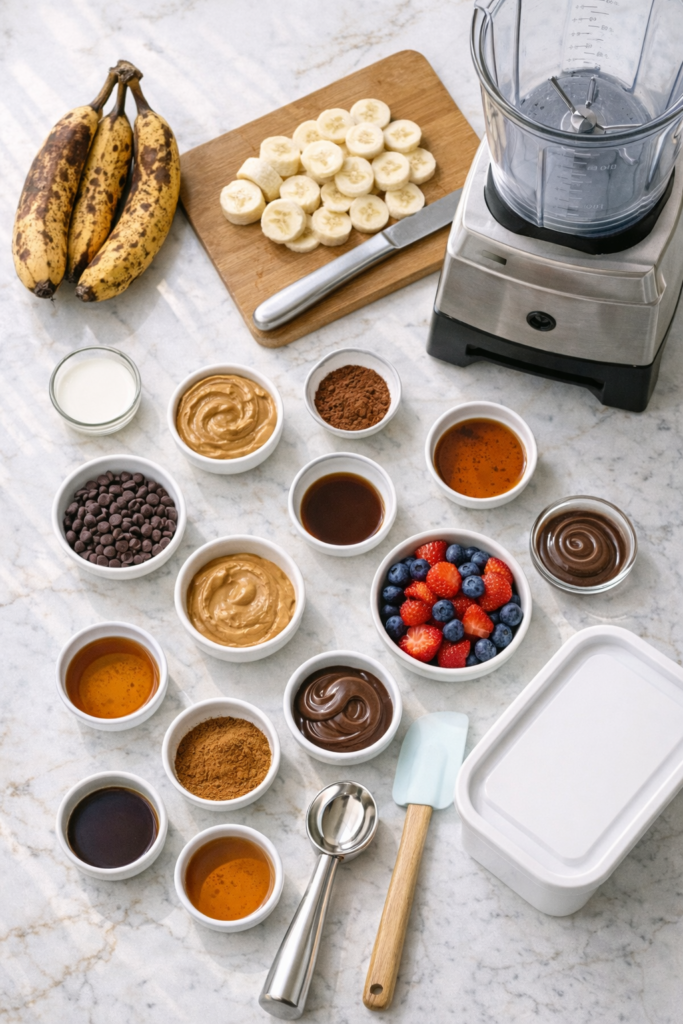
What You’ll Need
The Base (Non-Negotiable)
| Ingredient | Amount | Notes |
|---|---|---|
| Ripe bananas | 3-4, sliced & frozen | Look for brown spots |
| Milk (optional) | 1-2 tablespoons | Any kind works |
Mix-Ins (Pick Your Favorites)
Nutty Options:
- Peanut butter (2 tbsp)
- Almond butter (2 tbsp)
- Cashew butter (2 tbsp)
Chocolate Lovers:
- Cocoa powder (2 tbsp)
- Chocolate chips (¼ cup)
- Nutella (2 tbsp)
Fruity Additions:
- Strawberries (½ cup, frozen)
- Blueberries (½ cup, frozen)
- Raspberries (½ cup, frozen)
Flavor Boosters:
- Vanilla extract (½ tsp)
- Maple syrup (2 tbsp)
- Cinnamon (¼ tsp)
- Sea salt (tiny pinch)
Tools Required
Recommended for you : healthy banana recipe
✓ High-speed blender OR food processor
✓ Sharp knife
✓ Cutting board
✓ Parchment paper
✓ Baking sheet
✓ Freezer-safe bag/container
✓ Spatula
✓ Ice cream scoop
Pro Tips
1. The Freezing Method Matters
Slice your bananas BEFORE freezing.
Spread them on a parchment-lined baking sheet so they don’t stick together.
Freeze for 2+ hours, then transfer to a freezer bag.
Why this works: Pre-sliced bananas blend 10x faster. Trust me, I learned this the hard way after fighting with whole frozen bananas for 20 minutes.
2. The 2-Minute Thaw Rule
Let frozen bananas sit at room temperature for 2-3 minutes before blending.
Not longer. Not shorter.
This sweet spot makes everything blend smoothly without turning into banana soup.
3. Patience Through the Ugly Phase
Your bananas will look:
- Chopped up (10 seconds in)
- Crumbly and dry (30 seconds in)
- Like chunky mashed potatoes (1 minute in)
- Smooth ice cream (1.5-2 minutes in) ✨
Don’t panic during phases 1-3. Keep blending.
4. Use the Tamper (If You Have One)
Food processors work better than blenders for this.
But if you’re using a high-speed blender, use the tamper to push bananas into the blades.
Stops every 20 seconds to scrape the sides.
5. Texture Timing is Everything
| When to Eat | Texture You’ll Get |
|---|---|
| Immediately | Soft-serve 🍦 |
| After 30-60 min in freezer | Scoopable |
| After 2+ hours in freezer | Rock hard (needs thawing) |
I personally love it straight from the blender.
Substitutions and Variations
Milk Alternatives
| Type | Flavor Impact | Creaminess Level |
|---|---|---|
| Almond milk | Subtle nutty | ⭐⭐⭐ |
| Oat milk | Slightly sweet | ⭐⭐⭐⭐ |
| Coconut milk | Rich, tropical | ⭐⭐⭐⭐⭐ |
| Regular milk | Neutral | ⭐⭐⭐⭐ |
| Water | No flavor change | ⭐⭐ |
Flavor Variations That’ll Blow Your Mind
Chunky Monkey
- Add 2 tbsp peanut butter
- Fold in ¼ cup chocolate chips
- Top with chopped walnuts
Strawberry Cheesecake
- Blend with ½ cup frozen strawberries
- Add 2 tbsp cream cheese
- Crumble graham crackers on top
Mint Chocolate Chip
- Add 3-4 drops peppermint extract
- Fold in dark chocolate chips
- Garnish with fresh mint
Coffee Crunch
- Add 1 shot espresso (cooled)
- Mix in crushed cookies
- Drizzle with caramel
Salted Caramel
- Swirl in caramel sauce
- Add pinch of sea salt
- Top with crushed pretzels
My go-to: Peanut butter banana with a drizzle of honey. Tastes exactly like a Reese’s cup in ice cream form.
Make Ahead Tips
Prep Station Strategy:
Sunday Prep:
→ Buy 6-8 ripe bananas
→ Slice all of them
→ Freeze on baking sheets
→ Transfer to labeled freezer bags

Result: Ice cream ready to blend anytime for the next 2 weeks
Individual Portions:
Portion frozen banana slices into small bags (1-2 bananas per bag).
When a craving hits, grab one bag and blend.
No measuring. No waste. Pure convenience.
Batch Freezing:
Make a big batch and freeze in an airtight container.
Scoop what you need and let it thaw 10 minutes before eating.
Keeps for up to 2 weeks.
You may also like : banana cream pie recipe
How to Make Banana Ice Cream
Step 1: Prep Your Bananas
Start with ripe bananas (brown spots = perfect).
Peel them.
Slice into ½-inch coins.
Spread on a parchment-lined baking sheet.
Freeze for 2+ hours (overnight is better).
Transfer to a freezer bag once solid.
Step 2: Set Up
Pull out your food processor or high-speed blender.
Let frozen banana slices sit for 2-3 minutes at room temperature.
They should be frozen but not rock hard.
Step 3: Start Blending
Toss frozen slices into the food processor.
Turn it on.
For the first 30 seconds, they’ll just chop into small pieces.
Don’t stop.
Step 4: Push Through the Ugly Phase
Around 30-45 seconds in, it’ll look crumbly and dry.
This is where most people give up.
Keep going.
Scrape down the sides.
Blend again.
Step 5: Watch the Magic Happen
Between 1-2 minutes, something amazing happens.
The mixture suddenly transforms from chunky to silky smooth.
It’ll look exactly like soft-serve ice cream.
That’s when you know it’s ready.
Step 6: Add Mix-Ins
Plain banana ice cream? You’re done.
Want to jazz it up? Add your extras now.
Peanut butter, chocolate, berries—whatever you’re craving.
Pulse a few times to incorporate.
Don’t over-blend or you’ll lose the texture.
You’ll love these too : healthy banana bread recipe
Step 7: Serve or Freeze
Option A: Eat it immediately (soft-serve texture)
Option B: Freeze for 30-60 minutes (firmer, scoopable)
Scoop into bowls.
Add toppings.
Enjoy.
Nutritional Breakdown
Per Serving (1 cup, plain)
| Nutrient | Amount | % Daily Value |
|---|---|---|
| Calories | 110 | 5% |
| Total Fat | 0.4g | 1% |
| Carbohydrates | 27g | 9% |
| Fiber | 3g | 12% |
| Sugars | 14g | – |
| Protein | 1.3g | 3% |
| Potassium | 422mg | 12% |
| Vitamin C | 10mg | 17% |
| Vitamin B6 | 0.4mg | 20% |
The Good News:
- Zero added sugar
- Naturally high in potassium
- Good source of fiber
- Dairy-free (unless you add milk)
Compare to Regular Ice Cream:
| Factor | Banana Ice Cream | Regular Ice Cream |
|---|---|---|
| Calories (per cup) | 110 | 250-350 |
| Added sugar | 0g | 20-30g |
| Fat | 0.4g | 15-20g |
| Ingredients | 1 | 15+ |
Time Breakdown
| Task | Time Required |
|---|---|
| Slicing bananas | 3 minutes |
| Freezing | 2-24 hours |
| Thawing slightly | 2-3 minutes |
| Blending | 1-2 minutes |
| Adding mix-ins | 1 minute |
| Total active time | 5-7 minutes |
Leftovers and Storage
Short-Term Storage (Up to 3 Days)
Store in an airtight container.
Keep in the freezer.
Let thaw 10-15 minutes before scooping.
Long-Term Storage (Up to 2 Weeks)
Freeze in individual portions.
Use small containers or ice cube trays.
Pop out exactly what you need.
The Re-Blend Trick
If your ice cream gets too hard:
- Break into chunks
- Toss back in food processor
- Blend until smooth again
Works perfectly and brings back that fresh texture.
Quick tip: Microwave for 10-15 seconds to make it scoopable again. Sounds weird, but it works.
Pairing Suggestions
Breakfast Pairings
- Granola and fresh berries
- Drizzle of almond butter
- Chia seeds and sliced almonds
Dessert Pairings
- Warm brownies (ice cream on top)
- Apple crisp
- Chocolate cake
Snack Pairings
- Graham crackers
- Pretzels (sweet + salty combo)
- Fresh fruit
FAQ
Q: Can I use unripe bananas?
No. Unripe bananas are starchy and bland.
Wait for brown spots. That’s when they’re naturally sweet.
Q: Do I need to add sugar?
Nope. Ripe bananas are sweet enough.
But if you want it sweeter, add 1 tablespoon maple syrup.
Q: My ice cream is too icy. What happened?
Two possibilities:
- You didn’t blend long enough
- You added too much liquid
Blend for another minute and resist adding milk right away.
Q: Can I make this without a food processor?
A high-speed blender works.
You might need to add a splash of milk to get things moving.
Regular blenders struggle, but it’s possible if you’re patient.
Q: Is this actually healthy?
Healthier than regular ice cream? Absolutely.
No added sugar. No cream. No additives.
Just fruit.
Still dessert though, so enjoy in moderation.
Q: Can I use other fruits?
You can add other frozen fruits for flavor.
But bananas are the base that makes it creamy.
Without them, you’ll have sorbet (still delicious, just different).
Q: Why does mine taste like frozen bananas?
You didn’t blend long enough.
Keep going past the crumbly stage until it’s completely smooth.
Also, make sure your bananas were ripe before freezing.
Q: Can I make this dairy-free?
It already is!
The base is just bananas.
Use plant-based milk to keep it dairy-free.
Q: How long does it keep in the freezer?
Up to 2 weeks in an airtight container.
It’ll get hard, so thaw before eating.
Troubleshooting Guide
| Problem | Solution |
|---|---|
| Too thick to blend | Add 1 tbsp milk at a time |
| Too runny | Blend less or use less liquid |
| Not sweet enough | Use riper bananas next time |
| Too icy | Blend longer for smoother texture |
| Won’t blend | Let bananas thaw 2-3 more minutes |
| Too hard after freezing | Thaw 10-15 minutes or microwave 10 seconds |
Wrapping Up
This banana ice cream is one of those recipes that sounds too simple to be good.
But it works. Every single time.
It’s healthy, easy, and something you can feel good about eating.
Plus, you probably have everything you need in your kitchen right now.
Grab those bananas, throw them in the freezer, and you’ll have the creamiest ice cream ready in hours.
Try it with peanut butter first (my personal favorite). Then experiment with all the other flavors.
Drop a comment below with your favorite mix-in combo. I’m always looking for new ideas to try! 🍌


1 thought on “The Easiest 2-Ingredient Banana Ice Cream You’ll Make on Repeat”