
You don’t need eggs to make a cake that’s moist, rich, and so good people will ask for the recipe twice.
I know that sounds like I’m overselling it, but I’m not.
This eggless chocolate cake is the one I make when I want something indulgent but don’t feel like running to the store. It’s also the one I make for friends with egg allergies, and they literally cannot believe there are no eggs in it.
The texture is perfect. Not dry, not crumbly, just soft and tender with that deep chocolate flavor that makes you close your eyes after the first bite.
And here’s what I love most: it comes together in one bowl. No stand mixer, no complicated techniques, just simple ingredients you probably already have.
I stumbled on this recipe by accident when I was craving chocolate cake at 9 PM and realized I was out of eggs. I thought I’d just try it and see what happened.
That cake disappeared in less than 24 hours.
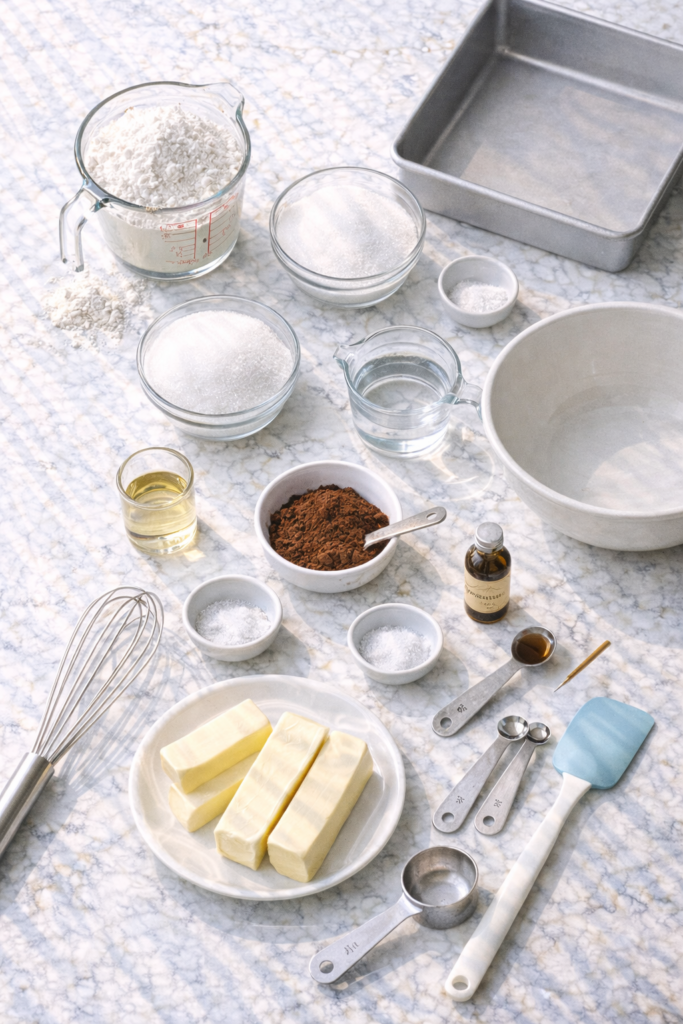
What You’ll Need
Dry Ingredients
| Ingredient | Amount | Notes |
|---|---|---|
| All-purpose flour | 1 ½ cups | Spoon and level, don’t pack |
| Granulated sugar | 1 cup | White sugar works best |
| Unsweetened cocoa powder | ¼ cup | Quality matters here |
| Baking soda | 1 teaspoon | Fresh is key |
| Salt | ½ teaspoon | Enhances chocolate flavor |
Wet Ingredients
| Ingredient | Amount | Notes |
|---|---|---|
| Water | 1 cup | Room temperature |
| Vegetable oil | ⅓ cup | Or melted coconut oil |
| White vinegar | 1 tablespoon | The secret ingredient |
| Vanilla extract | 1 teaspoon | Pure, not imitation |
Optional Toppings
- Powdered sugar for dusting ✨
- Fresh berries (raspberries are my favorite)
- Whipped cream or ice cream
- Chocolate ganache (for when you’re feeling extra)
Tools You’ll Need
You may also like : lemon cake recipe
Essential:
- 8×8 inch baking pan (or 9-inch round)
- Medium mixing bowl
- Whisk or fork
- Measuring cups and spoons
- Rubber spatula
- Toothpick for testing
Nice to Have:
- Cooling rack
- Parchment paper
- Fine mesh sieve (for dusting powdered sugar)
Pro Tips
The Cocoa Quality Rule
Use good quality unsweetened cocoa powder. The cheap stuff tastes chalky and won’t give you that rich chocolate flavor. Dutch-processed cocoa makes it even more luxurious, but regular cocoa works great too.
Don’t skip the vinegar. I know it sounds weird to put vinegar in a cake, but it’s what makes this recipe work.
When vinegar mixes with baking soda, it creates bubbles that help the cake rise and get fluffy. You won’t taste it at all, I promise.
Mix gently. Once you add the wet ingredients to the dry, mix just until combined.
Overmixing makes the cake tough and dense. A few small lumps are totally fine.
Temperature Check 🌡️
Start checking your cake at 25 minutes. It’s done when a toothpick inserted in the center comes out clean or with just a few moist crumbs. Ovens vary like crazy, so don’t just trust the timer.
Let it cool completely. This is hard because it smells incredible, but cutting into a warm cake makes it fall apart.
Wait at least 20 minutes if you can manage it.
You’ll love these too : Red velvet cake recipe
How to Make It
Step 1: Prep Work (5 minutes)
Preheat your oven to 350°F (175°C).
Grease your 8×8 inch pan with butter or oil, or line it with parchment paper. This prevents sticking and makes cleanup so much easier.
Step 2: Mix Dry Ingredients (2 minutes)
In your bowl, whisk together the flour, sugar, cocoa powder, baking soda, and salt.
Make sure there are no lumps of cocoa powder hiding in there.
Step 3: Add Wet Ingredients (1 minute)
Pour in the water, oil, vinegar, and vanilla extract right on top of the dry ingredients.
No need for a separate bowl. Told you this was easy.
Step 4: Combine (2 minutes)
Use a whisk or fork to mix everything until it’s just combined.
The batter will be thin and liquidy. That’s exactly what you want. Don’t panic.
Batter Check
Your batter should look almost like chocolate milk. If it’s thick, you probably measured the flour wrong. Add 1-2 tablespoons of water to thin it out.
Step 5: Bake (30-35 minutes)
Pour the batter into your prepared pan. It should fill it about halfway.
Pop it in the oven and set a timer for 25 minutes to check.
What to look for:
- Top looks set and slightly springy
- Toothpick comes out clean
- Edges are pulling away from the pan slightly
- Kitchen smells like heaven 🍫
Recommended for you : fruit cake recipe
Step 6: Cool and Serve
Let the cake cool in the pan for 10 minutes, then turn it out onto a cooling rack.
Or just let it cool completely in the pan if you’re serving it straight from there (I usually do this).
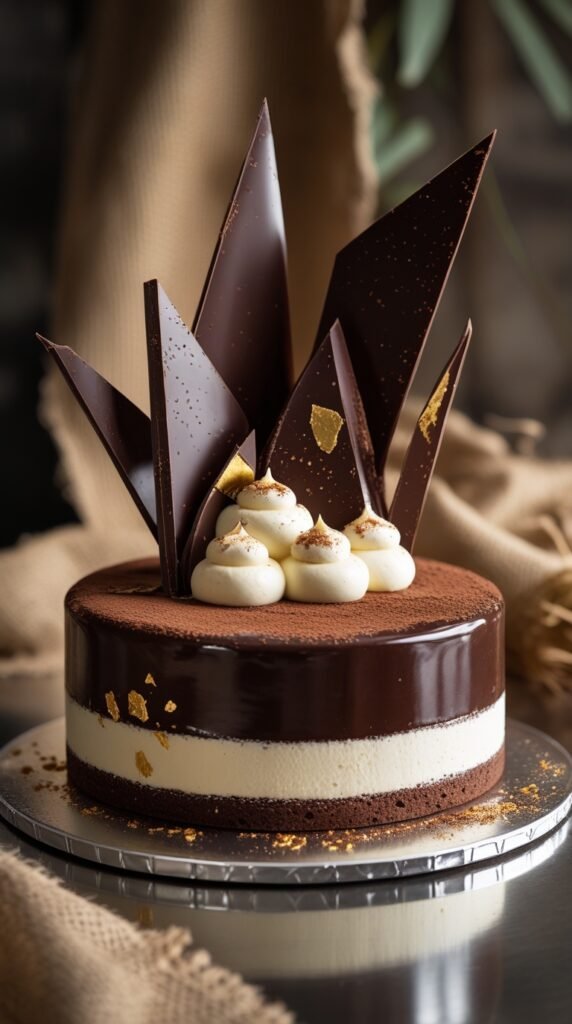
Dust with powdered sugar, add some berries, top with whipped cream, or just eat it plain.
Substitutions and Variations
| Instead of… | Try this… | What changes |
|---|---|---|
| Vegetable oil | Melted coconut oil | Slight coconut flavor |
| Vegetable oil | Melted butter | Richer, more cake-like |
| White sugar | Half brown sugar | Deeper, caramel notes |
| Water | Strong coffee | Intensifies chocolate (game changer!) |
| White vinegar | Apple cider vinegar | Slightly fruity undertone |
| 8×8 pan | Muffin tin (12 cups) | Bake 18-22 minutes |
Fun Add-Ins
Chocolate lovers: Fold in ½ cup chocolate chips before baking
Mint chocolate: Add ½ teaspoon peppermint extract
Mexican chocolate: Add ½ teaspoon cinnamon and a pinch of cayenne
Mocha: Replace half the water with espresso
Nutty: Top with chopped toasted nuts after baking
Make Ahead Tips
This cake actually tastes better the next day.
The texture gets even more moist and the flavors develop more. It’s one of those magical recipes that improves with time.
Timeline:
| When | What to do | Storage |
|---|---|---|
| 2 days ahead | Mix dry ingredients | Airtight container, room temp |
| 1 day ahead | Bake completely | Covered, room temp |
| Up to 3 months | Freeze baked cake | Wrapped tight, freezer |
Freezing hack: Slice the cake first, wrap each piece individually, then freeze. Pull out single servings whenever the craving hits.
Quick Reference Guide
Timing Breakdown
| Task | Time |
|---|---|
| Prep + mixing | 10 minutes |
| Baking | 30-35 minutes |
| Cooling | 20-30 minutes |
| Total | 60-75 minutes |
Serving Sizes
| Pan Size | Servings | Bake Time |
|---|---|---|
| 8×8 inch | 9 squares | 30-35 min |
| 9-inch round | 8 slices | 30-35 min |
| 9×13 inch | 12-15 | 20-25 min |
| 12 cupcakes | 12 | 18-22 min |
Nutritional Breakdown
Per slice (9 servings):
| Nutrient | Amount |
|---|---|
| Calories | 215 |
| Fat | 8g |
| Carbohydrates | 35g |
| Fiber | 1g |
| Sugar | 23g |
| Protein | 2g |
| Sodium | 240mg |
Diet-Friendly Notes
This cake is naturally dairy-free and vegan when made with oil. It’s also nut-free, making it safe for many common allergies. Not gluten-free, but readers have had success with 1:1 GF baking blends.
Perfect Pairings
Drinks:
- Strong black coffee ☕
- Cold milk (classic for a reason)
- Hot chocolate (go full chocolate mode)
- Red wine (try it, seriously)
Toppings that work:
- Vanilla ice cream (warm cake + cold ice cream = perfection)
- Fresh raspberries (tartness balances the sweetness)
- Salted caramel sauce
- Peanut butter (spread it on or dollop on the side)
- Whipped coconut cream (for vegan friends)
Make it a dessert plate:
Serve a slice with a scoop of vanilla ice cream, fresh berries, and a drizzle of chocolate sauce. Add a mint leaf if you’re feeling fancy.
Storage Guide
| Method | Duration | Best for |
|---|---|---|
| Room temp (covered) | 3 days | No toppings added |
| Refrigerated | 5 days | With frosting/cream |
| Frozen (whole) | 3 months | Make ahead |
| Frozen (slices) | 3 months | Portion control |
Thawing tips:
- Room temperature: 30 minutes
- Microwave: 20-30 seconds
- Overnight in fridge: Best texture
Storage Hack
Press plastic wrap directly onto the cut surface of the cake to prevent it from drying out. Works better than just covering the pan.
Frequently Asked Questions
Why is there no egg in this recipe?
The vinegar and baking soda create a chemical reaction that helps the cake rise and get fluffy, so you don’t need eggs. The oil keeps it moist. It’s basically kitchen chemistry at work.
Can I use a different size pan?
Yes! Check the serving size table above for adjusted baking times.
My cake sank in the middle. What happened?
This usually means it wasn’t fully baked. Make sure you’re checking with a toothpick and that it comes out clean. Also, don’t open the oven door in the first 20 minutes of baking.
The temperature drop can cause collapse.
Can I make this gluten-free?
I haven’t tested it personally, but readers have told me it works with a 1:1 gluten-free baking blend. You might need to add 1-2 tablespoons more liquid.
Why is my cake dry?
You probably overbaked it. Check it a few minutes early next time.
Also make sure you’re measuring the flour correctly by spooning it into the measuring cup and leveling it off, not scooping directly from the bag. That packs in too much flour.
Can I double this recipe?
Absolutely. Double everything and use a 9×13 pan. Baking time will be around 35-40 minutes.
What if I don’t have cocoa powder?
You really need it for this recipe. There’s no good substitute that will give you the same chocolate flavor and texture. Time to make a quick store run.
How do I know when it’s done?
Look for these signs:
- Toothpick comes out clean
- Top springs back when lightly pressed
- Edges pull away from pan
- Surface looks set, not jiggly
Common Mistakes to Avoid
❌ Overmixing the batter → Tough, dense cake
✅ Mix just until combined, lumps are fine
❌ Skipping the vinegar → Flat, dense cake
✅ It’s essential for rise and texture
❌ Opening the oven early → Sunken middle
✅ Wait at least 20 minutes before checking
❌ Using expired baking soda → Won’t rise properly
✅ Test it: Add to vinegar, should fizz immediately
Wrapping Up
This eggless chocolate cake proves you don’t need a complicated recipe or fancy ingredients to make something really, really good.
It’s become my go-to for last-minute desserts, casual dinner parties, and those nights when I just need chocolate cake to exist in my life immediately.
The best part is watching people’s faces when they find out there are no eggs in it. They never believe me until I show them the recipe.
Give it a try this week. I think you’re going to love how easy it is and how good it tastes.
And when you make it, come back and tell me what you think in the comments. Did you add anything extra? Did you serve it with ice cream or eat it straight from the pan at midnight? I want to hear all about it.


