Ever have one of those mornings where cereal just won’t cut it?
I’m talking about the kind of morning where you need something warm, comforting, and just a little bit indulgent.
That’s when I reach for this banana pancakes recipe.
They’re fluffy, naturally sweet from ripe bananas, and they make your kitchen smell like a cozy breakfast café. Plus, they come together in about 20 minutes, which means you’re not spending your entire Saturday morning in the kitchen.
And here’s what makes these different from your average pancakes: the banana isn’t just mixed into the batter.
It’s mashed up really well, which means every single bite has that sweet banana flavor. No random chunks, just perfectly distributed taste throughout.
I’ve been making these for years now, and I still get excited when I see them puff up in the pan.
There’s just something satisfying about watching those little bubbles form on the surface before you flip them over to reveal that golden-brown color.
Let me show you how to make them.
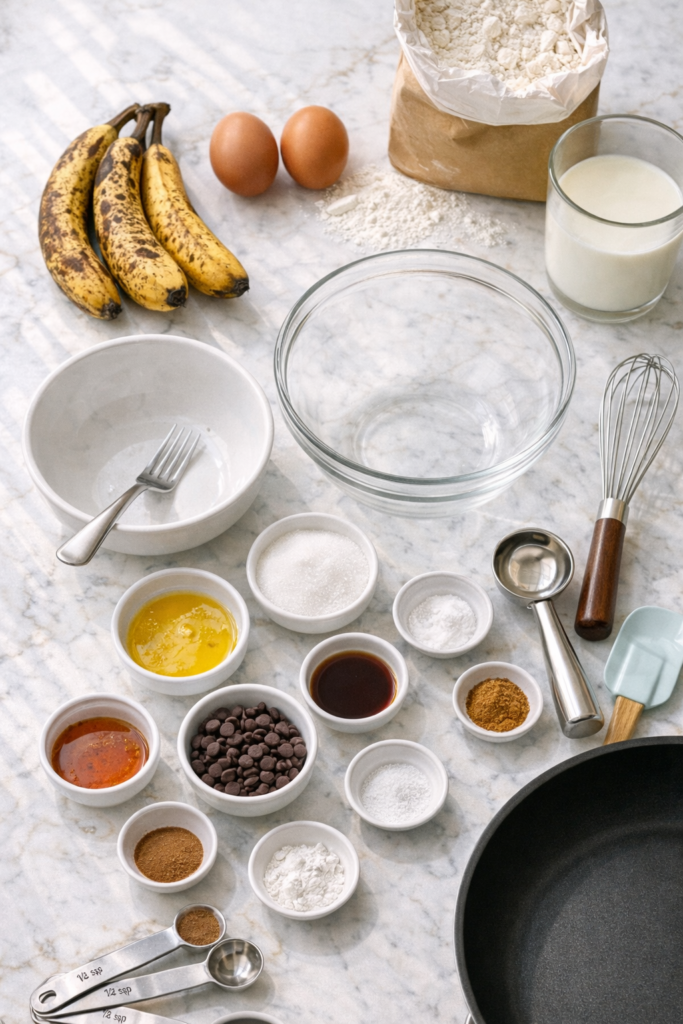
What You’ll Need
The Pancake Base
| Ingredient | Amount | Why It Matters |
|---|---|---|
| Ripe bananas | 2 medium | The spottier, the sweeter |
| All-purpose flour | 1½ cups | Creates that fluffy texture |
| Whole milk | 1 cup | Adds richness (any milk works) |
| Large eggs | 2 | Binds everything together |
| Melted butter | 3 tablespoons | Flavor + moisture |
| Granulated sugar | 2 tablespoons | Just a touch of sweetness |
| Baking powder | 2 teaspoons | The fluff factor |
| Baking soda | ½ teaspoon | Extra lift |
| Vanilla extract | ½ teaspoon | Depth of flavor |
| Salt | ¼ teaspoon | Balances the sweetness |
| Ground cinnamon | ½ teaspoon | Optional but amazing |
For Serving (Go Wild!)
- The Classics: Maple syrup, butter
- Fresh Fruit: Banana slices, berries
- Crunch Factor: Chopped pecans or walnuts
- Extra Special: Whipped cream, chocolate chips
Pro Tip: Those brown-spotted bananas you were about to throw away? They’re PERFECT for this recipe. The riper, the better!
Tools You’ll Need
You may also like : frozen banana recipes
Essential:
- Large mixing bowl
- Medium mixing bowl
- Fork for mashing
- Whisk
- Measuring cups & spoons
- Non-stick skillet or griddle
- Spatula
- Ladle or ¼ cup measure
Nice to Have:
- Electric griddle (for cooking multiple at once)
- Oven (for keeping batches warm)
Pro Tips That Actually Matter
1. The Banana Ripeness Rule 🍌
Don’t use yellow bananas. I’m serious.
You want the ones with brown spots all over them. They’re sweeter, easier to mash, and they give your pancakes way more flavor.
If your bananas are still firm and yellow, wait a few days or try my quick-ripen trick in the FAQ section.
2. Stop Overmixing (Please!)
Here’s what happens when you overmix:
- The gluten develops too much
- Your pancakes turn tough and dense
- They lose that fluffy texture we’re after
What to do instead: Stir just until you can’t see dry flour. Lumps are your friend here.
3. The 5-Minute Rest Period
I know you want to start cooking right away.
But this little rest period makes a HUGE difference. It lets the baking powder start working and gives you fluffier pancakes.
Just set a timer and use that time to prep your toppings or scroll through your phone. I won’t judge. 😊
4. Wait for the Bubble Show
| What You See | What It Means | What To Do |
|---|---|---|
| Batter just poured | Too early | Wait |
| Small bubbles forming | Getting close | Wait more |
| Bubbles all over + dry edges | PERFECT | Flip now! |
| Bubbles popped, edges browning | Almost too late | Flip quickly |
Usually takes about 2-3 minutes on the first side.
5. The Warm Oven Trick
Feeding more than just yourself?
Preheat your oven to 200°F and keep finished pancakes on a baking sheet inside while you cook the rest.
They’ll stay warm and fluffy without drying out. Game changer for weekend brunches.
You’ll love these too : banana dessert recipes
How to Make Banana Pancakes
Step 1: Prep Your Star Ingredient
Grab those spotty bananas and mash them in a medium bowl.
Use a fork and really get in there until they’re mostly smooth with just a few small chunks. You want them well-mashed so they distribute evenly in the batter.
Texture check: Should look like baby food. Not chunky salsa.
Step 2: Mix the Wet Crew
Add the eggs to your mashed bananas and whisk them together.
Then add the milk, melted butter, and vanilla extract. Keep whisking until everything is combined and smooth.
Quick Warning: Make sure your melted butter isn’t screaming hot or it’ll cook the eggs. Let it cool for a minute after melting. Nobody wants scrambled egg pancakes.
Step 3: The Dry Squad
In your large bowl, whisk together:
- Flour
- Sugar
- Baking powder
- Baking soda
- Salt
- Cinnamon (if using)
Give it a good mix so the leavening agents are distributed evenly.
Step 4: The Big Mix
Pour your wet ingredients into the dry ingredients.
Now here’s where that pro tip comes in: use a spatula or wooden spoon to gently fold everything together.
Stop as soon as you don’t see any more dry flour.
The batter will be thick and slightly lumpy, and that’s exactly what you want.
Then walk away for 5 minutes.
Step 5: Get That Pan Ready
Place your skillet or griddle over medium heat.
Add a small pat of butter and let it melt. You want the pan hot enough that a drop of water sizzles on contact, but not so hot that the butter burns.
Temperature guide:
- Too cold = pale, dense pancakes
- Just right = golden brown, fluffy
- Too hot = burnt outside, raw inside
Step 6: Cook Time!
Using a ladle or ¼ cup measure, pour the batter onto your hot pan.
You can usually fit 2-3 pancakes at a time depending on your pan size.
The waiting game: Watch for those bubbles I mentioned earlier. When you see them forming on the surface and the edges look set (about 2-3 minutes), slide your spatula underneath and flip.
Cook for another 1-2 minutes on the second side until golden brown.
Recommended for you : ripe banana recipes
Step 7: Repeat & Devour
Transfer your cooked pancakes to a plate (or that warm oven if you’re keeping them hot) and repeat with the remaining batter.
Remember to add a little butter to the pan between batches.
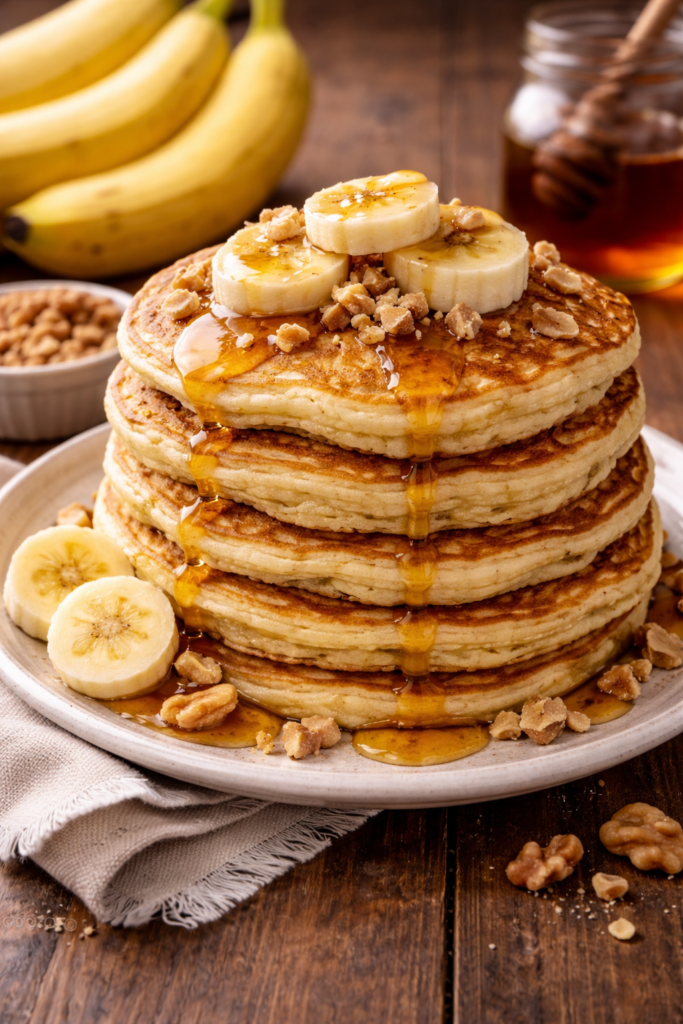
Stack them high, add your favorite toppings, and pour on that maple syrup.
Substitutions and Variations
Dietary Swaps
| Original | Substitute | Notes |
|---|---|---|
| Whole milk | Almond/oat/coconut milk | I’ve tried all three, all work perfectly |
| Butter | Coconut oil | Makes them dairy-free |
| All-purpose flour | 1:1 GF flour blend | Slightly different texture but still delicious |
| White sugar | Coconut sugar or honey | Adds a caramel-like flavor |
| 2 eggs | 2 flax eggs | 1 tbsp ground flax + 3 tbsp water each |
Fun Flavor Twists
Chocolate Banana Pancakes: Fold in ½ cup chocolate chips after mixing. They melt slightly as they cook and it’s honestly amazing.
Healthy-ish Version:
- Use whole wheat flour (or 50/50 mix)
- Reduce sugar to 1 tablespoon
- The bananas add plenty of natural sweetness
Spiced Banana Pancakes:
- Add ¼ teaspoon nutmeg
- Pinch of cardamom
- Keeps the cinnamon
- Tastes like a warm hug
Berry Banana Combo: Fold in ½ cup fresh blueberries or sliced strawberries. Just be gentle so you don’t crush them.
Nutty Delight: Add ¼ cup chopped walnuts or pecans directly to the batter.
Make Ahead Tips
Night Before Prep
What you CAN do:
- Mix all dry ingredients
- Store in airtight container
- Set out your tools
What you SHOULDN’T do:
- Mix the full batter (it won’t be as fluffy)
- Mash the bananas (they’ll brown)
Freezer Meal Prep
The batter is best used right away, but cooked pancakes freeze really well.
Here’s my Sunday routine:
- Make a double batch
- Let them cool completely
- Layer between parchment paper
- Store in freezer bag
- Keeps for up to 2 months
I like having my own frozen pancake stash. It’s like meal prep met breakfast and they became best friends.
Reheating from frozen:
- Toaster: 2-3 minutes (my favorite method)
- Microwave: 30-45 seconds
- Oven: 10 minutes at 350°F
Leftovers and Storage
Storage Guide
| Method | Duration | Best For |
|---|---|---|
| Counter (covered) | 2 hours max | Eating same day |
| Refrigerator | Up to 3 days | Week ahead prep |
| Freezer | Up to 2 months | Long-term storage |
Pro tip for fridge storage: Layer parchment paper between pancakes so they don’t stick together. Makes grabbing a quick breakfast so much easier.
Reheating Methods Ranked
🥇 Best: Toaster or Toaster Oven
- Gets them crispy on the outside
- Soft inside
- Almost like they’re freshly made
- Takes 2-3 minutes
🥈 Second Best: Oven
- Great for reheating multiple pancakes
- 350°F for about 10 minutes
- Cover with foil if they’re getting too dark
🥉 Third: Microwave
- Fastest option
- Can make them a bit soggy
- 20-30 seconds usually does it
- Put a damp paper towel over them for moisture
Nutritional Breakdown
Per Serving (3 medium pancakes, no toppings)
| Nutrient | Amount | % Daily Value* |
|---|---|---|
| Calories | 285 | 14% |
| Protein | 8g | 16% |
| Carbohydrates | 42g | 14% |
| Dietary Fiber | 2g | 8% |
| Sugars | 12g | – |
| Fat | 9g | 14% |
| Saturated Fat | 5g | 25% |
| Sodium | 380mg | 16% |
| Potassium | 295mg | 8% |
*Based on a 2,000 calorie diet
Reality Check: This is just the pancakes. Maple syrup, butter, and other toppings will add to these numbers. But you already knew that. 😉
Meal Pairing Suggestions
The Perfect Breakfast Plate
Savory Balance:
- Crispy bacon (3-4 strips)
- Breakfast sausage links
- Scrambled eggs on the side
The saltiness balances the sweetness perfectly.
Light & Fresh:
- Mixed berries in a bowl
- Fresh fruit salad
- Greek yogurt with honey
The Full Brunch Spread:
| Course | Suggestion | Why It Works |
|---|---|---|
| Main | Banana Pancakes | Obviously |
| Side #1 | Crispy bacon | Salty-sweet combo |
| Side #2 | Fresh berries | Cuts the richness |
| Drink | Strong coffee | Balances sweetness |
| Extra | Whipped cream | Because why not? |
Coffee Pairings
These go incredibly well with:
- Bold dark roast (my go-to)
- French press coffee (smooth and rich)
- Cold brew (if it’s summer)
- Latte (for the fancy mornings)
I usually make a strong brew since the pancakes are on the sweeter side.
Time-Saving Hacks
Want these on the table faster? Here’s my system:
The Mise en Place Method
| Prep Station | What To Do | Time Saved |
|---|---|---|
| Dry ingredients | Measure everything into one bowl | 2 minutes |
| Wet ingredients | Bananas mashed, eggs ready | 2 minutes |
| Toppings | Everything chopped and ready | 3 minutes |
| Serving | Plates out, table set | 2 minutes |
Total time saved: 9 minutes of scrambling during cooking
The Two-Pan Trick
Use a griddle AND a large skillet at the same time.
Cooking time goes from 15 minutes to 8 minutes.
You’ll be eating while the batter is still warm instead of making everyone wait.
The Assembly Line
- First batch cooks
- Set the table
- Second batch cooks
- Get toppings ready
- Third batch cooks
- Everyone sits down to eat together
Everything’s ready at the same time. No cold pancakes.
FAQ
Q: Why are my pancakes flat and not fluffy?
Three common culprits:
- Old baking powder (check the date, it goes bad after 6 months)
- Overmixing (creates tough, dense pancakes)
- Wrong temperature (too hot or too cold)
The fix: Buy fresh baking powder, mix gently, and test your pan with a drop of water first.
Q: Can I make these without eggs?
Absolutely!
Try flax eggs: Mix 1 tablespoon ground flaxseed with 3 tablespoons water per egg. Let it sit for 5 minutes until it gets goopy.
Or chia eggs: Same ratio, same process, slightly different texture.
The pancakes will be a bit denser but still tasty.
Q: My bananas aren’t ripe enough. Help!
Three quick fixes:
| Method | Time | Results |
|---|---|---|
| Paper bag overnight | 12-24 hours | Best flavor |
| Oven method (300°F) | 15-20 minutes | Works in a pinch |
| Microwave (30 sec bursts) | 1-2 minutes | Desperate times |
The oven method: Put unpeeled bananas on a baking sheet. Bake at 300°F for 15-20 minutes until soft. They won’t be as sweet but they’ll work.
Q: Can I use a different type of flour?
Sure can!
- Whole wheat: Denser texture, nuttier flavor
- Spelt: Almost identical to all-purpose
- Gluten-free blend: More delicate, follow package instructions
- Oat flour: Makes them slightly chewier
Each gives you a different result. Start with a 50/50 mix if you’re nervous.
Q: How do I know when to flip them?
Look for these signs:
- ✅ Bubbles all over the surface
- ✅ Bubbles starting to pop
- ✅ Edges look dry and set
- ✅ Bottom is golden brown (peek with spatula)
Takes about 2-3 minutes. Patience is key here.
Q: Why do my pancakes stick to the pan?
Usually one of these reasons:
- Pan isn’t hot enough
- Not enough butter/oil
- Flipping too early
- Pan isn’t non-stick (or coating is worn)
The solution: Preheat properly, grease well, wait for the bubbles.
Q: Can I double this recipe?
Definitely!
I do it all the time for meal prep Sundays. Just make sure your bowl is big enough for all that batter.
Yields about 24 pancakes (perfect for freezing half).
Q: How thick should the batter be?
Think somewhere between cake batter and cookie dough.
Too thick? Add milk 1 tablespoon at a time.
Too thin? Add flour 1 tablespoon at a time.
It should slowly pour off a spoon, not run off quickly.
Q: Can I use frozen bananas?
Yes!
Thaw them completely first and drain the excess liquid. They’ll be mushy and perfect for mashing.
Bonus: Frozen bananas are actually easier to mash once thawed. They basically turn into banana pudding.
Wrapping Up
There you have it. Fluffy, banana-filled pancakes that’ll make your mornings feel a little more special.
The great thing about this recipe is that it’s pretty hard to mess up.
Even if they’re not picture-perfect, they’re still going to taste amazing. And once you get the hang of it, you can start playing around with different add-ins and toppings.
I’d love to hear how yours turn out!
Drop a comment and tell me:
- Did you add chocolate chips?
- What toppings did you use?
- Any creative variations you discovered?
- Questions about the recipe?
I read every single comment and I’m happy to help troubleshoot or share more tips.
Now go make yourself some pancakes. You deserve them.


1 thought on “The Fluffiest Banana Pancakes You’ll Ever Make”