Ever watched a flat circle of dough balloon into a perfect pocket right before your eyes?
It’s kind of addictive.
I used to think making pita bread at home was one of those things that sounds good in theory but would just end up being a flour-covered disaster.
Turns out I was wrong.
After making these fluffy, pillowy pockets of bread at home for the first time, I realized something: store-bought pita has been lying to us. Real pita bread is soft, warm, and puffs up like magic in your oven.
It tears easily. Holds fillings without falling apart. And tastes like actual bread instead of cardboard.
The crazy part? You only need 6 basic ingredients.
| What You Get | What You DON’T Need |
|---|---|
| ✓ Pillowy soft pockets | ✗ Special equipment |
| ✓ Perfect puff every time | ✗ Overnight fermentation |
| ✓ Ready in 2 hours | ✗ Fancy ingredients |
| ✓ Costs pennies per pita | ✗ Baking experience |
Just simple pantry staples and about 2 hours from start to finish (most of that is hands-off rising time).
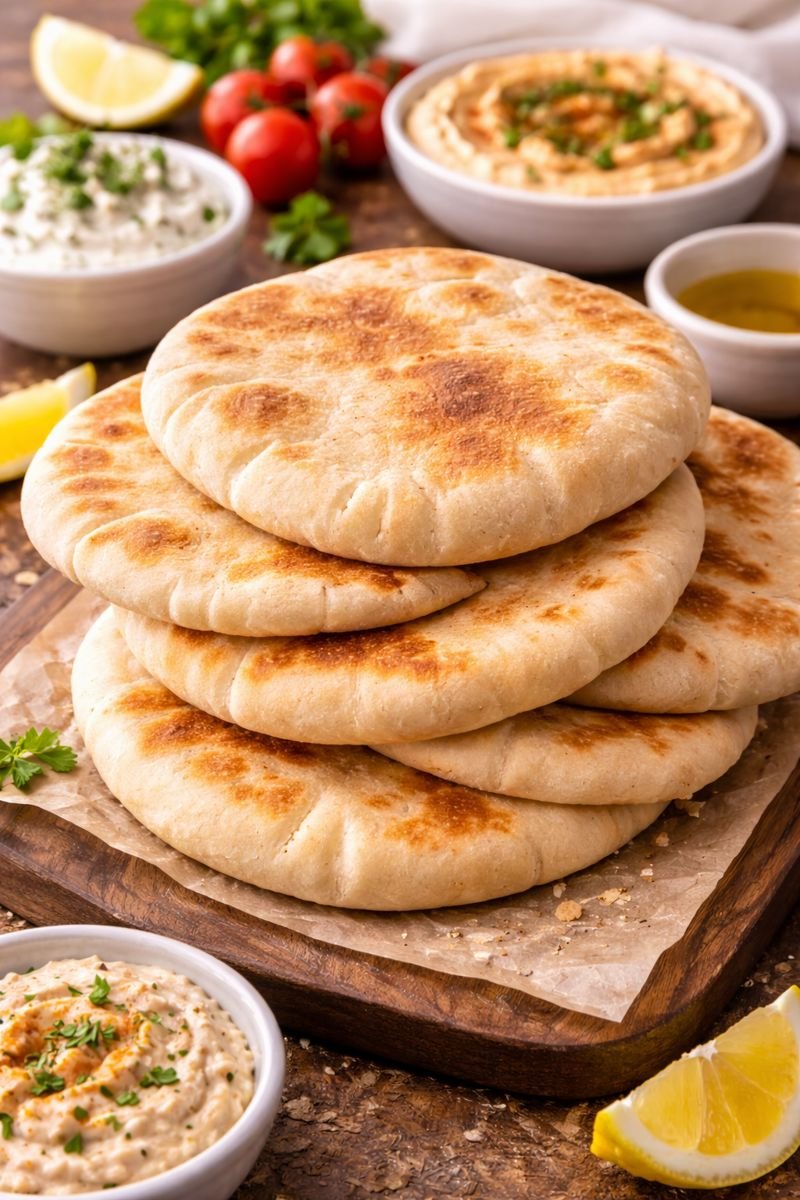
I’m talking golden-brown pockets that balloon up in your oven like little bread clouds. The kind you can stuff with grilled chicken and veggies, dip into hummus, or just tear apart while they’re still warm because you can’t help yourself.
“Once you make fresh pitas at home, the store-bought ones taste like sad, stale disappointment.” – Me, after my first homemade batch
And once you make these, going back to the grocery store version feels impossible.
What You’ll Need
For the Dough
| Ingredient | Amount | Notes |
|---|---|---|
| All-purpose flour | 3 cups (plus extra for dusting) | Bread flour works too for chewier pitas |
| Granulated sugar | 1 tablespoon | Feeds the yeast |
| Instant yeast | 2 teaspoons | Active dry works if that’s what you have |
| Salt | 1 teaspoon | Don’t skip – it’s not just for flavor |
| Olive oil | 2 tablespoons | Keeps them soft and adds flavor |
| Warm water | 1 cup (around 110°F) | Temperature matters here |
Here’s the thing about that warm water: It needs to feel like a warm bath. Not hot tub hot. Not lukewarm.
Too hot and you’ll kill the yeast. Too cold and nothing will happen.
Stick your finger in. If it feels comfortably warm but not burning, you’re good.
💡 Quick temp check: If you can hold your finger in the water for 10 seconds without it feeling uncomfortable, that’s your sweet spot.
Tools You’ll Need
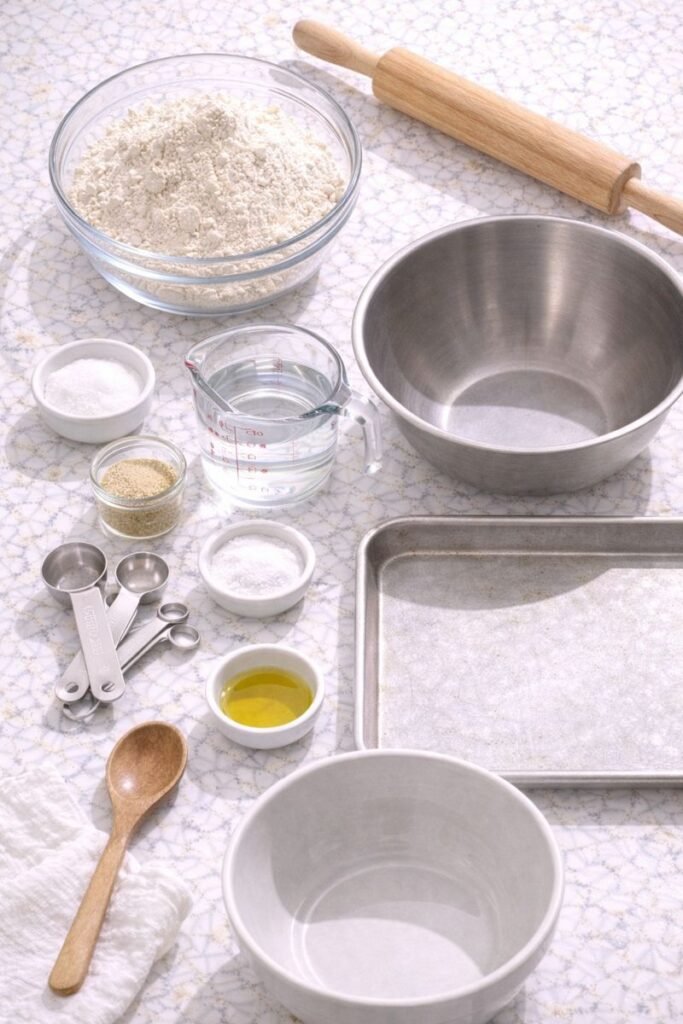
Must-Haves:
- 🥣 Large mixing bowl
- 📏 Measuring cups and spoons
- 🎯 Rolling pin
- 🧺 Clean kitchen towel
- 🍪 Baking sheet (or two)
Nice-to-Haves:
- Parchment paper (saves cleanup time)
- Stand mixer with dough hook (if you hate kneading)
- Pizza stone (helps with even heat, but not required)
Nothing fancy. If you’ve got a stand mixer with a dough hook, great. If not, your hands work just fine.
Actually, kneading by hand is kind of therapeutic. Just saying.
Pro Tips
1. Let the Dough Rest Properly ⏰
I know waiting is annoying, but this step is non-negotiable.
The dough needs that full hour to rise and develop flavor. Rushing it means dense, sad pitas that won’t puff.
Set a timer. Walk away. Watch an episode of something. Just don’t rush this.
2. Roll Evenly (Seriously, This Matters)
When you’re rolling out each pita, try to keep the thickness consistent across the whole circle.
Uneven dough = uneven puffing = weird half-pockets instead of beautiful balloons.
The sweet spot: About 1/4 inch thick all the way across. Use a ruler if you need to at first.
3. Crank the Heat 🔥
Your oven needs to be screaming hot. We’re talking 475°F minimum.
The high heat creates steam inside the dough, which is what makes it puff into that perfect pocket.
A lukewarm oven will just give you flat bread. And nobody wants flat bread when they’re making pitas.
Pro move: Put your baking sheet in the oven while it preheats. That initial blast of heat when the dough hits the hot surface helps with the puff.
4. Watch Them Like a Hawk 👀
These cook FAST. Like, 3-5 minutes fast.
Turn your back for too long and you’ve got hockey pucks instead of pitas.
Stay close. Keep the oven light on. Watch for the magic puff moment.
5. Keep Finished Pitas Wrapped
As soon as they come out of the oven, stack them and cover with a clean towel.
This traps steam and keeps them soft. Leaving them exposed will dry them out and make them stiff.
Trust me on this one. I learned this the hard way after my first batch turned into cardboard within 10 minutes.
Substitutions and Variations
| Want This? | Do This | What Changes |
|---|---|---|
| Whole wheat pita | Swap half the AP flour for whole wheat flour | Nuttier flavor, denser texture. Add 1-2 tbsp more water |
| Herb-infused | Mix in 1-2 tsp dried herbs (oregano, za’atar, rosemary) | More flavorful, perfect for sandwiches |
| Garlic butter finish | Brush hot pitas with garlic butter when they come out | Addictively good, you’ll eat them all immediately |
| Gluten-free | Use 1:1 GF flour blend | Different texture, won’t puff as much, but still works |
| Dairy butter swap | Use melted butter instead of olive oil | Slightly richer flavor |
My Favorite Variation: Za’atar Pitas
Add 2 teaspoons of za’atar spice blend to the dough when you mix in the flour.
The Middle Eastern spice mix (thyme, sesame, sumac) makes these insanely good. I can’t stop making them this way now.
Pro tip: Brush with olive oil and sprinkle more za’atar on top right after baking for an extra flavor punch.
How to Make Pita Bread

Step 1: Mix the Dough
Pour your warm water into a large bowl and sprinkle the yeast on top.
Add the sugar. Give it a quick stir.
Let it sit for about 5 minutes until it gets foamy on top.
💡 What you’re looking for: A layer of foam that looks like cappuccino. This is proof your yeast is alive and ready to work.
No foam? Your yeast is dead. Start over with fresh yeast. I know it’s annoying, but better to know now than waste time kneading dead dough.
Add the olive oil to the yeast mixture.
In a separate bowl, whisk together your flour and salt, then pour it into the wet ingredients.
Stir everything together until you’ve got a shaggy dough. It’ll look messy at this point and that’s completely fine.
Step 2: Knead the Dough
Dump the dough onto a lightly floured surface and start kneading.
The technique:
- Push it away from you with the heel of your hand
- Fold it back over itself
- Turn it a quarter turn
- Repeat
Keep going for about 8-10 minutes until the dough is smooth and elastic.
It should bounce back when you poke it.
Using a stand mixer? Knead with the dough hook on medium speed for 5-6 minutes.
The dough should feel slightly tacky but not stick to your hands. Add tiny amounts of flour if it’s too sticky, or a splash of water if it’s too dry.
How to tell if you’re done kneading: Press your finger into the dough. If the indent slowly springs back, you’re good. If it stays there, keep kneading.
Step 3: Let It Rise
Shape your dough into a ball and place it in a lightly oiled bowl.
Turn it once so the top is coated in oil. This prevents a dry skin from forming.
Cover with a clean kitchen towel or plastic wrap and let it rise in a warm spot for about 1 hour.
You want it to double in size.
Where to let it rise:
- ✓ In the oven (turned off) with just the light on
- ✓ On top of the fridge
- ✓ Near a sunny window
- ✗ In a cold, drafty spot
I usually put mine in the oven with the light on. That little bit of heat from the bulb creates the perfect environment.
Step 4: Divide and Shape
Once your dough has doubled, punch it down to release the air.
Feels good, right?
Turn it out onto a clean surface and divide it into 8 equal pieces.
Pro tip: Use a kitchen scale if you want them all exactly the same size. Each piece should be about 85-90 grams.
Roll each piece into a smooth ball.
The technique: Cup your hand over the dough and roll it in a circular motion on the counter. The friction against the counter helps create surface tension.
Let these balls rest for 10 minutes under a towel.
This relaxes the gluten and makes rolling SO much easier. Skip this and you’ll be fighting springy dough that keeps shrinking back.
Step 5: Roll Out the Pitas
Preheat your oven to 475°F.
If you have a pizza stone, put it in to heat up. If not, just use a baking sheet flipped upside down.
On a lightly floured surface, roll each ball into a circle about 6-7 inches wide and roughly 1/4 inch thick.
Rolling tips:
- Start from the center and roll outward
- Rotate the dough as you roll to keep it circular
- Don’t press too hard or you’ll create thin spots
- Flip it over once during rolling for even thickness
Don’t stress about perfect circles. Rustic and slightly wonky is fine.
Just keep the thickness even across the whole thing.
As you roll them out, keep the finished ones covered with a towel so they don’t dry out.
Step 6: Bake (The Magic Moment)
Place 2-3 pitas on your preheated baking surface.
Don’t overcrowd them or they won’t puff properly. Give them space to breathe.
Bake for 3-5 minutes.
You’ll see them start to puff up like little balloons around the 2-minute mark.
It’s honestly kind of magical.
First they just sit there. Then suddenly they start bubbling. Then POOF – they inflate into perfect pockets.
They’re done when they’re puffed and just barely starting to get light golden spots.
Don’t let them brown too much or they’ll be too crispy.
| Baking Time | What’s Happening |
|---|---|
| 0-1 min | Nothing yet, don’t panic |
| 1-2 min | Dough starts to firm up |
| 2-3 min | THE PUFF BEGINS 🎈 |
| 3-4 min | Fully puffed, light spots forming |
| 4-5 min | Slightly golden, PERFECT |
| 5+ min | Too brown, getting crispy (oops) |
Remove from the oven and immediately stack them on a plate covered with a clean towel.
The steam will keep them soft.
Repeat with the remaining dough balls.
Leftovers and Storage
| Storage Method | How Long | Best For | How to Reheat |
|---|---|---|---|
| Room temp | 2-3 days | Eating soon | 30 sec per side in dry skillet |
| Freezer | Up to 3 months | Meal prep | Thaw 1 hour, or toast frozen |
| Fridge | DON’T | Making them stiff and sad | Seriously, skip the fridge |
These are best eaten the day you make them, but they’ll keep for 2-3 days at room temperature in an airtight bag or container.
Just reheat them quickly in a dry skillet for 30 seconds on each side. Or wrap in foil and warm in a 300°F oven for 5 minutes.
Freezing Tips
For longer storage, freeze them. Here’s how:
- Let pitas cool completely
- Stack with parchment paper between each one
- Seal in a freezer bag, squeezing out air
- Freeze for up to 3 months
- Label with the date (future you will thank present you)
To use frozen pitas:
- Thaw at room temperature for an hour, OR
- Pop frozen pitas straight into a toaster oven until warmed through
Why not the fridge? The fridge will dry them out and make them stiff. It’s the worst place for bread. Room temp or freezer only.
FAQ
Why didn’t my pitas puff up? 😭
This is the most common problem. Usually it’s one of three things:
| Problem | Solution |
|---|---|
| Oven wasn’t hot enough | Preheat to at least 475°F, use oven thermometer |
| Dough rolled wrong | Keep thickness even at 1/4 inch |
| Didn’t rise enough | Let it double in size, full hour |
Make sure your oven is fully preheated to at least 475°F. Get an oven thermometer if you’re not sure yours is accurate.
And give that dough the full rise time. Patience pays off here.
Can I make the dough ahead of time?
Yes! This is actually really convenient for meal prep.
After the first rise:
- Punch down the dough
- Cover it tightly with plastic wrap
- Refrigerate for up to 24 hours
- Let it come to room temperature (about 30 minutes) before dividing and rolling
The slow cold rise actually develops more flavor. Some people think they taste even better this way.
What if I don’t have instant yeast?
Active dry yeast works too.
Just bloom it in the warm water with the sugar for about 10 minutes before adding the other ingredients.
You’ll know it’s ready when it’s foamy and smells yeasty.
The rise time might be slightly longer with active dry, so just watch the dough instead of the clock.
Can I cook these on the stovetop instead?
You can, but they won’t puff as well.
Stovetop method:
- Heat a cast-iron skillet or griddle over medium-high heat
- Cook each pita for about 2 minutes per side
- Look for light charring and some puffing
They’ll be more like flatbreads than pocketed pitas. Still tasty, just different.
My take: If you want the full pita pocket experience, use the oven. If you just want quick flatbread, stovetop works fine.
How do I know when they’re done?
Visual cues:
- ✓ Fully puffed up (like a balloon)
- ✓ Light golden spots starting to appear
- ✓ No wet, raw-looking dough
- ✗ Dark brown or crispy edges (you’ve gone too far)
Better to underbake slightly than overbake.
A slightly pale pita that’s soft is better than a perfectly golden one that’s hard.
Can I add toppings before baking?
Not really.
Adding toppings before baking will weigh down the dough and prevent it from puffing.
Instead:
- Mix seasonings into the dough itself, OR
- Brush with toppings after baking
The garlic butter finish I mentioned earlier? That goes on AFTER they come out of the oven.
Why are my pitas tough?
A few possible culprits:
Over-kneading: More isn’t always better. Stop when the dough is smooth and elastic.
Too much flour: Add flour gradually. The dough should be tacky, not dry.
Overbaking: They dry out fast. Watch them closely.
Improper storage: Keep them covered right after baking to trap steam.
The fix: Brush warm pitas with olive oil or melted butter. It won’t make them soft again, but it helps.
Do I need a pizza stone?
Nope.
It helps with even heat distribution, but a regular baking sheet works fine.
Just flip it upside down so you can easily slide the pitas on and off.
What actually matters more:
- Oven temperature (hot hot hot)
- Proper rise time
- Even rolling
Get those three things right and you’ll have perfect pitas with or without a stone.
What to Do With Your Fresh Pitas
Now that you’ve got a stack of warm, pillowy pockets, here are my favorite ways to use them:
| Filling Idea | What You Need | Why It’s Good |
|---|---|---|
| Classic Gyro | Grilled chicken or lamb, tzatziki, tomatoes, onions, lettuce | The OG. Can’t go wrong. |
| Falafel Bowl | Falafel, hummus, tahini, cucumbers, pickled turnips | Vegetarian perfection |
| Breakfast Pocket | Scrambled eggs, feta, spinach, hot sauce | Game-changing morning meal |
| Pizza Pita | Marinara, mozzarella, pepperoni | Kids love these |
| Shawarma Style | Spiced meat, garlic sauce, pickles, tomatoes | So. Much. Flavor. |
Or just tear them apart and dip into:
- Hummus (obviously)
- Baba ganoush
- Tzatziki
- Labneh with olive oil and za’atar
- Literally any dip in your fridge
My go-to: Grilled chicken with tzatziki, diced tomatoes, red onion, and a handful of fresh herbs. Simple but ridiculously good.
Wrapping Up
Making pita bread from scratch is one of those things that sounds harder than it actually is.
You mix up a simple dough. Let it rise. Roll it out. Bake.
That’s it.
And what you get is fresh, warm, pillowy bread that makes everything you put in it taste better. The kind that actually holds your fillings without falling apart. The kind that’s soft enough to tear but sturdy enough to stuff.
Try them with grilled chicken and tzatziki. Stuff them with falafel and hummus. Use them for breakfast sandwiches with scrambled eggs.
Or just tear them apart and dip into whatever you’ve got.
Once you nail this recipe, you’ll find yourself making pitas all the time. Because they’re that easy and that good.
And because once you taste them fresh from your own oven, the grocery store version just doesn’t cut it anymore.
Now I want to know: What are you planning to fill your homemade pitas with? Drop a comment below and let me know how they turned out for you. Bonus points if you share which variation you tried.


