
You know that moment when your bananas go from yellow to brown and you feel guilty throwing them away?
Stop right there.
Those ugly bananas are about to become the best banana bread you’ve ever made. I’m not exaggerating.
I’ve been making this exact recipe for years, and it’s never failed me once. No complicated steps. No fancy equipment. No ingredients you need to hunt down at three different grocery stores.
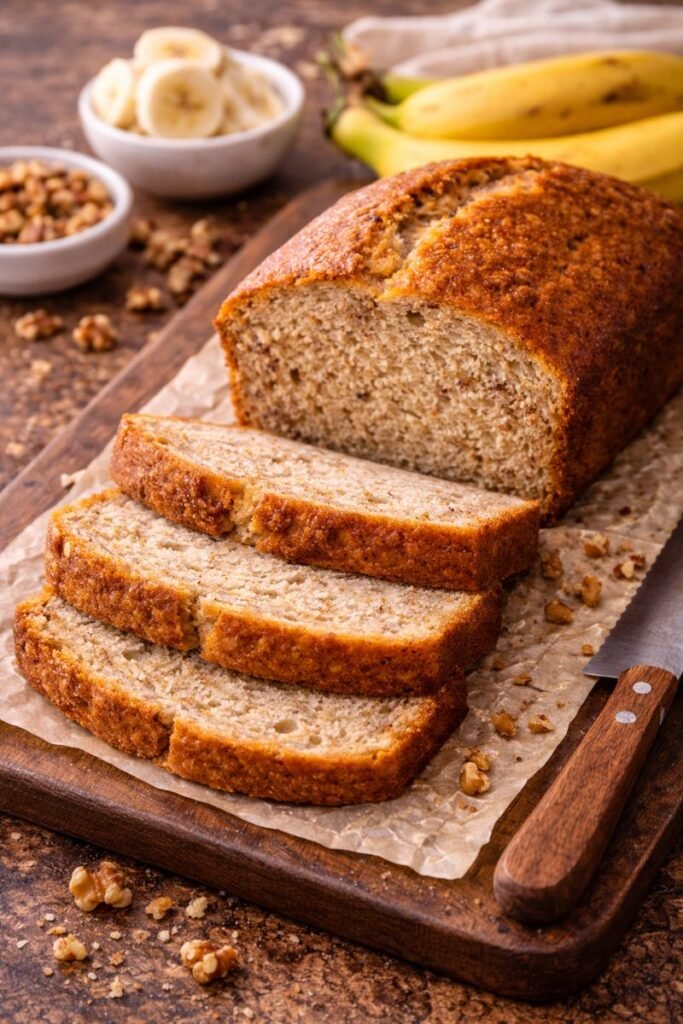
Just really good banana bread that’s moist, sweet, and makes your kitchen smell like an actual bakery.
Here’s what makes this recipe different: it disappears in 24 hours because people can’t stop sneaking back for “just one more slice.”
Fun fact: Americans throw away nearly 2.5 billion pounds of bananas every year. This recipe is about to save yours.
What You’ll Need
The Ingredients
| Ingredient | Amount | Why It Matters |
|---|---|---|
| Overripe bananas | 3 medium | The browner, the sweeter |
| Melted butter | 1/3 cup | Keeps it super moist |
| Granulated sugar | 3/4 cup | Perfect sweetness level |
| Large egg | 1 (beaten) | Binds everything together |
| Vanilla extract | 1 tsp | Flavor boost |
| Baking soda | 1 tsp | Makes it rise |
| Salt | Pinch | Balances the sweetness |
| All-purpose flour | 1 1/2 cups | The foundation |
Total prep time: 10 minutes
Baking time: 50-60 minutes
Cooling time: 30 minutes (torture, I know)
Your Kitchen Arsenal
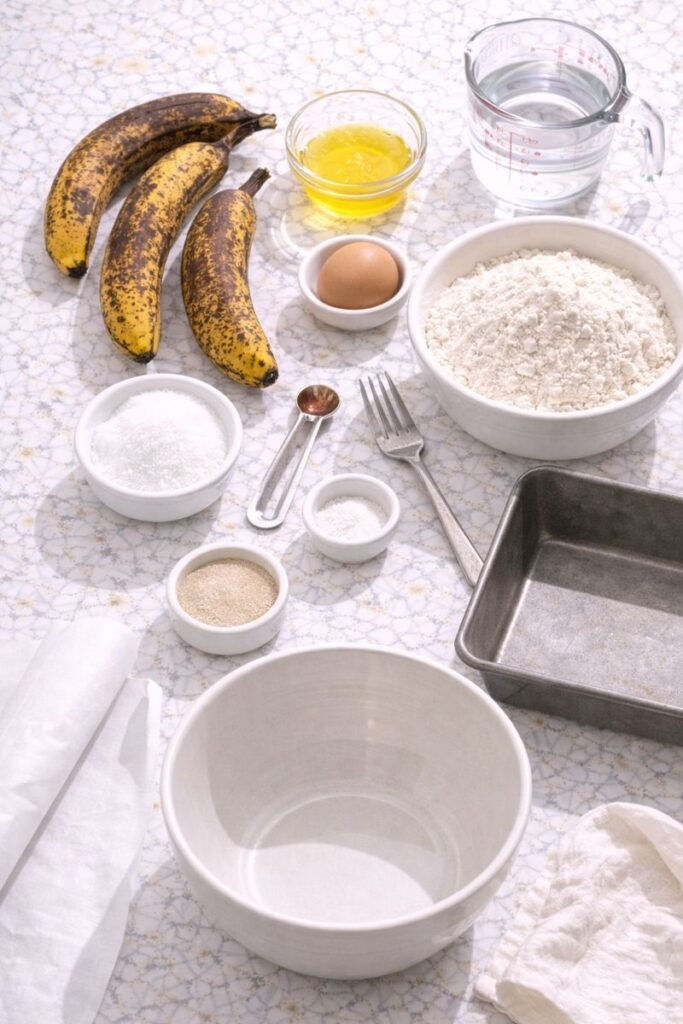
You probably have all of this already:
✓ Large mixing bowl
✓ Fork or potato masher
✓ Wooden spoon or spatula
✓ 9×5 inch loaf pan
✓ Measuring cups and spoons
✓ Oven mitts
That’s it. No stand mixer. No fancy gadgets. Just basic kitchen stuff.
Pro Tips
🍌 The Uglier the Banana, The Better
Don’t toss those black bananas.
The more spots and brown patches your bananas have, the sweeter your bread will be. I literally wait until mine look like they belong in the compost bin.
Hack: If you’re impatient, throw yellow bananas in a 300°F oven for 15-20 minutes until the skins turn black. Instant overripe bananas.
👋 Ditch the Mixer
Mix by hand. Always.
I know your stand mixer is sitting right there, begging to be used. Resist.
Overmixing = tough, dense bread. A fork and some arm work = tender, fluffy perfection.
Pro baker secret: Lumps in your batter are totally fine. They’ll bake out. Stop mixing the second you don’t see dry flour.
⏰ Patience Is Everything
Let it cool completely before slicing.
This is torture when your kitchen smells like heaven, but cutting into warm banana bread turns it into gummy mush instead of clean slices.
Minimum cooling time: 30 minutes on the counter
🌡️ Room Temperature Wins
Cold ingredients don’t play nice together.
If your butter is melted, you’re golden. But if your egg is straight from the fridge, it’ll seize up that butter into weird little clumps.
Quick fix: Put your egg in a bowl of warm water for 5 minutes before using it.
📄 Parchment Paper Changes Everything
Forget greasing the pan.
Line it with parchment paper with a little overhang on the sides. When it’s done, you just lift the whole loaf right out.
Game changer for cleanup and perfect slicing.
How to Make It
Step 1: Prep Your Oven
Temperature: 350°F
What to do: Grease your loaf pan OR line it with parchment paper (my preference)
This is the boring part. Get it out of the way while you’re still motivated.
Step 2: Mash Those Bananas
Grab your fork and go to town on those bananas in a large mixing bowl.
Texture goal: Mostly smooth with a few small lumps
Those lumps give you nice pockets of banana flavor, so don’t stress about making it perfectly smooth.
Step 3: Add the Wet Stuff
Pour in your melted butter and stir.
Then add:
- Sugar (3/4 cup)
- Beaten egg (1)
- Vanilla extract (1 tsp)
Mix until combined. This doesn’t need to be perfect. You’re not making a cake.
Step 4: The Magic Ingredients
Sprinkle the baking soda and salt over your mixture.
Stir it in. You might see it bubble a little. That’s the baking soda activating. That’s exactly what you want.
Science moment: Baking soda reacts with the natural acids in bananas to create carbon dioxide, which makes your bread rise and stay fluffy.
Step 5: Fold in the Flour (Gently!)
Add your 1 1/2 cups flour all at once.
Important: Use a gentle folding motion with your wooden spoon or spatula. Mix just until you don’t see dry flour anymore.
Then stop.
Seriously. Put the spoon down. Overmixing is the enemy.
Step 6: Bake
Pour the batter into your prepared pan and smooth the top.
Baking time: 50-60 minutes
Done test: Insert a toothpick in the center. If it comes out clean or with just a few moist crumbs, you’re golden.
Step 7: The Hardest Part
Let it cool in the pan for 10 minutes.
Then transfer to a wire rack and let it cool completely (another 20-30 minutes minimum).
I know. It’s painful. But this step is what separates good banana bread from great banana bread.
Substitutions and Variations
Quick Swap Guide
| Want to Change | Original | Substitute | Notes |
|---|---|---|---|
| Make it vegan | Butter | Coconut oil | Use refined for no coconut taste |
| Make it vegan | Egg | Flax egg* | Works perfectly |
| Different sweetness | White sugar | Brown sugar | Adds caramel flavor |
| Dairy-free | Butter | Vegetable/canola oil | Texture stays the same |
| Lower sugar | 3/4 cup | 1/2 cup minimum | Less = drier bread |
*Flax egg = 1 tbsp ground flaxseed + 3 tbsp water, let sit 5 minutes
Level Up Your Loaf
🍫 Chocolate Chip Version
Fold in 1/2 to 3/4 cup chocolate chips after adding the flour.
Dark, milk, or white chocolate all work. I prefer dark because it’s not too sweet.
🌰 Nutty Upgrade
Add 1/2 cup chopped walnuts or pecans.
Toast them first in a dry pan for 5 minutes. Trust me on this. It makes them taste 10x better.
🧁 Muffin Mode
Same batter, different pan.
Pour into a greased muffin tin and bake at 350°F for 18-20 minutes. Perfect for meal prep.
🌶️ Spice It Up
Add to your dry ingredients:
- 1/2 tsp cinnamon
- Pinch of nutmeg
Gives it that cozy, warm vibe without overpowering the banana.
🍯 Natural Sweetener Swap
Replace half the sugar with honey or maple syrup.
You’ll need to reduce the butter by 1 tablespoon to account for the extra liquid.
Make Ahead Tips
🧊 Freeze Your Bananas
Your bananas are getting too ripe but you’re not ready to bake?
Solution: Peel them, toss in a freezer bag, freeze.
When you’re ready to bake, thaw at room temperature. They’ll be mushy and perfect for banana bread.
Bonus: Frozen bananas are actually easier to mash than fresh ones.
📦 Batch Prep the Dry Mix
Save yourself 5 minutes next time.
What to do: Mix flour, baking soda, and salt in a container or zip-top bag.
Shelf life: Up to 3 months
When you’re ready to bake, just dump it into your wet ingredients.
🍞 Double Batch = Future You Wins
This recipe freezes beautifully after baking.
The method:
- Let the bread cool completely
- Wrap tightly in plastic wrap
- Wrap again in aluminum foil
- Label with the date
- Freeze
Lasts: 3 months in the freezer
To thaw: Leave on the counter for 2-3 hours or microwave individual slices for 30 seconds.
Nutritional Information
Serving size: 1 slice (based on 10 slices per loaf)
| Nutrient | Amount | % Daily Value* |
|---|---|---|
| Calories | 185 | 9% |
| Total Fat | 5g | 6% |
| Saturated Fat | 3g | 15% |
| Cholesterol | 30mg | 10% |
| Sodium | 150mg | 7% |
| Total Carbs | 33g | 12% |
| Fiber | 1g | 4% |
| Sugars | 17g | – |
| Protein | 3g | 6% |
*Based on a 2,000 calorie diet
Reality check: These are estimates. The exact numbers depend on how big your bananas are and how thick you slice your bread.
Dietary notes:
- Vegetarian: ✓
- Can be vegan: ✓ (with swaps)
- Gluten-free: ✗ (but you can use 1:1 GF flour)
- Dairy-free: ✓ (with oil instead of butter)
Pairing Suggestions
☕ Morning Situation
The spread: Salted butter, cream cheese, or almond butter
The drink: Hot coffee or English breakfast tea
The sweetness of the bread + strong black coffee = chef’s kiss
🍨 Dessert Mode Activated
Warm a slice in the microwave for 15 seconds.
Add a scoop of vanilla ice cream on top.
Thank me later. It’s ridiculously good.
Next level: Drizzle with caramel or hot fudge
🥐 Brunch Vibes
Serve alongside:
- Scrambled eggs with cheese
- Fresh fruit salad
- Crispy bacon
It’s sweet enough to satisfy but not so sweet it feels like cake for breakfast.
🌙 Late Night Snack
Just you, a thick slice, and a glass of cold milk.
No judgment here.
Leftovers and Storage
Storage Showdown
| Method | Duration | Best For | Pro Tip |
|---|---|---|---|
| Counter | 3-4 days | Eating soon | Wrap in plastic wrap |
| Fridge | 1 week | Hot/humid climates | Toast before eating |
| Freezer | 3 months | Long-term storage | Slice first, then freeze |
🏠 Room Temperature Storage
How: Wrap in plastic wrap or keep in an airtight container
Duration: 3-4 days
Pro tip: The texture actually gets better after the first day once the flavors develop.
❄️ Refrigerator Storage
When to use: Hot or humid kitchen
Duration: Up to 1 week
The catch: Refrigeration dries it out a little. Toast slices before eating to bring them back to life.
🧊 Freezer Storage (My Favorite)
The method:
- Slice the entire loaf
- Wrap each slice in plastic wrap
- Put all slices in a freezer bag
- Label with date
Why this works: You can grab individual slices whenever you want one
To thaw:
- Counter: 1 hour
- Microwave: 20-30 seconds
🔥 Revival Method
Even 3-day-old banana bread tastes fresh again with this trick.
What to do: Toast it for 1-2 minutes in the toaster or under the broiler
Result: Crispy edges, warm center, tastes like you just baked it
Game changer: Spread butter on it WHILE it’s hot from toasting. The butter melts into the bread. You’re welcome.
FAQ
❓ Why is my banana bread dense and heavy?
The culprit: Overmixing
Once you add the flour, mix just until you don’t see dry spots. Overmixing develops gluten and makes your bread tough instead of tender.
The fix: Use a gentle folding motion and stop as soon as the flour disappears.
🍌 Can I use frozen bananas?
Yes! Actually, they’re perfect.
How to use them:
- Thaw completely at room temperature
- Drain off excess liquid
- Mash as usual
Bonus: Frozen bananas are easier to mash because they get super soft.
🔥 My bread is raw in the middle but burnt on top. Help!
What happened: Your oven is too hot
The fix:
- Lower temperature to 325°F
- Bake longer (check every 5 minutes)
- Tent aluminum foil over the top if it’s browning too fast
Pro tip: Get an oven thermometer. Most ovens run 25°F hotter or cooler than the dial says.
🍯 Can I reduce the sugar?
You can, but don’t go below 1/2 cup.
Why: Sugar doesn’t just add sweetness. It also:
- Keeps the bread moist
- Makes it tender
- Helps it brown
Go below 1/2 cup and your bread will be dry and pale.
📏 Why didn’t my bread rise?
Common reasons:
| Problem | Solution |
|---|---|
| Old baking soda | Check expiration date, buy fresh |
| Didn’t mix baking soda properly | Stir into wet ingredients first |
| Oven temp too low | Use oven thermometer |
| Overmixing | Mix less next time |
🎨 Can I add other mix-ins?
Absolutely. Go wild (but not too wild).
Good additions:
- Chocolate chips (1/2 to 3/4 cup)
- Chopped nuts (1/2 cup)
- Dried cranberries (1/3 cup)
- Shredded coconut (1/2 cup)
- Peanut butter chips (1/2 cup)
The rule: Don’t exceed 3/4 cup total mix-ins or they’ll weigh down the batter.
🔪 How do I know when it’s done?
The toothpick test:
Insert a toothpick or knife into the center of the loaf.
✓ Done: Comes out clean or with a few moist crumbs
✗ Not done: Comes out with wet batter
Give it: Another 5-10 minutes and test again
🌱 Can I make this vegan?
Yes! Two simple swaps:
| Original | Vegan Substitute |
|---|---|
| Egg | Flax egg (1 tbsp flaxseed + 3 tbsp water) |
| Butter | Coconut oil or vegetable oil |
Result: Works perfectly. You won’t taste the difference.
🎂 Why does my bread sink in the middle?
Possible causes:
Underbaked: The center wasn’t fully set when you took it out
Too much liquid: Used extra-large bananas or didn’t measure flour correctly
Opened the oven door: Don’t open it before 45 minutes
The fix: Bake longer next time and resist peeking.
🥄 Do I really need to use overripe bananas?
Technically no. But you should.
Why overripe is better:
Green/yellow bananas = starchy, not sweet
Spotty brown bananas = natural sugars developed, super sweet
The difference: Overripe bananas make your bread naturally sweeter and more flavorful. You’ll taste it.
💰 Can I use less butter?
Not recommended.
What butter does:
- Creates the moist, tender texture
- Adds rich flavor
- Helps the bread stay fresh longer
Use less and you’ll get dry, crumbly bread.
Better option: Swap butter for oil (same amount) if you want dairy-free.
Wrapping Up
Here’s the truth about banana bread: it’s one of those recipes that feels impressive but is actually ridiculously easy.
You’re taking ingredients you already have, mixing them in one bowl, and ending up with something that makes your whole house smell like a professional bakery.
No special skills required.
No expensive ingredients.
Just really good banana bread.
The next time you see those bananas getting brown on your counter, you’ll know exactly what to do.
Now It’s Your Turn
Make this recipe and come back to tell me how it went.
I want to know:
Did you keep it classic or add chocolate chips?
Go the nutty route with walnuts?
Make it vegan?
Turn it into muffins?
Drop a comment below. Tell me what you thought, share your variations, or ask any questions if something didn’t work quite right.
I read every comment and I’ll help you troubleshoot if you need it.
Happy baking! 🍌


