
Does your weeknight dinner need rescuing from the same boring rotation?
I’m talking about that moment when you open the fridge and feel completely uninspired by the same chicken breast staring back at you. Been there, done that, bought the takeout.
But here’s what changed everything for me: discovering that restaurant-quality chicken biryani doesn’t require a culinary degree or three hours of your precious time.
My first attempt at making biryani was, let’s just say, memorable for all the wrong reasons.
The rice was mushy. The chicken was dry. The spices tasted like I’d dumped a spice cabinet into a pot and hoped for magic.
Spoiler alert: it wasn’t magic.
But after countless trials, YouTube rabbit holes at 2 AM, and even a very patient phone call with my friend’s mom who grew up making this in Mumbai, I finally cracked the code.
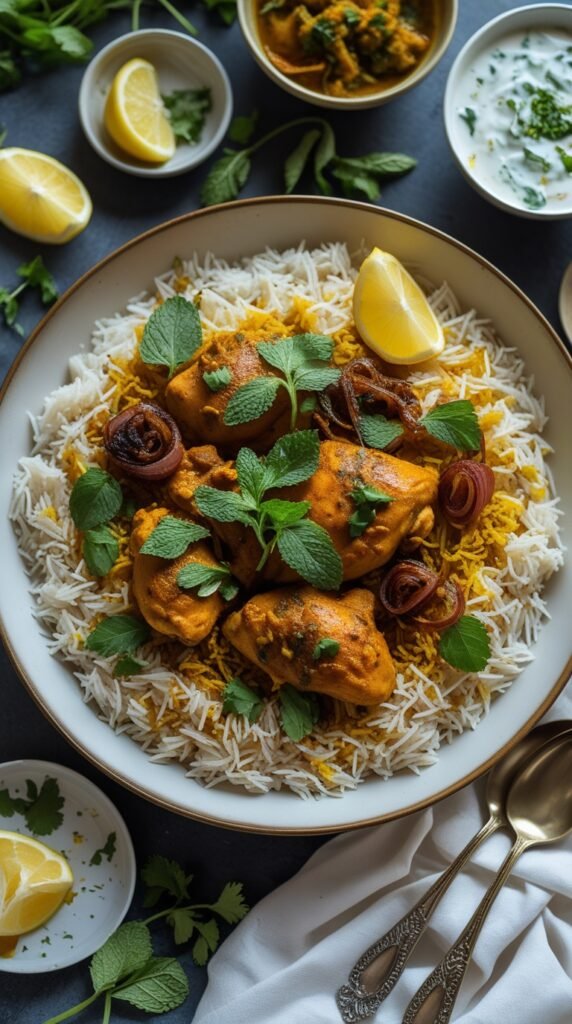
This isn’t some watered-down version that barely resembles the real thing. This is the kind of biryani that makes your whole house smell incredible and has people fighting over the crispy rice at the bottom of the pot.
The layers of perfectly spiced chicken, fragrant basmati rice, and that gorgeous golden color from the saffron? It’s all happening.
And you’re about to learn exactly how to make it without losing your mind in the process.
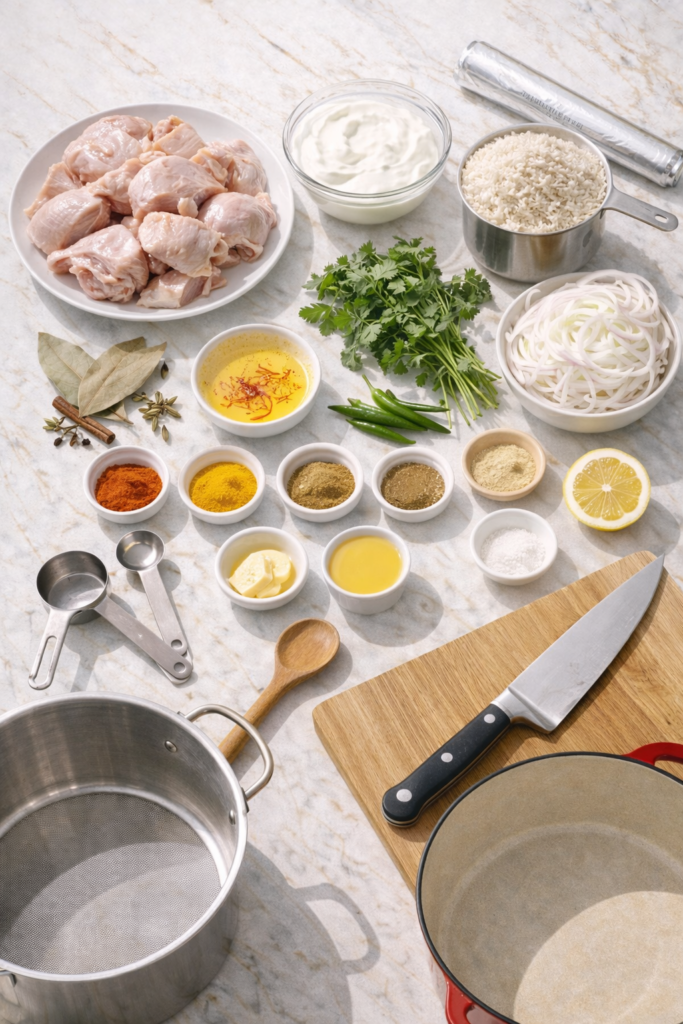
What You’ll Need
For the Chicken Marinade
| Ingredient | Amount | Why It Matters |
|---|---|---|
| Chicken thighs (bone-in, skin removed) | 2 lbs | Bones = flavor, thighs = juiciness |
| Plain yogurt (full-fat) | 1 cup | Tenderizes the meat |
| Ginger-garlic paste | 2 tbsp | Aromatic base |
| Red chili powder | 1 tsp | Heat level |
| Turmeric powder | ½ tsp | Color + earthy flavor |
| Garam masala | 1 tsp | Warm spice blend |
| Ground coriander | 1 tsp | Citrusy undertone |
| Ground cumin | 1 tsp | Smoky depth |
| Salt | 1½ tsp | Flavor enhancer |
| Fresh lemon juice | 2 tbsp | Brightens everything |
For the Rice
- 3 cups basmati rice (nothing else will give you that authentic aroma)
- 6 cups water
- 3 bay leaves
- 5 green cardamom pods
- 5 whole cloves
- 1 cinnamon stick (about 2 inches)
- 1 tablespoon salt
For the Biryani Layers
- 4 large onions, thinly sliced (don’t skimp on these!)
- ½ cup ghee (or vegetable oil, but ghee is traditional)
- 1 cup fresh cilantro, chopped
- ½ cup fresh mint leaves, chopped
- 4 green chilies, slit lengthwise
- ¼ teaspoon saffron threads
- ¼ cup warm milk
- 2 tablespoons rose water (optional but recommended)
- ½ cup fried onions for garnish
Tools You’ll Need
You’ll love these too : chicken wings recipe
Here’s what you actually need (no fancy equipment required):
✓ Large mixing bowl for marinating
✓ Heavy-bottomed pot or Dutch oven (5-6 quart capacity) – this is crucial
✓ Large pot for boiling rice
✓ Fine-mesh strainer or colander
✓ Sharp knife and cutting board
✓ Measuring cups and spoons
✓ Small bowl for saffron milk
✓ Aluminum foil (for sealing the pot)
✓ Kitchen towel
Pro Tips
Start with bone-in chicken thighs.
I know boneless is easier, but hear me out. The bones add so much flavor to the biryani, and thighs stay juicier than breasts.
You can always remove the bones after cooking if you’re serving picky eaters, but don’t skip this step if you want restaurant-level flavor.
Soak your rice for exactly 30 minutes.
Not 10, not 45. Thirty.
This helps the grains cook evenly and prevents that dreaded mushy texture. I set a timer on my phone because I used to just eyeball it and wonder why my rice never turned out right.
Par-cook the rice to 70% done.
This was the game-changer for me. You want the rice grains to still have a slight bite when you drain them. They’ll finish cooking during the dum (steaming) process.
The texture should be firm but not crunchy when you bite into a grain.
Don’t skip the saffron milk.
I thought this was just for fancy presentation, but it actually adds a subtle floral note that ties everything together.
Plus, those golden streaks make your biryani look like it came from a five-star restaurant.
Use a heavy-bottomed pot for the dum.
A thin pot will burn the bottom layer before the top cooks through. I learned this the hard way when I ruined an entire batch and had to order pizza at 9 PM on a Tuesday.
Not my finest moment.
Recommended for you : chicken noodle soup recipe
How to Make Chicken Biryani
Step 1: Marinate the Chicken (2+ hours ahead)
Mix yogurt, ginger-garlic paste, all the spices, lemon juice, and salt in a large bowl.
This paste should be thick and vibrant.
Add your chicken pieces and massage the marinade into every crevice. Cover and refrigerate for at least 2 hours, but overnight is even better.
The longer marination means more flavor penetration.
Quick tip: The yogurt breaks down the chicken fibers, making them incredibly tender. Don’t skip this step!
Step 2: Soak the Rice (30 minutes)
Rinse your basmati rice under cold water until the water runs clear.
This removes excess starch and prevents clumping.
Then soak it in fresh water for 30 minutes. Set a timer. Seriously.
Step 3: Fry the Onions (20-25 minutes)
Heat ghee in your heavy pot over medium heat.
Add the sliced onions and cook, stirring frequently, until they turn deep golden brown. This takes about 20-25 minutes.
Don’t rush this. Pale onions won’t give you that rich, caramelized flavor.
Remove half the onions and set aside for garnish.
Pro move: Fry these a day ahead and store in an airtight container. They’ll stay crispy and save you precious time.
Step 4: Cook the Chicken (10 minutes)
To the same pot with the remaining onions, add the marinated chicken along with all that yogurt marinade.
Add the slit green chilies.
Cook on medium-high heat for about 10 minutes, stirring occasionally. The chicken should be about 80% cooked through.
The yogurt will create a thick gravy at the bottom.
Step 5: Par-Cook the Rice (5-6 minutes)
In a separate large pot, bring 6 cups of water to a rolling boil.
Add the bay leaves, cardamom, cloves, cinnamon stick, and salt.
Drain your soaked rice and add it to the boiling water. Cook for exactly 5-6 minutes.
The grains should be firm but cooked about 70% through.
Drain immediately and set aside.
Step 6: Layer the Biryani
This is where the magic happens.
Over the chicken in your pot, sprinkle half of the cilantro and mint.
Add half the par-cooked rice in an even layer. Don’t pack it down.
Sprinkle the remaining herbs over the rice. Add the rest of the rice.
Layering matters: Each layer traps steam and infuses flavor. Think of it like building a delicious tower.
Step 7: Add the Saffron Milk
Warm the milk slightly and soak your saffron threads in it for 5 minutes.
Drizzle this golden milk over the top layer of rice.
If using rose water, drizzle that too. Dot with small pieces of butter or ghee.
You may also like : chicken alfredo recipe
Step 8: Seal and Steam – The Dum Process (35-40 minutes)
Cover the pot tightly with aluminum foil, then place the lid on top. This double seal traps all the steam inside.
Cook on high heat for 3 minutes until you see steam escaping.
Then reduce to the lowest possible heat and cook for 35-40 minutes.
Don’t peek. Seriously, just leave it alone.
| Time | Heat Level | What’s Happening |
|---|---|---|
| 0-3 min | High | Building up steam |
| 3-40 min | Lowest | Rice finishing, flavors melding |
| After 40 min | Off | Resting period – crucial! |
Step 9: Rest and Serve (10 minutes)
Turn off the heat and let the pot rest, still covered, for 10 minutes.
This allows the flavors to settle.
Gently fluff the biryani with a fork, working from the sides to the center.
Garnish with the reserved fried onions and extra cilantro.
The first scoop you take? Pure gold. 🤤
Substitutions and Variations
| Want to swap… | Use this instead | Notes |
|---|---|---|
| Chicken thighs | Bone-in chicken drumsticks | Same cooking time |
| Ghee | Butter or vegetable oil | Less authentic but works |
| Saffron | ½ tsp turmeric in milk | Color only, not flavor |
| Fresh herbs | Dried (use half the amount) | Fresh is always better |
| Basmati rice | Jasmine rice | Texture won’t be identical |
Popular Variations
Vegetarian Biryani: Swap chicken for paneer, potatoes, and mixed vegetables. Use the same marinade but reduce cooking time to 15 minutes total.
Lamb Biryani: Replace chicken with bone-in lamb pieces. Increase marination time to overnight and cooking time by 20 minutes.
Keto-Friendly: Substitute rice with cauliflower rice. Par-cook it for just 2 minutes and reduce dum time to 20 minutes.
Hyderabadi Style: Add ½ cup fried cashews and raisins between the layers for a sweeter, richer version.
Make Ahead Tips
Want to save time on busy nights? Here’s your game plan:
📅 24 hours ahead: Marinate your chicken. The longer it sits, the more tender and flavorful it becomes.
📅 1 day ahead: Fry your onions and store them in an airtight container. They’ll stay crispy and save you 25 minutes.
📅 Morning of: Assemble the entire biryani, refrigerate it, and just do the dum cooking when dinner time rolls around. Add 5-10 extra minutes to the steaming time if cooking from cold.
Leftovers and Storage
Refrigerator: Store in an airtight container for up to 3 days.
Freezer: Freeze for up to a month. Thaw overnight in the fridge before reheating.
Reheating Without Ruining It
Don’t microwave it directly or you’ll end up with dry, sad rice.
Instead, sprinkle a tablespoon of water over the biryani, cover with a damp paper towel, and microwave in 1-minute intervals.
For best results: Reheat in a pot on the stove with a splash of water or broth. Cover and steam on low heat for 5-7 minutes.
Nutritional Breakdown
| Nutrient | Per Serving (serves 6) |
|---|---|
| Calories | 585 |
| Protein | 32g |
| Carbs | 58g |
| Fat | 22g |
| Fiber | 2g |
| Sugar | 4g |
| Sodium | 890mg |
Note: Values are approximate and vary based on specific ingredients used.
Perfect Pairings
Your biryani deserves great sidekicks:
Raita – Cooling yogurt with cucumber and mint balances the warm spices perfectly.
Kachumber Salad – Diced tomatoes, onions, and cucumbers with lemon juice adds freshness.
Chicken Korma or Dal Makhani – For those who want extra richness.
Papadums – That satisfying crunch you didn’t know you needed.
Mango Lassi – Sweet, creamy, and the perfect beverage match.
FAQ
Why is my biryani rice mushy?
You either soaked the rice too long, par-cooked it beyond 70%, or used too much liquid during the dum process.
The rice should be firm when you drain it before layering.
Can I make this in a rice cooker?
Not recommended. The dum process requires specific heat control that rice cookers can’t replicate.
The traditional stovetop method is really the only way to get authentic results.
My bottom layer burned. What did I do wrong?
Your heat was too high during the dum process, or your pot was too thin.
Always use the lowest heat setting and a heavy-bottomed pot. You can also place a heat diffuser under the pot.
Do I really need to use basmati rice?
For authentic biryani, yes. Basmati has a unique aroma and texture that other rice varieties can’t match.
Long-grain jasmine rice works in a pinch but won’t give you the same results.
How do I know when the chicken is done?
Check the thickest piece. It should reach an internal temperature of 165°F.
The meat should be tender and easily pull away from the bone.
Can I skip marinating the chicken?
You can, but you really shouldn’t. Marination is what makes the chicken incredibly tender and flavorful.
At minimum, marinate for 2 hours.
What’s the crispy rice at the bottom called?
That’s called tahdig, and it’s the most coveted part of any biryani.
To ensure you get a good crust, increase heat slightly for the last 2 minutes of cooking, but watch carefully to avoid burning.
Is biryani supposed to be spicy?
It should be aromatic with a moderate heat level. Adjust the green chilies and red chili powder to your preference.
The yogurt helps mellow the spice.
Can I use chicken breasts instead?
You can, but they’ll be drier than thighs. If you must use breasts, reduce cooking time by 5 minutes and consider adding extra yogurt to the marinade.
Why does my biryani lack flavor?
Common culprits: not marinating long enough, using old spices, skipping the onion caramelization, or not sealing the pot properly during dum.
Each step builds flavor.
Wrapping Up
Making biryani at home might seem intimidating at first, but once you nail the technique, it becomes one of those recipes you’ll make over and over.
The layering, the dum process, those incredible aromas filling your kitchen? It’s all worth it when you take that first bite and realize you just made something truly special.
Your family’s going to ask for this on repeat. Mine does.
Now I want to hear from you. Did you try this recipe? Did you make any fun substitutions? Any disasters or triumphs?
Drop a comment below and let me know how your biryani adventure went!


2 thoughts on “The Only Chicken Biryani Recipe You’ll Ever Need”