You can throw your yeast packet away for this one.
Irish soda bread is one of those recipes that sounds way more complicated than it actually is.
You don’t need to proof anything. You don’t need to wait around for dough to rise. And you definitely don’t need any special equipment.
Just five basic ingredients, a bowl, and about 45 minutes.
I’m talking flour, baking soda, salt, buttermilk, and butter. That’s it.
And if you don’t have buttermilk sitting in your fridge (who does?), I’ll show you how to make your own in about 5 minutes.
Why This Bread Is Different
Here’s what blows my mind about Irish soda bread:
No yeast = No waiting
Traditional bread: 3+ hours of rising time
Irish soda bread: Zero minutes of rising time
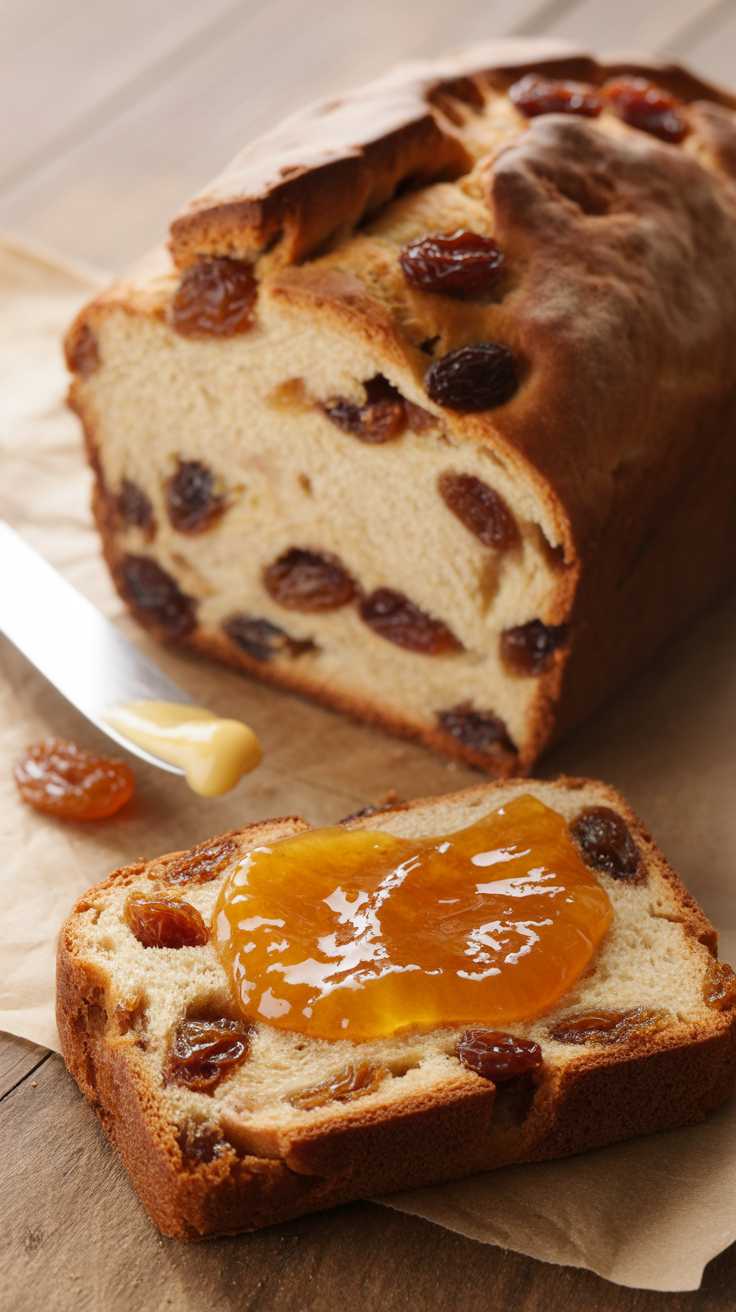
This bread has this incredibly crispy, golden crust on the outside and a soft, slightly tangy inside that’s perfect for slathering with butter. Or jam. Or both.
And here’s the history that really gets me: this recipe has been around since the 1800s.
Back then, Irish households didn’t have access to yeast or fancy ovens. So they came up with this genius solution using baking soda instead.
The acid in the buttermilk reacts with the baking soda and creates all the lift you need.
What You Skip With This Recipe
| Traditional Bread | Irish Soda Bread |
|---|---|
| Kneading for 10+ minutes | Mix for 30 seconds |
| First rise: 1-2 hours | Skip entirely |
| Punch down & shape | Just shape once |
| Second rise: 1 hour | Skip entirely |
| Total time: 3-4 hours | Total time: 45 minutes |
You literally mix everything together, shape it into a round loaf, cut a cross on top, and pop it in the oven.
That cross you cut? It’s not just pretty. I’ll tell you the real reason later.
The smell alone while it’s baking is worth making this recipe. Your whole house will smell like a cozy Irish cottage, even if you’re in a tiny apartment in the city.
I’ve made this bread at least 30 times now.
Every single time, it disappears within a day. My husband eats it for breakfast toasted with butter. I use it to mop up soups and stews. And sometimes I just eat a slice straight from the oven because I have zero self-control when it comes to fresh bread.
Let me show you exactly how to make it.
What You’ll Need
Here’s everything you need (and I mean everything):
The Bread Ingredients
| Ingredient | Amount | Notes |
|---|---|---|
| All-purpose flour | 4 cups | Plus extra for dusting |
| Salt | 1 teaspoon | Don’t skip this |
| Baking soda | 1 teaspoon | Must be fresh (check expiration!) |
| Buttermilk | 1¾ cups | Or make your own below |
| Butter (optional) | 2 tablespoons | Melted, adds richness |
DIY Buttermilk (If You Don’t Have Any)
Total time: 5 minutes
| Ingredient | Amount |
|---|---|
| Whole milk | 1¾ cups |
| White vinegar OR lemon juice | 2 tablespoons |
Mix them together. Let sit for 5-10 minutes. Done.
You’ll know it’s ready when it looks curdled and slightly thick. That’s exactly what you want.
Tools You’ll Need

The essentials:
✓ Large mixing bowl
✓ Wooden spoon or spatula
✓ Measuring cups and spoons
✓ Sharp knife (for scoring)
✓ Baking sheet OR Dutch oven
Nice to have:
✓ Parchment paper (makes cleanup so much easier)
✓ Pastry brush (for buttering the top)
✓ Wire cooling rack
You probably already have everything in your kitchen right now.
Pro Tips
These five tips will save you from the most common mistakes:
1. Don’t Overmix the Dough ⚠️
What happens: Your bread becomes tough and dense
What to do: Stir just until everything comes together
It should look: Shaggy and rough, NOT smooth
“If you overmix it, you’ll activate too much gluten. Mix for 30 seconds max.”
The dough will look messy. That’s perfect.
2. The Cross on Top Isn’t Just Decorative
The real reason you cut it:
It helps heat penetrate to the center so your bread bakes evenly all the way through.
Without it? You’ll end up with a raw center and an overbaked crust.
How deep to cut: ½ inch deep
How wide: Almost edge to edge
Some people say it also lets the fairies out. But I’ll leave that up to you to decide. 😊
3. Use COLD Buttermilk
| Temperature | Result |
|---|---|
| Cold buttermilk | Better texture, perfect crumb |
| Room temp buttermilk | Still works, but not as good |
| Warm buttermilk | Don’t even think about it |
Keep it in the fridge until the very last second before you pour it in.
4. Check for Doneness By Sound
The knock test:
- Take bread out of oven
- Flip it over
- Tap the bottom with your knuckles
What you want to hear: Hollow sound (like knocking on a door)
What means it’s not done: Dense, dull thud
If it’s not ready, pop it back in for 5 more minutes.
5. Don’t Skip the Resting Time
I know you want to cut into it immediately.
But give it at least 10 minutes to cool on a wire rack.
Why? The inside is still finishing the cooking process with residual heat. Cut it too soon and you’ll get a gummy texture.
Trust me on this one. Those 10 minutes are worth it.
Substitutions and Variations
Want to customize this recipe? Here are all your options:
Flour Swaps
| Original | Swap To | What Changes |
|---|---|---|
| 4 cups all-purpose | 2 cups AP + 2 cups whole wheat | Nuttier flavor, denser texture |
| 4 cups all-purpose | 4 cups whole wheat | Very dense, add 2 tbsp more buttermilk |
Flavor Add-Ins
Sweet versions:
- Raisins or currants: 1 cup (soak in warm water 10 min first, then drain)
- Dried cranberries: ¼ cup
- Honey: 2 tablespoons mixed into buttermilk
Savory versions:
- Caraway seeds: 1 tablespoon (this is traditional Irish!)
- Rosemary: Handful chopped + sea salt sprinkled on top
- Cheddar & chives: ½ cup shredded cheese + 2 tbsp fresh chives
No Buttermilk? No Problem
Option 1: DIY Buttermilk
1¾ cups milk + 2 tbsp vinegar = Perfect substitute
Let sit 5-10 minutes until curdled
Option 2: Yogurt
1 cup plain yogurt + ¾ cup milk = Works great
Mix together before adding to flour
Dairy-Free Version
| Replace This | With This |
|---|---|
| Buttermilk | Oat milk or soy milk + 2 tbsp vinegar |
| Butter | Melted coconut oil OR skip it |
Size Variations
Want mini loaves?
Divide dough into 4 smaller rounds instead of one large loaf.
New bake time: 25-30 minutes
Perfect for: Individual servings or gifting
Want dinner rolls?
Divide dough into 8-10 portions.
New bake time: 18-22 minutes
Perfect for: Soups and stews
How to Make Irish Soda Bread

Follow these steps exactly and you’ll nail it every time.
Step 1: Preheat Your Oven
Temperature: 425°F (220°C)
If using a Dutch oven: Put it in the oven NOW to preheat
If using a baking sheet: Line it with parchment paper
Step 2: Make Your Buttermilk (If Needed)
Pour milk into a measuring cup.
Add vinegar or lemon juice.
Stir once.
Walk away and let it sit.
What you’ll see: It starts to curdle and thicken
Time needed: 5-10 minutes
Step 3: Mix the Dry Ingredients
Grab your large mixing bowl.
Add:
- 4 cups flour
- 1 tsp salt
- 1 tsp baking soda
Give it a quick whisk with a fork.
Check for: No clumps of baking soda hiding in there
Step 4: Add the Buttermilk
Make a well in the center of your dry ingredients.
Pour in the buttermilk. (And melted butter if you’re using it.)
Mixing method:
- Start mixing from the center
- Work your way out
- Stop when dough just comes together
What it should look like:
- Sticky ✓
- A little messy ✓
- Shaggy and rough ✓
- Smooth like pizza dough ✗
Time spent mixing: 30 seconds max
Step 5: Shape the Dough
Lightly flour your countertop.
Turn dough out onto it.
With floured hands, gently shape it into a round loaf.
Don’t knead it like regular bread dough. Just pat and shape.
Final size: Roughly circular, about 2 inches thick
Step 6: Score the Top
Transfer shaped dough to your prepared baking sheet (or into your hot Dutch oven if using one).
Grab a sharp knife.
Cut a deep cross into the top.
How deep: ½ inch
How wide: Almost edge to edge
Step 7: Bake
Pop it in your preheated oven.
Bake time: 35-45 minutes
What you’re looking for:
- Deep golden brown crust
- Hollow sound when you tap the bottom
- Internal temp of 200°F (93°C) if using thermometer
Pro move: If the top gets too dark before inside is done, tent it loosely with aluminum foil.
Step 8: Cool
Take the bread out.
Transfer to a wire rack.
Wait time: At least 10-15 minutes
I know it’s hard. But your patience will be rewarded.
Step 9: Slice and Serve
Cut yourself a thick slice while it’s still warm.
Slather it with butter.
Watch it melt into all those nooks and crannies.
This is what bread dreams are made of.
Make Ahead Tips
Prep the dry ingredients:
You can mix flour, salt, and baking soda up to 1 week in advance.
Store in an airtight container. Add buttermilk when ready to bake.
Freeze the shaped dough:
| Step | Instructions |
|---|---|
| 1. Shape | Form dough into a loaf |
| 2. Wrap | Wrap tightly in plastic wrap, then aluminum foil |
| 3. Freeze | Up to 3 months |
| 4. Thaw | In fridge overnight |
| 5. Bake | Bring to room temp 30 min, then score and bake |
Freeze the baked bread:
Let it cool completely first.
Wrap it really well (plastic wrap + foil).
Freeze for up to 3 months.
To reheat: Thaw at room temp, then warm in a 350°F oven for 10 minutes to crisp the crust.
Leftovers and Storage
Here’s the truth about Irish soda bread:
It’s at its absolute best within the first 24 hours.
After that, it starts to dry out pretty quickly. There’s no fat in the dough to keep it moist (unless you added butter).
Storage Guide
| Method | Duration | Result |
|---|---|---|
| Paper bag at room temp | Up to 2 days | Crust stays crispy |
| Kitchen towel at room temp | Up to 2 days | Crust stays good |
| Plastic bag/airtight container | Don’t do it | Soggy crust |
| Refrigerator | Don’t do it | Dries out faster |
If Your Bread Goes Stale
Don’t throw it away!
Best uses for day-old soda bread:
Toast it – It’s actually better toasted
Sandwiches – Sturdy enough for wet fillings
Bread pudding – Cube it and use in dessert
Breadcrumbs – Pulse in food processor
French toast – Trust me on this one
My favorite way to eat it:
Toast + mashed avocado + fried egg = perfection
I sometimes deliberately let mine go stale just so I have an excuse to make toast. 🍞
Nutritional Information
Based on 10 slices per loaf:
| Nutrient | Per Slice |
|---|---|
| Calories | 185 |
| Protein | 6g |
| Carbohydrates | 38g |
| Fat | 1g |
| Fiber | 1.5g |
| Sodium | 350mg |
| Sugar | 3g |
Note: Numbers will vary if you add butter or any mix-ins like raisins or cheese.
FAQ
Why is my soda bread dense and heavy?
Most common causes:
| Problem | Solution |
|---|---|
| Overmixing | Mix for 30 seconds max, until just combined |
| Old baking soda | Check expiration date, replace if needed |
| Too much flour | Measure properly (spoon & level, don’t pack) |
The dough should look shaggy and rough, not smooth.
Can I make this without buttermilk?
Yes! You have options:
Option 1: Milk + vinegar (see DIY buttermilk section above)
Option 2: Plain yogurt thinned with milk
Option 3: Kefir works great too
All three work just as well as store-bought buttermilk.
Why did my bread crack in weird places?
Two main reasons:
- Oven temperature too high
- Didn’t score the cross deep enough
The fix:
The cross you cut gives the bread a controlled place to expand. Without it (or if it’s too shallow), the bread cracks wherever it wants.
Cut it ½ inch deep and you won’t have this problem.
How do I know when it’s done?
Three ways to check:
✓ Visual: Deep golden brown on top
✓ Sound: Tap the bottom – should sound hollow
✓ Temperature: Internal temp around 200°F (93°C)
Pick whichever method you like best. They all work.
Can I add sugar to make it sweeter?
Yes! Add 2-3 tablespoons if you want.
But know that traditional Irish soda bread isn’t sweet. Some people in Ireland do add sugar, so you’re making a variation, not the classic version.
My take: Try it the traditional way first, then customize.
My dough is too dry/too wet, what do I do?
Flour absorbs different amounts of liquid depending on humidity and brand.
If too dry:
- Add buttermilk 1 tablespoon at a time
- Mix after each addition
- Stop when dough comes together
If too wet:
- Add flour 1 tablespoon at a time
- Mix gently
- Stop when you can shape it
Perfect consistency: Sticky but manageable
Do I have to use a Dutch oven?
No! A regular baking sheet works perfectly fine.
| Method | Result |
|---|---|
| Dutch oven | Extra crispy crust from steam |
| Baking sheet | Still great, slightly less crispy |
The Dutch oven is nice to have, not necessary.
Can I make this gluten-free?
You can try a 1:1 gluten-free flour blend.
Full disclosure: I haven’t personally tested this. The texture will be different from the traditional version.
If you try it, come tell me how it goes in the comments!
What’s the best way to slice it?
Use a serrated knife with a gentle sawing motion.
Don’t press down and try to cut through it. You’ll squish the bread and tear it.
Pro tip: Let it cool completely first for the cleanest slices.
Wrapping Up
There’s a reason this bread has been made for nearly 200 years.
It’s simple.
It’s fast.
And it works every single time as long as you don’t overthink it.
You don’t need to be an experienced baker.
You just need five ingredients and 45 minutes. That’s it.
Make it for breakfast and eat it with butter and jam.
Make it for dinner and use it to soak up your stew.
Make it on a Sunday afternoon just because your house could use the smell of fresh bread.
And when you pull that golden loaf out of your oven and hear that perfect hollow sound when you tap the bottom?
You’re going to feel like an absolute wizard. 🧙
Now go make this bread.
Come back and tell me what you thought.
Did you add raisins?
Did you use the Dutch oven?
Did you eat half the loaf before it even cooled down?
(No judgment. I’ve been there.)
Drop a comment below and let me know how it turned out!


