
You take one bite of homemade chocolate icing and suddenly… the stuff from a can tastes like regret.
Rich. Glossy. Fluffy. And done in 10 minutes flat.
The wild part? You probably have every single ingredient in your kitchen right now.
Why Homemade Beats Store-Bought Every Time
| Homemade Chocolate Icing | Store-Bought | |
|---|---|---|
| Flavor | Deep, rich, customizable | Sweet, one-note, slightly waxy |
| Ingredients | 6 real ingredients | 20+ (including hydrogenated oils) |
| Texture | Light, fluffy, smooth | Dense, greasy |
| Time | ~10 minutes | 0 minutes… but at what cost? |
| Cost | ~$1.50 per batch | ~$3–4 per can |
Yeah. There’s really no competition here.
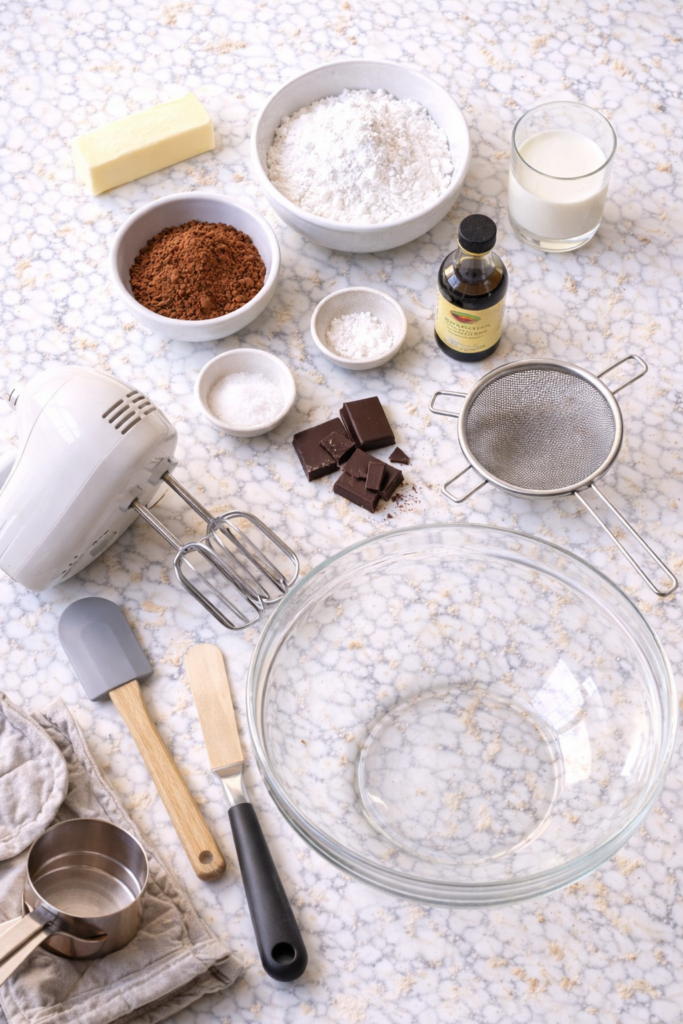
What You’ll Need
The Core Ingredients:
- ½ cup (113g) unsalted butter — room temperature, not cold, not melted
- 2½ cups (300g) powdered sugar — sifted (this step matters more than you think)
- ½ cup (45g) unsweetened cocoa powder — sifted
- 3–4 tablespoons whole milk — or heavy cream for extra richness
- 1 tsp pure vanilla extract
- ¼ tsp fine sea salt
- 2 oz (57g) dark chocolate (optional but highly recommended) — melted and cooled
💡 The secret weapon: That 2 oz of melted dark chocolate alongside the cocoa powder is what makes people ask “wait, what did you put in this?” It adds a depth powdered cocoa alone just can’t reach.
Tools You’ll Need
Recommended for you : chocolate pie
| Tool | Why You Need It |
|---|---|
| Hand mixer or stand mixer | Gets the icing light and fluffy — hand-mixing won’t cut it |
| Large mixing bowl | Gives you room to work without icing flying everywhere |
| Fine mesh sieve / sifter | Prevents lumpy, grainy icing |
| Rubber spatula | For scraping down the sides |
| Offset spatula or butter knife | For spreading like a pro |
| Small microwave-safe bowl | For melting the dark chocolate (if using) |
| Measuring cups + spoons | Precision matters here |
Pro Tips
These are the things that separate a good batch from an unforgettable one.
1. Sift. Your. Sugar. Lumpy icing is a heartbreak that’s 100% avoidable. Sift the powdered sugar and cocoa together every time, no exceptions.
2. Room temperature butter is non-negotiable. Cold butter = chunky, uneven icing that won’t whip properly. Leave it out 30–45 minutes before starting. If you forgot, cut it into small pieces and wait 15 minutes.
3. Add milk slowly — one teaspoon at a time. Start with 2 tablespoons. You can always add more liquid but you can’t take it away. The difference between spreadable and runny is literally one tablespoon.
4. Whip longer than feels necessary. Beat the finished icing for a full 3–4 minutes on medium-high. It gets lighter, fluffier, and develops a texture that sets it completely apart from anything you’d spread straight from a tub.
5. Salt is not optional. That ¼ teaspoon of sea salt balances the sweetness and makes the chocolate flavor actually pop. Don’t skip it.
People also like : dubai chocolate bar recipe
How to Make Chocolate Icing
Step 1 — Prep Everything First (5 minutes)
Bring butter to room temperature.
Sift the powdered sugar and cocoa powder together into a bowl and set aside.
If using dark chocolate, melt it in a microwave-safe bowl in 20-second bursts, stirring between each until smooth. Let it cool for 5 minutes before adding to the icing.
Step 2 — Beat the Butter (2 minutes)
Beat room-temperature butter on medium speed for 2 full minutes until pale and fluffy.
This builds the base. Don’t rush it.
Step 3 — Add the Cocoa + Sugar (3 minutes)
Drop mixer to low speed (trust me on this — a powdered sugar cloud to the face is not a vibe).
Add the sifted cocoa/sugar mixture about ½ cup at a time, mixing until just incorporated before each addition.
Step 4 — Add Liquid, Vanilla + Chocolate (1 minute)
Add vanilla extract and 2 tablespoons of milk. Increase to medium speed and beat until combined.
If the icing looks too thick, add milk one teaspoon at a time.
If you’re using melted dark chocolate, pour it in now and mix until fully combined.
You may also like : soft chocolate chip cookie recipe
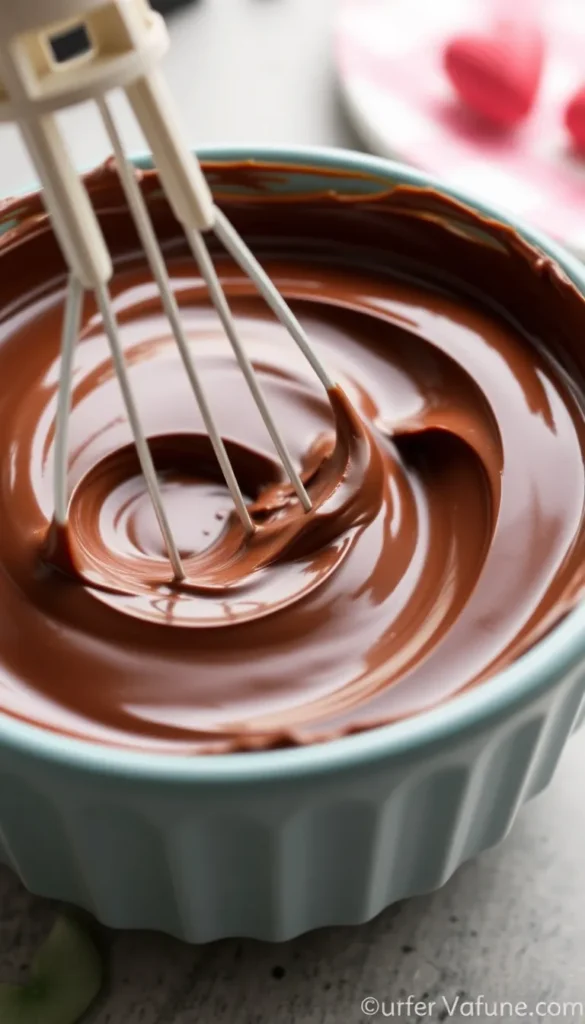
Step 5 — Final Whip + Salt (3–4 minutes)
Add the sea salt, then crank the mixer to medium-high and beat for 3–4 minutes.
Watch it transform. 👀
Taste it. Adjust salt or vanilla if needed. Use immediately or store.
Quick Reference: Icing Consistency Guide
| Consistency | Milk Amount | Best For |
|---|---|---|
| Thick + stiff | 1–2 tbsp | Piping rosettes, borders, detailed work |
| Medium + spreadable | 3 tbsp | Layered cakes, cupcakes |
| Soft + flowing | 4 tbsp | Drip cakes, brownies, quick spreads |
Substitutions and Variations
Dairy-free?
- Butter → vegan butter (Earth Balance works great)
- Milk → oat milk, almond milk, or full-fat coconut milk
Want it richer?
- Swap milk for heavy cream
- Use Dutch-process cocoa for a deeper, smoother flavor
Mocha version: Add 1 tsp of espresso powder with the vanilla. It amplifies the chocolate without tasting like coffee. 🙌
Whipped ganache version: Skip the butter entirely. Heat 1 cup of heavy cream, pour over 8 oz chopped dark chocolate, let it sit 5 minutes, stir smooth, then whip. Completely different texture — dangerously good.
| Variation | Key Swap | Flavor Profile |
|---|---|---|
| Classic | Recipe as written | Rich, balanced chocolate |
| Extra rich | Heavy cream + dark chocolate | Deep, fudgy, intense |
| Mocha | + 1 tsp espresso powder | Chocolate-forward with subtle coffee |
| Dairy-free | Vegan butter + oat milk | Slightly lighter, still delicious |
| Ganache style | Heavy cream instead of butter | Silky, glossy, truffle-like |
Make-Ahead Tips
Making this for a party or big bake? Good news — this icing is incredibly forgiving.
- Up to 5 days ahead: Store in an airtight container in the fridge
- Up to 3 months ahead: Freeze in a sealed container
- Before using from fridge: Bring to room temperature (30–45 mins), then re-whip 1–2 minutes
- Before using from freezer: Thaw overnight in fridge → room temp → re-whip
One thing to know: icing firms up significantly in the fridge. Spreading cold icing onto a cake will tear it apart. Always let it soften first.
Nutrition Breakdown
Per 2-tablespoon serving | Recipe makes ~16 servings | Without optional dark chocolate
| Nutrient | Per Serving |
|---|---|
| Calories | ~145 |
| Total Fat | 6g |
| Saturated Fat | 3.8g |
| Carbohydrates | 23g |
| Sugar | 21g |
| Protein | 0.5g |
| Sodium | 40mg |
Add ~15–20 calories and ~1.5g fat per serving if using the melted dark chocolate (worth it).
What Pairs Perfectly With This Icing
You could frost practically anything with this and it would be good. But these combinations? On another level.
| Baked Good | Why It Works |
|---|---|
| Classic chocolate layer cake | Double the chocolate, double the depth |
| Vanilla sponge | The contrast is genuinely incredible |
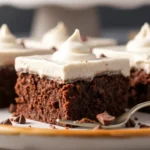
| Brownies | Spread it on while still slightly warm |
| Banana bread | Sounds unconventional, tastes like a revelation |
| Cupcakes | Pipe it high, don’t be shy |
| Graham crackers | Low-effort snack that feels like a full dessert |
Leftovers and Storage
| Storage Method | How Long | Notes |
|---|---|---|
| Room temperature (covered) | Up to 2 days | Only if kitchen isn’t too warm |
| Fridge (airtight container) | Up to 5 days | Let come to room temp + re-whip before using |
| Freezer (sealed container) | Up to 3 months | Thaw overnight in fridge, then re-whip |
| On a frosted cake (room temp) | 2–3 days | Keep covered |
| On a frosted cake (fridge) | Up to 5 days | Bring cake to room temp before serving |
FAQ
Can I use salted butter? You can. Just skip the added sea salt. Unsalted gives you more control over the final flavor though.
My icing turned out grainy. What went wrong? Almost always a sifting issue. The fix: keep mixing and add milk a teaspoon at a time. Next time, sift the cocoa and powdered sugar together before starting.
Can I pipe with this recipe? Yes! Use 1–2 tablespoons of milk for firm piping. If it’s still too soft after making, pop it in the fridge for 15 minutes to firm up.
How much cake does this recipe frost?
- One 9-inch two-layer cake ✓
- 24 cupcakes ✓
- One 9×13 sheet cake ✓
- Three-layer cake with thick filling? Double the recipe.
Dutch-process cocoa vs. natural cocoa — does it matter? Dutch-process = smoother, deeper, less bitter flavor. Natural cocoa = slightly sharper, more common in pantries. Both work beautifully here — it comes down to preference.
Can I make this without a mixer? Technically yes, but you won’t get the same light, fluffy texture. A hand mixer makes a real difference, especially in that final whipping step. It’s worth the $20 investment if you bake regularly.
Wrapping Up
If you’ve been reaching for the store-bought tub out of habit, now you know what you’ve been missing. 😄
This chocolate icing is glossy, rich, deeply chocolatey, and honestly almost too easy for how impressive it tastes. Ten minutes. Six ingredients. Zero regrets.
Make it for a birthday cake. Spread it on a pan of brownies. Or just make a batch to keep in the fridge because you deserve something good this week.
When you do — drop a comment below. Did you try the dark chocolate version? Did you use it on something unexpected? Did the mocha variation blow your mind? Tell me everything. Questions are totally welcome too. 👇


1 thought on “This Chocolate Icing Will Ruin Every Store-Bought Frosting for You”