
Can store-bought bread ever really compete with homemade?
Here’s the truth: I used to walk past focaccia in the bakery section and think “that looks amazing, but I could never make that.”
Wrong. So wrong.
Focaccia is probably the easiest artisan bread you’ll ever make. No kneading. No fancy equipment. No degree from culinary school required.
Just flour, water, yeast, and a lot of olive oil.
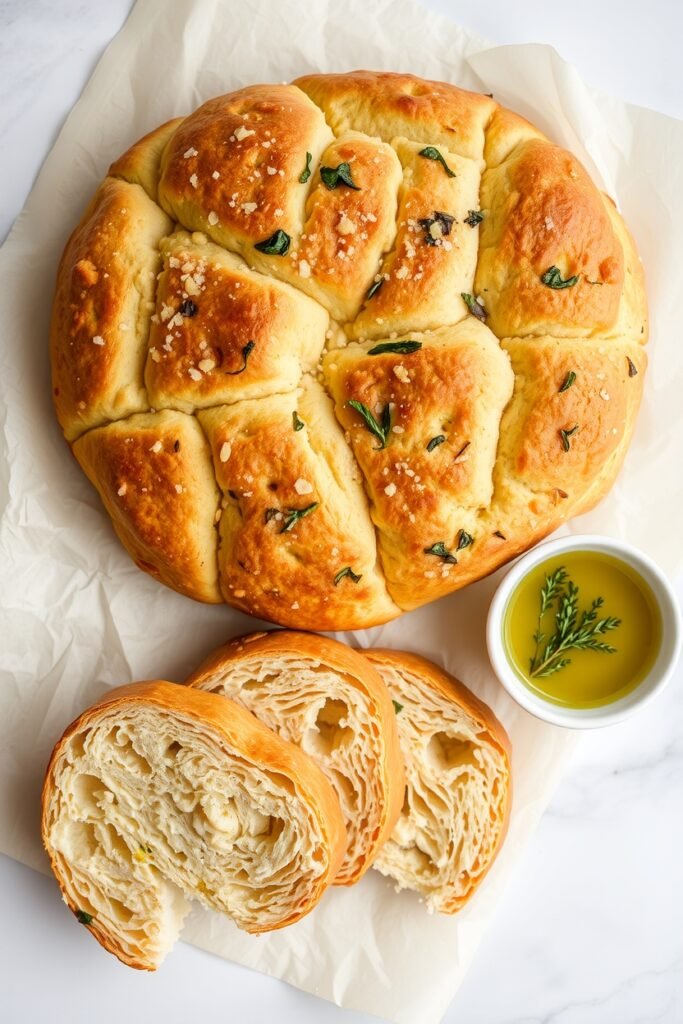
I’m talking pools of golden, garlicky olive oil soaking into every dimple. A crust so crispy it shatters when you bite into it. An interior so fluffy and airy, you’ll question every piece of bread you’ve ever bought.
And here’s the kicker: it takes about 15 minutes of actual work.
The rest? Just waiting for the dough to do its thing while you binge your favorite show.
I make this twice a month now, and every single time, my husband walks into the kitchen and says the same thing: “Are we Italian now?”
Pretty much, babe. Pretty much. 🍞
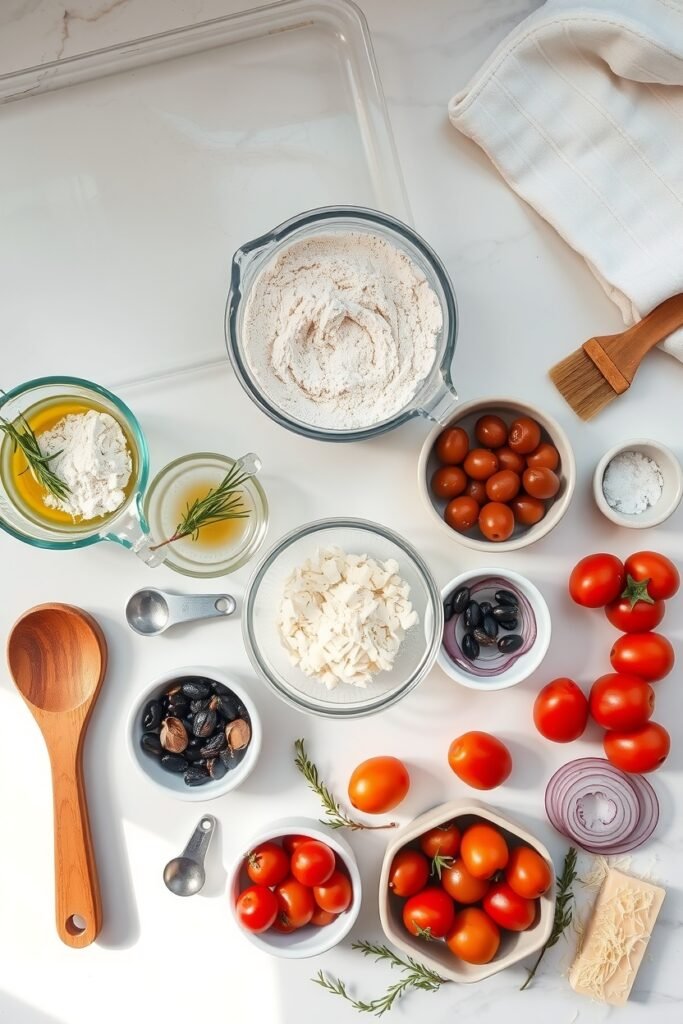
What You’ll Need
Let me break this down into the simplest shopping list ever:
The Dough Base
| Ingredient | Amount | Why It Matters |
|---|---|---|
| All-purpose flour | 4 cups (500g) | Creates that perfect chewy-fluffy texture |
| Instant yeast | 2 teaspoons | Makes the magic happen (aka rising) |
| Salt | 2 teaspoons | Flavor + controls yeast activity |
| Warm water | 2 cups (475ml) | Activates yeast, brings dough together |
| Olive oil | 4 tablespoons | For the dough itself |
The Topping Game
| Ingredient | Amount | The Vibe |
|---|---|---|
| Extra virgin olive oil | 1/4 cup (60ml) | This is non-negotiable, trust me |
| Fresh garlic | 2-3 cloves, minced | Because garlic makes everything better |
| Fresh rosemary | 2 tablespoons, chopped | Classic Italian flavor |
| Flaky sea salt | To taste | Maldon is chef’s kiss |
| Black pepper | Freshly cracked | Adds a little kick |
Optional Toppings (Get Creative!)
- 🍅 Cherry tomatoes, halved
- 🫒 Olives (black or green, your call)
- 🧅 Thinly sliced red onion
- 🌿 Fresh thyme or oregano
- 🧀 Grated parmesan
- Caramelized onions (if you’re feeling fancy)
Tools You’ll Need
Nothing crazy here:
✓ Large mixing bowl
✓ 9×13 inch baking pan
✓ Wooden spoon (or just use your hands)
✓ Clean kitchen towel
✓ Measuring cups and spoons
✓ Pastry brush (helpful but not required)
That’s it. No stand mixer. No bread machine. No special gadgets.
Pro Tips
These are the things I wish someone had told me the first time I made focaccia:
1. Temperature is everything
Your water should be warm, not hot. Think bathwater temperature (around 100°F/38°C). Too hot and you’ll kill the yeast. Too cold and nothing will happen.
2. Don’t fight the sticky dough
Focaccia dough is supposed to be wet and sticky. Like, really sticky. Don’t panic and add more flour. That wetness is what creates those beautiful air pockets inside.
3. Dimple like you mean it
When you’re poking holes in the dough, go all the way down to the bottom of the pan. Really press your fingers in there. Those dimples are what hold all that delicious olive oil and toppings.
4. The second rise is crucial
I know you’re excited. I know you want to skip ahead. Don’t. That second rise in the oiled pan is what gives focaccia its signature fluffy texture and helps it spread to the edges.
5. Use good olive oil
This is where you splurge a little. The olive oil is a main flavor component here, not just a cooking fat. Use something you’d actually want to dip bread into.
Time Breakdown: What to Expect
Here’s the honest timeline:
| Phase | Active Time | Passive Time | What’s Happening |
|---|---|---|---|
| Mixing dough | 5 minutes | – | Just stirring ingredients together |
| First rise | – | 1-2 hours | Dough doubles in size |
| Shaping in pan | 3 minutes | – | Stretching dough to fit pan |
| Second rise | – | 30-45 minutes | Dough relaxes and spreads |
| Dimpling & topping | 5 minutes | – | Creating those signature dimples |
| Baking | 2 minutes | 20-25 minutes | Golden, crispy magic |
Total hands-on time: About 15 minutes
Total time: 2.5-3 hours (but you’re not babysitting it)
How to Make Focaccia Bread
Step 1: Make the Dough
Grab your large bowl. Dump in the flour, yeast, and salt. Give it a quick stir so everything’s mixed.
Add the warm water and 2 tablespoons of olive oil.
Now get in there with a wooden spoon or your hands and stir until it forms a shaggy, sticky mess. It won’t look pretty. It won’t look Instagram-worthy. That’s exactly right.
Mix just until there are no dry flour patches left.
Step 2: First Rise
Drizzle another tablespoon of olive oil over the dough. Turn the dough around in the bowl so it gets coated.
Cover with a clean kitchen towel.
Walk away for 1-2 hours.
Go watch TV. Read a book. Take a nap. Live your life.
When you come back, the dough should have doubled in size. It’ll look puffy and bubbly.
Step 3: Prep Your Pan
Pour the last tablespoon of olive oil into your 9×13 inch pan.
Use your hands to spread it around. Coat the bottom and sides like you’re giving it a spa treatment.
Step 4: Shape (Gently!)
Here’s where people mess up: they punch the dough down like they’re angry at it.
Don’t do that.
Gently (and I mean gently) transfer the dough to your oiled pan. Let it flop in there. Don’t deflate it.
Use your hands to stretch it toward the corners. It probably won’t reach. That’s fine.
Cover with the towel again.
Let it rest for 30-45 minutes.
During this time, the dough will relax and spread out more on its own. It’s like when you put on jeans fresh from the dryer and they loosen up as you wear them.
Step 5: Dimple Time
Preheat your oven to 425°F (220°C).
Now for the fun part.
Press your fingers straight down into the dough. All the way to the bottom of the pan. Do this all over the surface.
You want it to look like bubble wrap.
Drizzle that 1/4 cup of olive oil all over the top. Let it pool in those dimples.
Sprinkle the minced garlic and rosemary everywhere.
Hit it with a generous amount of flaky sea salt and black pepper.
Adding tomatoes or olives? Press them gently into the dough now.
Step 6: Bake
Slide that pan into the oven.
Set a timer for 20 minutes.
At 20 minutes, check it. The top should be golden brown and the edges should be pulling away from the sides and looking crispy.
If it needs more time, give it another 3-5 minutes.
You’ll know it’s done when you tap the bottom of the pan and it sounds hollow.
Step 7: The Hardest Part (Waiting)
Let it cool in the pan for 10 minutes.
Then transfer to a cutting board.
Slice into squares or rectangles.
Try not to eat the entire thing in one sitting. (I’ve failed at this multiple times.)
Substitutions and Variations
Want to mix things up? Here’s how:
Flour Swaps
Bread flour instead of all-purpose: You’ll get a slightly chewier texture. Still delicious.
Half whole wheat: Adds a nutty flavor and makes it feel slightly healthier (even though you’re still using a ton of olive oil).
Gluten-free: I haven’t tested this myself, but a 1:1 gluten-free baking blend should work. Texture will be different though.
Herb Options
| Instead of Rosemary | Try This |
|---|---|
| Fresh thyme | Earthy and subtle |
| Fresh oregano | More Mediterranean vibe |
| Fresh basil | Add it AFTER baking |
| Za’atar spice blend | Middle Eastern twist |
| Everything bagel seasoning | Breakfast focaccia vibes |
Creative Topping Combos
🍇 Grape & Rosemary: Red grapes + fresh rosemary + sea salt (sounds weird, tastes incredible)
🧅 Caramelized Onion & Thyme: Sweet onions + fresh thyme + balsamic drizzle
🍅 Caprese Style: Cherry tomatoes + fresh mozzarella + basil (add mozzarella last 5 minutes of baking)
🥔 Potato Focaccia: Thinly sliced potatoes + rosemary + sea salt
🫒 Mediterranean: Olives + sun-dried tomatoes + feta cheese
Make Ahead Tips
Life gets busy. Here’s how to prep ahead:
Option 1: Refrigerate the Dough
After the first rise, cover the bowl tightly with plastic wrap.
Stick it in the fridge for up to 24 hours.
When you’re ready to bake, let it sit at room temperature for 30 minutes, then continue with shaping.
Cold fermentation = more developed flavor. This is actually the better option if you have time.
Option 2: Freeze the Baked Focaccia
Let it cool completely.
Wrap tightly in plastic wrap, then aluminum foil.
Freeze for up to 3 months.
Thaw at room temperature, then reheat in a 350°F oven for 10 minutes.
Option 3: Par-Bake It
Bake for only 15 minutes until barely golden.
Let it cool, then freeze.
When ready to serve, bake from frozen at 425°F for 10-12 minutes.
What to Serve With Focaccia
This bread is a total chameleon:
As an appetizer: Slice into small squares. Serve with olive oil and balsamic for dipping.
For sandwiches: Slice horizontally. Fill with Italian meats, cheese, roasted veggies. Panini press optional but recommended.
With soup: Pairs perfectly with tomato soup, minestrone, or literally any soup ever.
For breakfast: Top with scrambled eggs and cheese. You’re welcome.
As a pizza base: Top with sauce and cheese. Bake until melty. Life-changing.
Leftovers and Storage
Storing
Room temperature in an airtight container: 3 days
Refrigerator (if it’s humid where you live): 5 days
Freezer: 3 months
Reheating
Oven method (best): 350°F for 5-7 minutes. Brings back that crispy crust.
Toaster: Individual slices toast beautifully.
Microwave: Please don’t. It’ll get rubbery.
Creative Uses for Leftover Focaccia
Turn it into croutons: Cut into cubes. Toss with olive oil. Bake at 375°F until crispy. Best salad croutons ever.
Make focaccia chips: Slice thin. Brush with olive oil. Bake until crispy. Serve with hummus or dips.
French toast: Sounds crazy. Tastes incredible. The olive oil adds this savory element that’s just right.
Nutritional Info (Per Serving)
Based on 12 servings:
| Nutrient | Amount |
|---|---|
| Calories | 215 |
| Carbohydrates | 33g |
| Protein | 5g |
| Fat | 7g |
| Fiber | 1g |
| Sodium | 390mg |
Note: This varies based on toppings and how heavy-handed you are with the olive oil (no judgment)
FAQ
Q: Why is my dough not rising?
A: Three common reasons:
- Your yeast is dead (check expiration date)
- Your water was too hot and killed the yeast
- Your kitchen is too cold (move it somewhere warmer or give it more time)
Q: Can I use active dry yeast instead of instant?
A: Yep. Dissolve it in the warm water first. Let it sit for 5 minutes until foamy. Then proceed with the recipe.
Q: My focaccia came out dense. What happened?
A: Probably didn’t rise enough. Make sure you’re giving it the full rise times. Also, don’t over-mix the dough.
Q: How do I know when it’s done baking?
A: The top should be golden brown, edges crispy and pulling away from the pan. Tap the bottom of the pan – it should sound hollow.
Q: Can I make this without a baking pan?
A: You can use a rimmed baking sheet, but the focaccia will be thinner. Adjust baking time to 15-20 minutes.
Q: Why do I need so much olive oil?
A: That’s what makes focaccia focaccia. The oil creates that crispy bottom and golden top. Don’t skimp on it.
Q: Can I add cheese?
A: Absolutely. Sprinkle shredded mozzarella or grated parmesan on top during the last 5-10 minutes of baking.
Q: Help! My dough is SO sticky. Did I mess up?
A: Nope. Focaccia dough is wet and sticky. That’s normal. Don’t add more flour. Just oil your hands when handling it.
Wrapping Up
Listen, I get it.
Bread-making sounds intimidating. It sounds like something that requires skill and experience and maybe a Pinterest board full of inspiration.
But focaccia? Focaccia is the bread that doesn’t care if you’re a beginner.
It’s forgiving. It’s flexible. It’s basically impossible to mess up.
And once you make it, you’ll realize that store-bought focaccia has been lying to you this whole time about what bread can taste like.
Make this on a lazy Sunday. Make it for a dinner party. Make it because your kitchen deserves to smell like an Italian bakery for a few hours.
Drop a comment below and tell me what toppings you used. Or if you have questions. Or if you just want to brag about how amazing your focaccia turned out.
I’m here for all of it 💚


