You know that feeling when you spot those bananas on your counter turning from cheerful yellow to speckled brown faster than you can say “smoothie”?
I used to panic every single time.
But here’s what changed everything for me: those overly ripe bananas sitting there looking sad are actually kitchen gold. The browner they get, the sweeter they become.
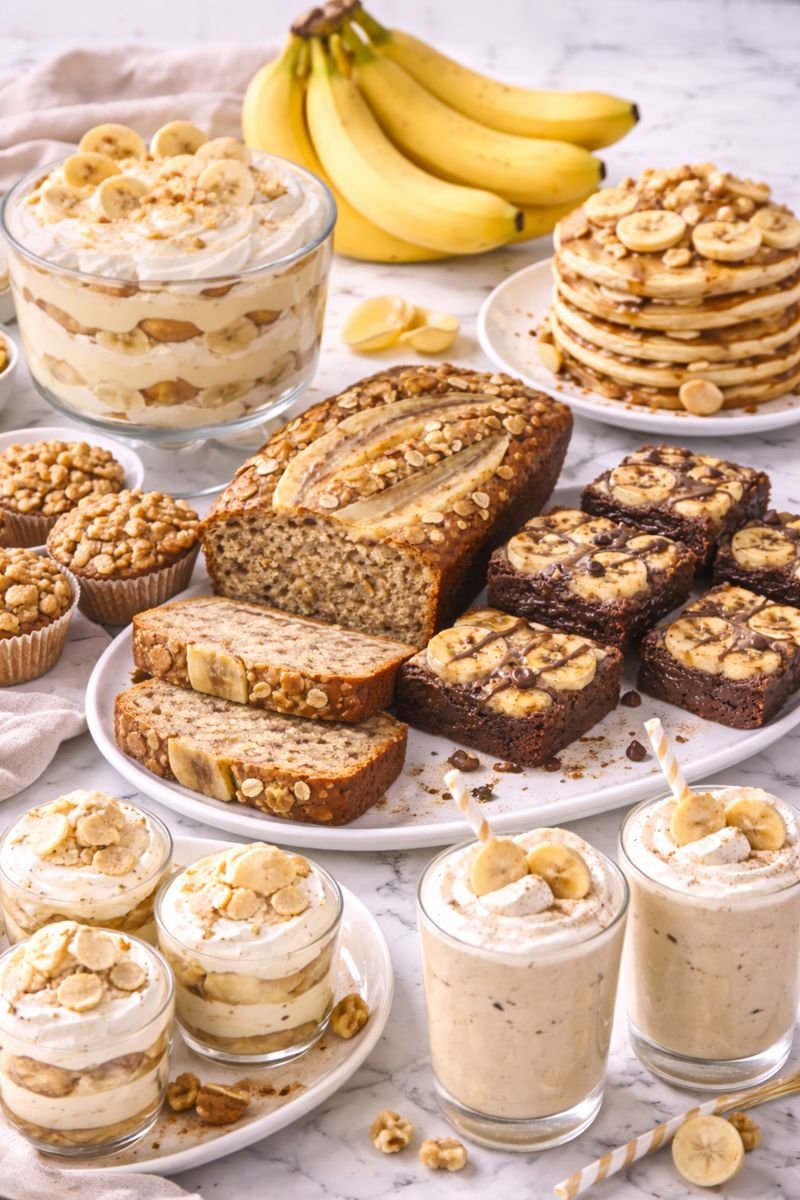
And I’m not just talking about making another basic loaf of banana bread (though I’ll give you an amazing recipe for that too).
I’m talking about a recipe that’s so ridiculously moist and flavorful that you’ll actually start hoping your bananas go brown.
This recipe saved me from tossing out countless bananas, and it’s become my go-to whenever I need something comforting, sweet, and dead simple to make.
Let’s get into it.
What You’ll Need
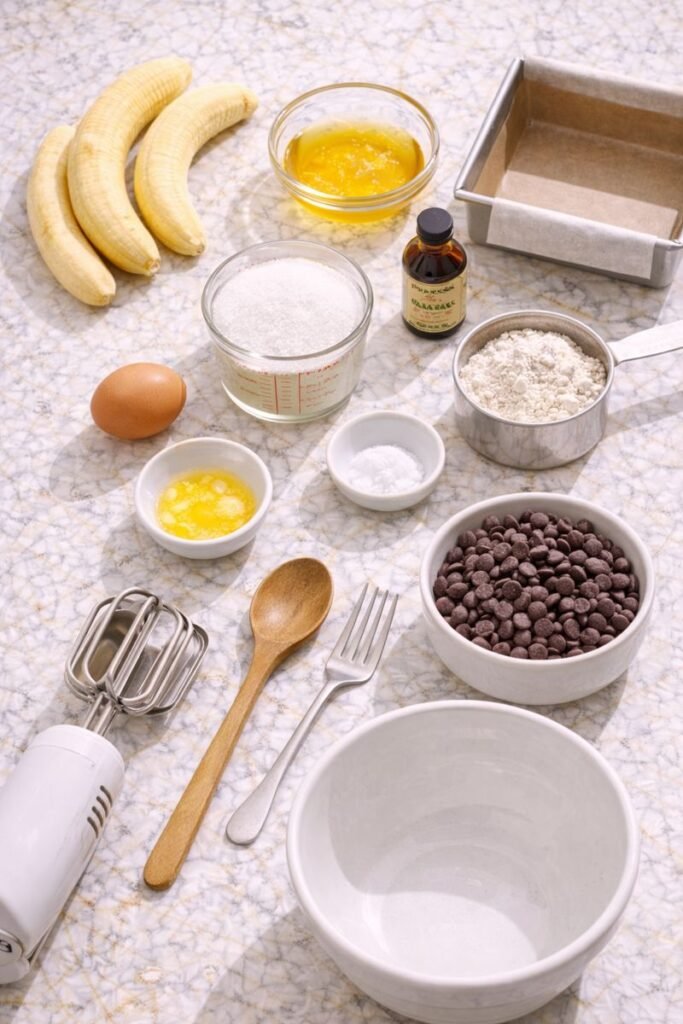
Main Ingredients
| Ingredient | Amount | Why It Matters |
|---|---|---|
| Ripe bananas | 3 large | The browner, the sweeter – don’t toss those black ones! |
| Melted butter | 1/3 cup | Makes it rich and moist (coconut oil works too) |
| Granulated sugar | 3/4 cup | Sweetness + moisture retention |
| Egg | 1 large | Binds everything together |
| Vanilla extract | 1 tsp | Flavor boost that makes it smell incredible |
| Baking soda | 1 tsp | Your leavening agent for that perfect rise |
| Salt | Pinch | Balances sweetness, enhances flavor |
| All-purpose flour | 1 1/2 cups | The structure of your bread |
Optional Add-Ins (Pick Your Favorite!)
- 🍫 1/2 cup chocolate chips (my personal fave)
- 🌰 1/2 cup chopped walnuts or pecans
- ✨ 1 tsp cinnamon for extra warmth
- 🥥 1/2 cup shredded coconut
- 🍇 1/2 cup dried cranberries
Tools You’ll Need
You may also like : peanut butter banana pudding
Nothing fancy here. Just basic kitchen stuff you probably already have:
- Large mixing bowl
- Fork or potato masher
- Wooden spoon or spatula
- 9×5 inch loaf pan
- Measuring cups and spoons
- Oven (obviously 😄)
Pro Tips
🍌 Pro Tip #1: Don’t throw out those black bananas.
I know they look scary, but bananas with completely black peels are still perfect for baking. Just make sure the inside isn’t moldy. That super ripe stage makes the bread incredibly sweet and moist.
🥄 Pro Tip #2: Skip the mixer.
This is a one-bowl recipe that works best when you mix by hand. Overmixing with an electric mixer makes the bread tough and dense. You want to stir just until the flour disappears.
🔥 Pro Tip #3: The toothpick test is your friend.
Banana bread can look done on top but still be gummy in the middle. Stick a toothpick in the center – if it comes out with just a few moist crumbs (not wet batter), you’re good.
⏰ Pro Tip #4: Let it cool completely before slicing.
I know this is torture, but cutting into hot banana bread makes it fall apart. Give it at least 30 minutes in the pan, then another 30 on a cooling rack.
❄️ Pro Tip #5: Freeze those overripe bananas.
If you’re not ready to bake, just throw your brown bananas in the freezer with the peel on. When you’re ready, thaw them, peel, and use. They’ll be mushy but that’s exactly what you want.
You’ll love these too : banana pancakes recipe
How to Make It

Step 1: Prep Your Oven and Pan
Preheat your oven to 350°F (175°C).
Grease your loaf pan with butter or cooking spray.
You can also line it with parchment paper if you want to make your life easier when it’s time to remove the bread.
Step 2: Mash Those Bananas
Peel your bananas and toss them in a large mixing bowl.
Mash them with a fork until they’re mostly smooth.
A few small lumps are totally fine and actually add nice texture to the bread.
You should end up with about 1 to 1 1/4 cups of mashed banana.
Step 3: Mix the Wet Ingredients
Pour the melted butter into your mashed bananas and mix well.
Stir in the sugar, beaten egg, and vanilla extract until everything’s combined.
The mixture will look a bit lumpy and weird, but that’s normal. Don’t stress about it.
Step 4: Add the Dry Ingredients
Sprinkle the baking soda and salt over the mixture, then stir it in.
Add the flour all at once.
Here’s the key: stir just until the flour disappears.
You’ll still see some streaks and it won’t look perfectly smooth. That’s exactly what you want. Overmixing is the enemy of tender banana bread.
Step 5: Fold in Any Extras
If you’re adding chocolate chips, nuts, or cinnamon, gently fold them in now.
I usually go with chocolate chips because melty chocolate + banana is an unbeatable combo.
Step 6: Bake
Pour the batter into your prepared loaf pan. It’ll be thick – that’s good.
Bake for 50-60 minutes.
Start checking at 50 minutes with that toothpick test I mentioned earlier.
The top should be deep golden brown and a toothpick inserted in the center should come out with just a few moist crumbs.
Recommended for you : frozen banana recipes
Step 7: Cool and Devour
Let the bread cool in the pan for 10 minutes.
Then run a knife around the edges and turn it out onto a wire rack.
Let it cool for at least another 20 minutes before slicing.
I know it smells incredible and you want to dig in immediately, but trust me on this one.
Substitutions and Variations
| Instead of This | Try This | What You’ll Get |
|---|---|---|
| White sugar | Brown sugar | Deeper, caramel-like flavor |
| White sugar | 1/2 cup honey | Extra moisture, floral sweetness |
| Butter | Coconut oil | Subtle tropical vibe, still super moist |
| Butter | Vegetable oil | Extra moist (but less flavor) |
| All-purpose flour | Half whole wheat flour | Nuttier, heartier bread (bit denser) |
| Regular egg | Flax egg (1 tbsp flaxseed + 3 tbsp water) | Vegan version! |
Fun Flavor Twists
🍫 Chocolate Lovers: Add 1 tablespoon cocoa powder to the dry ingredients
🥥 Tropical Vibes: Mix in 1/2 cup shredded coconut
🥜 Peanut Butter Swirl: Drop spoonfuls of peanut butter on top before baking, swirl with a knife
🎄 Spice It Up: Add 1/2 tsp cinnamon + 1/4 tsp nutmeg + pinch of cloves
Make Ahead Tips
💡 Night Before Trick
Mix the batter the night before and keep it covered in the fridge. Bake it fresh in the morning. Just add 5-10 minutes to the baking time since it’ll be cold.
❄️ Freezer Hack
This bread actually tastes better the next day after the flavors have had time to meld. Wrap it tightly in plastic wrap, then aluminum foil, and freeze for up to 3 months. Thaw at room temperature or pop individual slices in the toaster.
Storage Guide
| Storage Method | How Long | Best For |
|---|---|---|
| Room temperature (wrapped) | 3-4 days | Immediate eating |
| Refrigerator (airtight container) | 7 days | Extending freshness |
| Freezer (double wrapped) | 3 months | Long-term storage |
| Individual frozen slices | 3 months | Grab-and-go portions |
Game changer tip: Toast leftover slices in a pan with a little butter until they’re crispy on the outside. Spread some cream cheese or peanut butter on top. You’re welcome. 😋
Nutritional Breakdown
Per Slice (10 slices total)
| Nutrient | Amount |
|---|---|
| Calories | 210 |
| Total Fat | 7g |
| Saturated Fat | 4g |
| Cholesterol | 35mg |
| Sodium | 160mg |
| Total Carbs | 35g |
| Fiber | 1g |
| Sugars | 18g |
| Protein | 3g |
Note: Values vary with add-ins like chocolate chips or nuts
Perfect Pairings
For Breakfast 🌅
Slice it thick, toast it lightly, spread some almond butter on top, and drizzle with honey.
Pairs with: Strong black coffee, chai latte, or green smoothie
For Dessert 🍨
Warm a slice in the microwave for 15 seconds, add a scoop of vanilla ice cream, and drizzle with caramel sauce.
Pairs with: Hot chocolate, espresso, or dessert wine
For a Snack ☕
Just grab a slice with your afternoon coffee or tea.
The sweetness pairs perfectly with a strong black coffee or Earl Grey tea.
For Brunch 🥐
Serve alongside scrambled eggs and fresh fruit for a sweet and savory spread.
Complete the spread: Add crispy bacon, fresh berries, and mimosas
Troubleshooting Guide
| Problem | What Went Wrong | How to Fix It |
|---|---|---|
| Dry, crumbly bread | Overbaked or too much flour | Check oven temp, measure flour properly (spoon & level) |
| Gummy center | Underbaked | Tent with foil if browning too fast, bake until toothpick is clean |
| Bread sank in middle | Pulled out too early | Always do the toothpick test, even if edges look done |
| Dense, tough texture | Overmixed the batter | Mix by hand, stop as soon as flour disappears |
| Not sweet enough | Bananas weren’t ripe | Use brown-spotted or completely brown bananas only |
FAQ
Q: How ripe do the bananas really need to be?
The riper, the better. You want bananas that are covered in brown spots or even completely brown. Green or yellow bananas won’t be sweet enough and won’t mash easily.
Fun fact: The starch converts to sugar as bananas ripen, which is why brown bananas are sweeter!
Q: Can I use less sugar?
Yes, you can reduce the sugar to 1/2 cup if you prefer less sweet bread.
The bananas add natural sweetness, so it’ll still taste good. Just know it won’t be as moist since sugar helps retain moisture.
Q: Why is my banana bread dry?
Usually this means you either overbaked it or used too much flour.
Make sure you’re measuring flour correctly (spoon it into the measuring cup and level it off – don’t pack it down).
Also check your oven temperature with an oven thermometer since many ovens run hot.
Q: Can I double this recipe?
Absolutely! Just use two loaf pans.
The baking time stays the same – still check at 50 minutes.
Q: My banana bread has a weird texture. What happened?
If it’s gummy or dense, you probably overmixed the batter.
If it’s crumbly and falls apart, you might have overbaked it or used too much flour.
Banana bread should be moist and tender with a tight crumb.
Q: Can I make muffins instead of a loaf?
Yes! Fill muffin tins 2/3 full and bake at 350°F for 18-22 minutes.
You’ll get about 12 muffins from this recipe.
Quick Reference: Baking Timeline
| Time | What’s Happening |
|---|---|
| 0 min | Preheat oven, prep pan |
| 5 min | Mash bananas, mix wet ingredients |
| 10 min | Add dry ingredients, fold in extras |
| 15 min | Batter goes in oven |
| 65 min | Pull from oven (check at 50 min mark) |
| 75 min | Cool in pan |
| 105 min | Ready to slice and eat! |
Total hands-on time: About 15 minutes
Total time start to finish: Under 2 hours
Wrapping Up
That pile of brown bananas on your counter isn’t a problem anymore.
It’s an excuse to make something warm, sweet, and comforting that’ll make your whole house smell like a bakery.
This recipe is foolproof, forgiving, and so much better than anything you’ll buy at the store.
Plus you get to feel good about not wasting food, which is always a win.
Make a loaf this weekend. Eat a warm slice with butter. Save some for breakfast the next few days.
Then come back and tell me what you thought.
Did you add chocolate chips? Go nuts with the walnuts? Try a variation I didn’t mention?
Drop a comment below. I read every single one and I love hearing about your baking adventures. 🍌


1 thought on “What to Do With Ripe Bananas (That Isn’t Just Another Basic Banana Bread)”